To use a Keurig single cup coffee maker in the United States, fill the water reservoir, turn on the machine, place a mug under the spout, insert a K-Cup pod, choose a cup size, and press the brew button. Wait for the cycle to finish before removing the mug or opening the pod holder.
Most Keurig brewers work in much the same way, but button names, water tanks, and cup sizes can vary by model. Always check your model’s guide if the controls do not match these steps. Keurig provides manuals and support through its official support center.
What You Need Before Brewing
You need four basic items:
- A Keurig single cup coffee maker
- Clean, cold water
- A K-Cup pod or compatible coffee pod
- A heat-safe mug
Place the brewer on a flat, dry surface near a grounded electrical outlet. Leave space above the machine if the water reservoir or pod lid lifts upward.
Use the power cord that came with the brewer. Do not use the machine if the cord, plug, or housing is damaged. Keep the brewer away from the edge of the counter so a hot mug cannot tip over.
K-Cup pods and reusable filters
A K-Cup pod is a sealed, single-use coffee pod made for Keurig brewers. It contains ground coffee between filter layers.
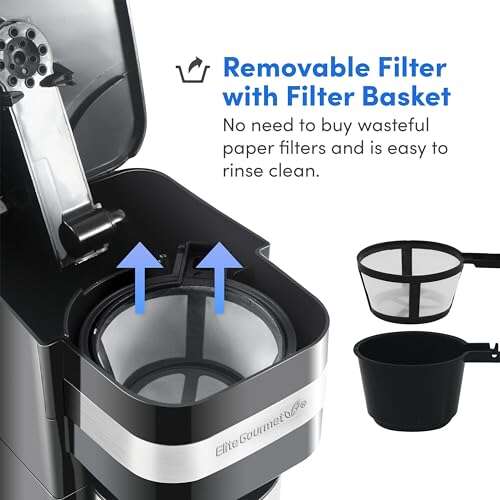
Some Keurig models also accept a reusable filter, often called a My K-Cup Universal Reusable Filter. Compatibility depends on the brewer and filter version. A reusable filter lets you use your own ground coffee, but it needs to be filled and cleaned after each use.
Do not place loose coffee grounds directly into the pod holder. Use a compatible reusable filter instead.
How to Use a Keurig Coffee Maker
Follow these steps for a normal cup of coffee.
1. Fill the water reservoir
Remove the water reservoir if your model has a removable tank. Fill it with fresh, cold water up to the MAX FILL line.
Do not fill above that line. If the reservoir is built into the machine, pour water into the tank without spilling it into the pod area or control panel.
Filtered tap water can help reduce mineral buildup, especially in areas with hard water. Do not use hot water, milk, juice, or other liquids in the reservoir. The machine is designed to heat water on its own.
2. Turn on the brewer
Plug in the machine and press the power button. Some Keurig models start heating at once. Others may show a message such as Heating, Ready, or Lift to Begin.
Wait until the brewer is ready. Brewing before the heating cycle ends may not be possible on some models.
3. Place a mug under the coffee outlet
Set a mug on the drip tray. Center it under the coffee spout.
Check the mug size before brewing. A small cup may overflow if you select a large brew size. If your mug is taller than the space below the spout, remove the drip tray only if your model allows it.
4. Lift the handle and insert a pod
Lift the handle on the front of the brewer. Place a K-Cup pod into the pod holder with the foil lid facing up.
Do not remove the foil lid. The brewer punctures the pod during the brew cycle.
Close the handle fully. You may hear the pod being punctured. Keep your fingers away from the pod holder while the handle is closing.
5. Choose a cup size
Select the cup size shown on the control panel. Common choices include 6, 8, 10, and 12 ounces, but the available options differ by model.
A smaller water volume usually produces a stronger-tasting cup because the same coffee grounds are mixed with less water. A larger size makes more coffee but may taste lighter.
Some brewers include a Strong or Brew Strength setting. This often slows the water flow or changes the brew process to increase contact with the grounds. It does not add more coffee to the pod.
6. Press the brew button
Press Brew, K, or the button that matches your selected cup size. The machine may pause for a few seconds before coffee begins to flow.
Keep the mug in place during the full cycle. The brewer may release a small amount of water or steam after the main stream stops.
7. Wait until brewing ends
When the machine stops dispensing coffee, wait until the display says Ready or the brew light turns off. Some models make a sound at the end of the cycle.
The coffee and pod may be hot. Do not open the handle while coffee is flowing or steam is escaping.
8. Remove and discard the used pod
Lift the handle carefully. Many Keurig brewers automatically drop the used pod into an internal holder.
Remove the pod when the machine is cool enough to handle. Most K-Cup pods are not accepted in every local recycling program, so check your local waste rules before placing one in a recycling bin.
How to Use a Keurig for Tea, Hot Water, or Hot Cocoa
A Keurig can prepare more than coffee, but use the correct product for the job.
For tea, insert a tea K-Cup pod and brew it as you would a coffee pod. For hot cocoa, use a compatible hot cocoa pod and follow the package directions. Some cocoa products may leave more residue than coffee, so rinse the brewer afterward.
To dispense hot water, some Keurig models have a Hot Water button or setting. Other models require a brew cycle without a pod. Check the manual first because the procedure varies.
If you brew coffee after hot cocoa or a flavored drink, run a water-only cycle. This helps reduce leftover taste.
Never put tea bags, cocoa powder, loose coffee, or flavor syrup inside the pod holder. Use the product in the way its package or brewer instructions specify.
How Much Coffee Does a Keurig Make?
The selected cup size controls how much water passes through the pod. It does not necessarily change the amount of coffee inside the pod.
| Selected size | Approximate volume | Typical result |
|---|---|---|
| 6 ounces | 177 milliliters | Stronger, smaller cup |
| 8 ounces | 237 milliliters | Balanced standard cup |
| 10 ounces | 296 milliliters | Larger, milder cup |
| 12 ounces | 355 milliliters | Largest cup on some models |
These are common settings, not a guarantee for every Keurig model. Check the markings on your brewer.
If an 8-ounce cup tastes good but a 12-ounce cup tastes weak, use a smaller setting or brew a second pod. Do not run the same pod through the machine twice. The first cycle removes much of the available flavor, so the second pass often tastes thin and bitter.
For a travel mug, first confirm that the mug fits beneath the spout. If it does not, remove the drip tray only when the manufacturer designed the brewer for that use.
How to Use a Reusable K-Cup Filter
A reusable filter can reduce single-use pod waste and lets you choose your own ground coffee. It also adds more cleaning work.
- Confirm that the reusable filter fits your Keurig model.
- Open the reusable filter.
- Add the recommended amount of medium-ground coffee.
- Do not pack the grounds tightly.
- Close the filter and place it in the pod holder.
- Close the brewer handle.
- Choose a smaller cup size for a fuller flavor.
- Brew, then remove and empty the filter after it cools.
- Rinse the filter and let it dry.
Use a medium grind rather than an espresso-fine grind. Fine grounds can slow the flow and may cause sediment in the cup. Overfilling can also make the filter hard to close or cause weak flow.
A reusable filter is not the same as a standard K-Cup pod. Do not use both at the same time unless the manufacturer specifically says the setup is compatible.
How to Clean and Maintain a Keurig Brewer
Regular cleaning helps keep the machine working well and prevents old coffee residue from affecting taste.
After each use
Remove the used pod. Empty the drip tray when it becomes full. If you use a reusable filter, rinse it after every brew.
If coffee splashes onto the brewer, wipe the outside with a soft, damp cloth. Keep water away from electrical parts.
Every week
Wash removable parts, such as the water reservoir lid, drip tray, and pod holder, according to the model instructions. Use mild dish soap and rinse well.
Some water reservoirs are not dishwasher safe. Check the manual before placing any part in a dishwasher.
Wipe the area around the pod holder. Coffee grounds can collect near the entrance needle and interfere with water flow.
When the brewer displays a reminder or develops scale
Mineral deposits from water can build up inside the brewer. This buildup is commonly called scale. It can slow brewing, reduce water flow, and affect taste.
Run the manufacturer’s descaling process when the machine displays a Descale message or when you notice slower brewing, reduced volume, or a change in flavor. Keurig provides model-specific instructions for descaling and cleaning on its support pages.
Use the descaling product and dilution instructions listed for your model. Never mix descaling solution with bleach or other cleaners. After descaling, run the required fresh-water rinse cycles before making coffee.
Descaling frequency depends on water hardness and use. A fixed schedule may not fit every home, so the brewer’s reminder and the condition of the machine are useful guides.
What to Do If the Keurig Does Not Work
Check the simplest and safest causes first. Do not take apart the brewer unless the manual permits it and the machine is unplugged.
The brewer will not turn on
- Confirm that the plug is fully inserted.
- Test the outlet with another safe appliance.
- Check whether a power switch or circuit breaker has been turned off.
- Unplug the brewer before checking for visible damage.
- Contact Keurig support if the cord, plug, or machine is damaged.
The machine turns on but does not brew
- Make sure the water reservoir is seated correctly.
- Fill the tank above the minimum level.
- Confirm that the handle is closed fully.
- Remove and reinsert the pod.
- Check for a message such as Add Water, Heating, or Descale.
- Run a water-only cycle if the model allows it.
If the brewer makes a loud pump sound but little or no water comes out, mineral scale or a blocked needle may be restricting flow. Follow the model’s cleaning instructions. Do not push a sharp object into the brewer while it is plugged in.
The coffee volume is too small
A low water level, an incorrectly seated reservoir, or scale buildup can reduce the amount brewed. A clogged pod can also slow the flow.
Remove the pod after the machine stops. Run a water-only cycle. If the problem continues, clean the removable parts and follow the descaling instructions.
The coffee tastes weak
Try a smaller cup setting, a darker roast pod, or the Strong setting if your model includes one. A large cup size can make the same pod taste lighter.
Weak coffee can also result from old or poorly stored pods. Keep unopened pods in a cool, dry place and follow the package’s quality guidance.
The coffee tastes strange
Run one or more water-only cycles. Clean the pod holder, drip tray, and reservoir. If the brewer was recently descaled, complete all rinse cycles listed in the manual.
If the taste remains unusual or the water appears discolored, stop using the machine and contact the manufacturer.
Common Mistakes to Avoid
The most common mistakes are simple:
- Filling the reservoir above the MAX line
- Using hot water, milk, or juice in the reservoir
- Opening the handle during brewing
- Reusing a single-use K-Cup pod
- Running a pod twice to make a larger drink
- Using a reusable filter that does not fit the model
- Packing too much coffee into a reusable filter
- Ignoring a descale reminder for a long period
- Putting loose grounds directly into the pod holder
- Leaving a used pod inside the brewer for an extended time
Do not leave a mug under the spout when the brewer is not in use if the drip tray or outlet could collect water. Empty the drip tray before it overflows.
Hot water, steam, and coffee can burn skin. Keep children away from the brewer during and shortly after brewing.
Key Takeaways
- Fill the tank with fresh, cold water.
- Insert one compatible pod with the foil lid facing up.
- Choose a cup size that matches your mug and taste preference.
- Wait until the brew cycle ends before opening the handle.
- Remove the used pod and rinse reusable parts.
- Use the model manual for hot-water settings, reusable-filter compatibility, and descaling steps.
- Smaller cup settings usually produce a stronger cup from the same pod.
Frequently Asked Questions
Do you put water in a Keurig every time?
Fill the reservoir when the water level is low. Some models have a large removable tank that holds enough water for several cups. Other models require fresh water for each brew. Do not let the tank run below the machine’s minimum level.
Do you remove the foil from a K-Cup pod?
No. Leave the foil lid on. The Keurig brewer punctures the lid and the bottom of the pod during brewing.
Can you use tap water in a Keurig?
Usually, yes, if the tap water is safe to drink. Filtered water may reduce mineral buildup and improve taste in areas with hard water. Never use carbonated water, milk, juice, or other liquids in the reservoir.
Can you run a Keurig without a pod?
Many models can dispense hot water through a dedicated hot-water function or a water-only brew cycle. The exact method depends on the model. Check the manual before starting a cycle without a pod.
Why does my Keurig make a clicking or pumping sound?
A short pump or clicking sound can be part of normal operation. A loud or repeated sound with little water flow may indicate low water, an incorrectly seated reservoir, air in the water path, or scale buildup. Stop the cycle if the machine behaves unusually, then follow the cleaning and support steps for the model.
How often should you descale a Keurig?
Descale when the brewer displays a reminder or when brewing becomes slow, the output drops, or the coffee taste changes. The right interval depends on water hardness and how often you use the machine. Follow the manufacturer’s directions for the correct solution and rinse process.
Conclusion
Using a Keurig single cup coffee maker is a short process: add cold water, insert a compatible pod, choose a size, brew, and remove the pod when the cycle ends. The best cup usually comes from the right water level, a sensible cup size, and a clean machine.
For the next step, find your brewer’s model number and save its official manual. That will give you the exact instructions for reusable filters, hot water, cleaning, and descaling.

Liora Pennings is a seasoned chef and kitchen enthusiast with a passion for turning everyday cooking into an effortless experience. With years of hands-on culinary expertise, she specializes in practical techniques, ingredient know-how, and smart kitchen solutions that help home cooks elevate their meals. At KitchFlair.com, Liora shares her best tips, time-saving tricks, and honest product reviews to guide readers toward a more efficient, enjoyable, and inspired cooking routine. Whether you’re a beginner or a seasoned home chef, Liora’s friendly, knowledge-packed insights make every visit to the kitchen a little easier—and a lot more delicious.