How To Use Coffee Maker On Stove: Easy Brewing Guide
To use a coffee maker on the stove, add water and coffee, then heat it slowly on a suitable burner.
Learning how to use coffee maker on stove equipment is simple when you know which type you have. This guide covers stovetop percolators, moka pots, safety rules, brewing steps, common mistakes, and easy ways to make better coffee at home.
What “coffee maker on stove” means
A coffee maker made for stove use is usually a stovetop percolator or moka pot. Both use heat from a burner, but they brew coffee in different ways.
A stovetop percolator sends hot water through coffee grounds again and again. This creates a strong, bold cup. A moka pot pushes hot water through coffee grounds once, producing a small, rich coffee that is stronger than drip coffee.
A regular electric coffee maker must never sit on a stove. Its plastic parts, heating plate, wiring, and water tank can melt or catch fire. Before learning how to use coffee maker on stove equipment, check that the pot clearly says “stovetop,” “stove safe,” or “moka pot.”
What you need before brewing
Gather the right tools before you turn on the burner. Good preparation makes the process safer and helps your coffee taste more balanced.
You will need:
• A stovetop percolator or moka pot
• Fresh, cool water
• Ground coffee
• A spoon or coffee scoop
• A stove or cooktop
• An oven mitt or dry kitchen towel
• A mug or heat-safe serving pot
Use medium or medium-fine coffee grounds based on your brewer. Percolators work well with medium grounds. Moka pots usually need fine grounds, but they should not be as powdery as espresso grounds.
Freshly ground beans usually taste better than old grounds. However, grind size matters more than expensive equipment. Very fine grounds can pass through a filter or create a bitter brew. Very coarse grounds may produce weak coffee.

How to use a stovetop percolator
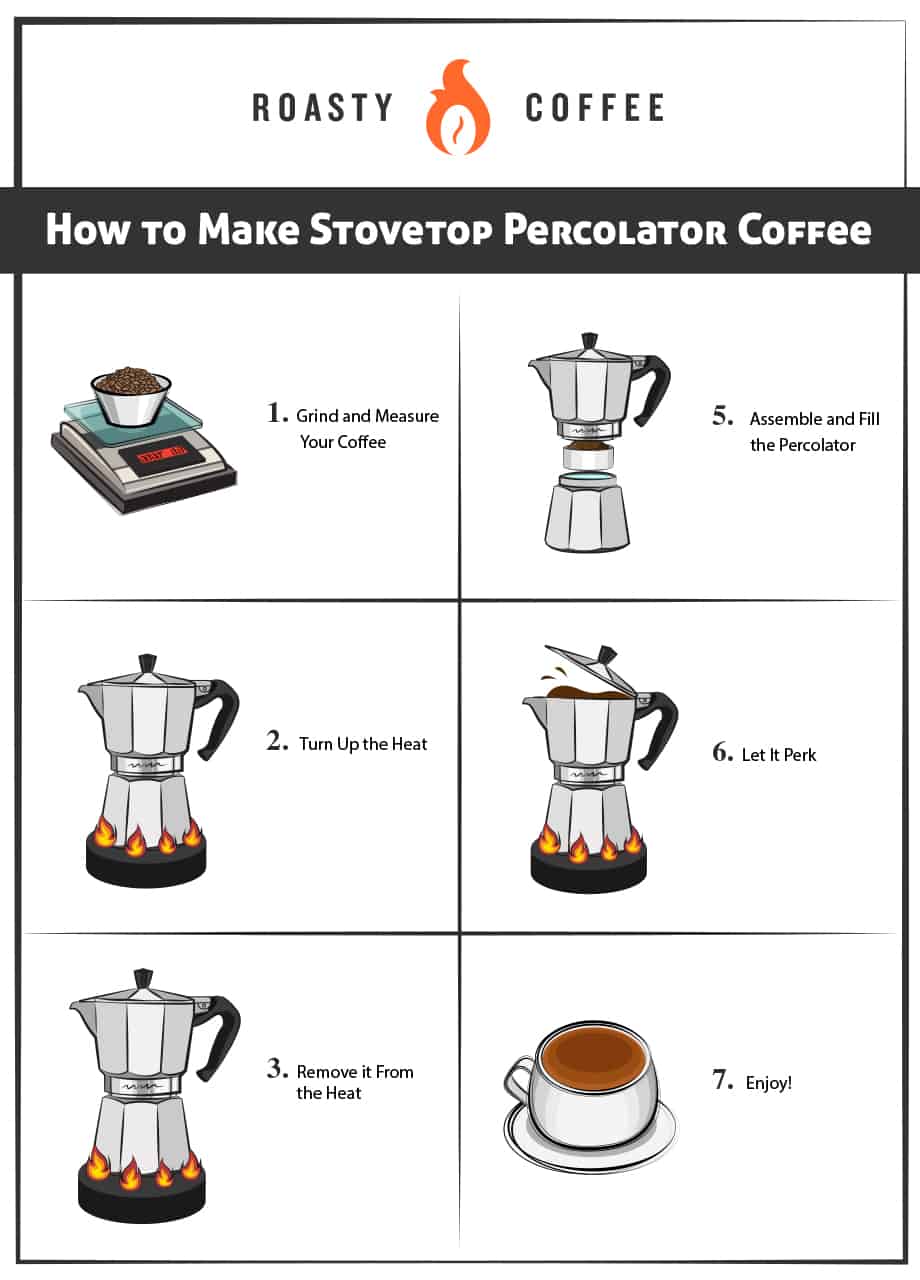
A stovetop percolator has a lower water chamber, a tube, a perforated basket, and a lid. As the water heats, it rises through the tube and sprays over the coffee grounds.
Follow these steps to learn how to use coffee maker on stove percolator correctly:
-
Remove the basket and tube from the pot.
-
Fill the lower chamber with cool water. Stay below the safety valve or maximum fill line.
-
Place the tube back into the chamber.
-
Add one tablespoon of medium-ground coffee for every 6 ounces of water. Adjust this amount to suit your taste.
-
Put the basket on the tube and spread the grounds evenly.
-
Secure the lid. Make sure the handle and lid fit firmly.
-
Place the percolator on a burner over medium heat.
-
Watch the clear knob on the lid. You should see coffee begin to rise and bubble.
-
Reduce the heat when percolation starts. Keep the coffee bubbling gently for about 7 to 10 minutes.
-
Turn off the burner and let the pot rest for one minute.
-
Remove it with an oven mitt and pour carefully.
The key is gentle heat. A hard, rapid boil can make coffee taste harsh. It can also force hot liquid out of the spout or cause grounds to spill into the brewed coffee.
When I test a stovetop percolator, I listen for a steady, soft bubbling sound. Loud sputtering usually means the heat is too high. Lowering the burner often improves the flavor within minutes.

How to use a moka pot on the stove
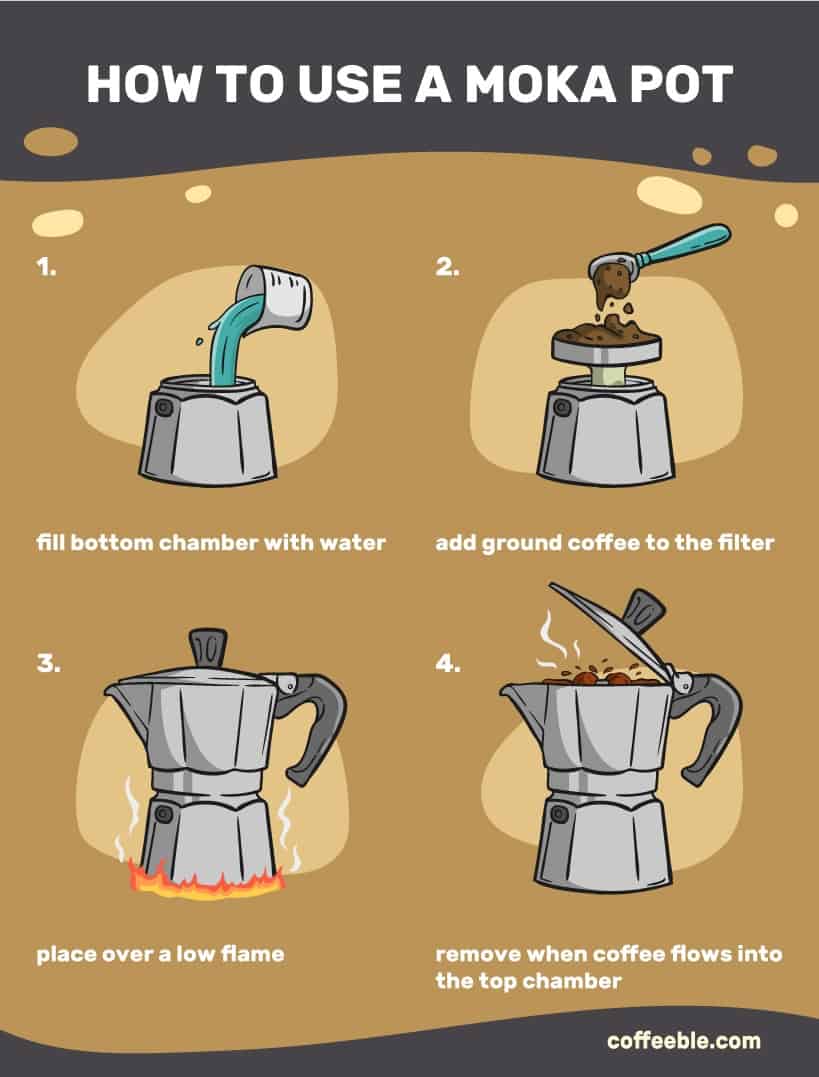
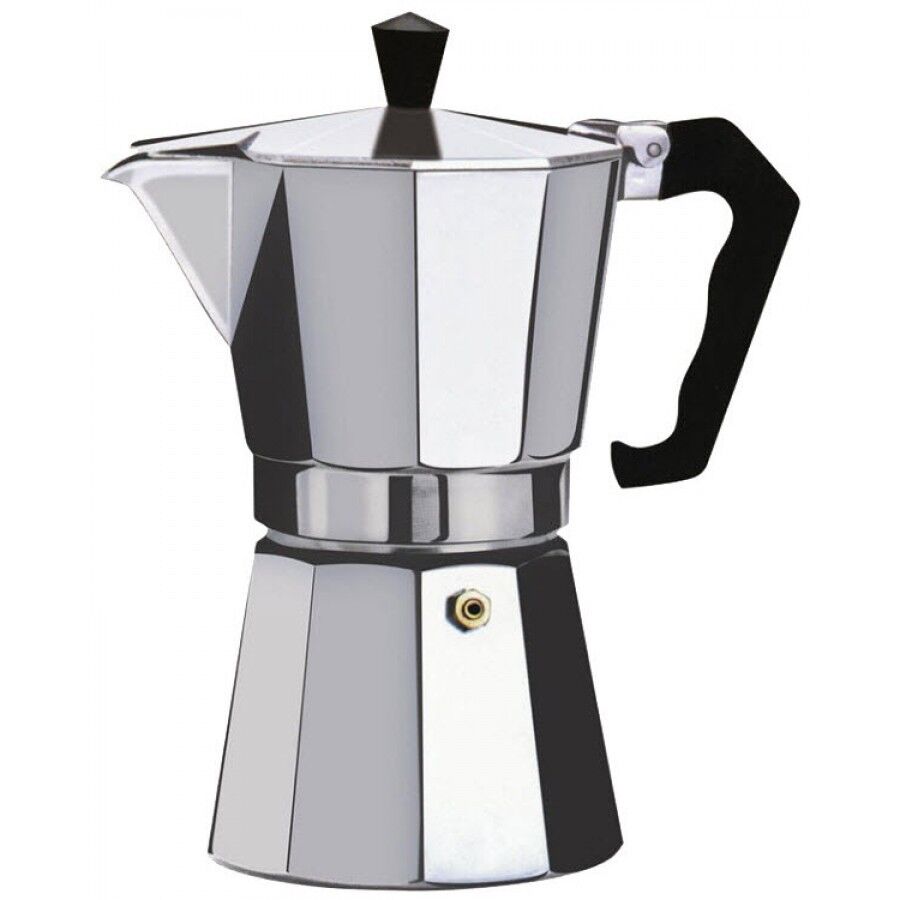
A moka pot has three main parts: a bottom chamber, a coffee basket, and a top chamber. It uses pressure from heated water to brew concentrated coffee.
Here is how to use coffee maker on stove moka pot safely:
-
Unscrew the pot and separate the three parts.
-
Fill the bottom chamber with water up to the safety valve. Do not cover the valve.
-
Fill the filter basket with fine or medium-fine coffee grounds.
-
Level the grounds with your finger or a flat edge. Do not press them down.
-
Place the basket into the bottom chamber.
-
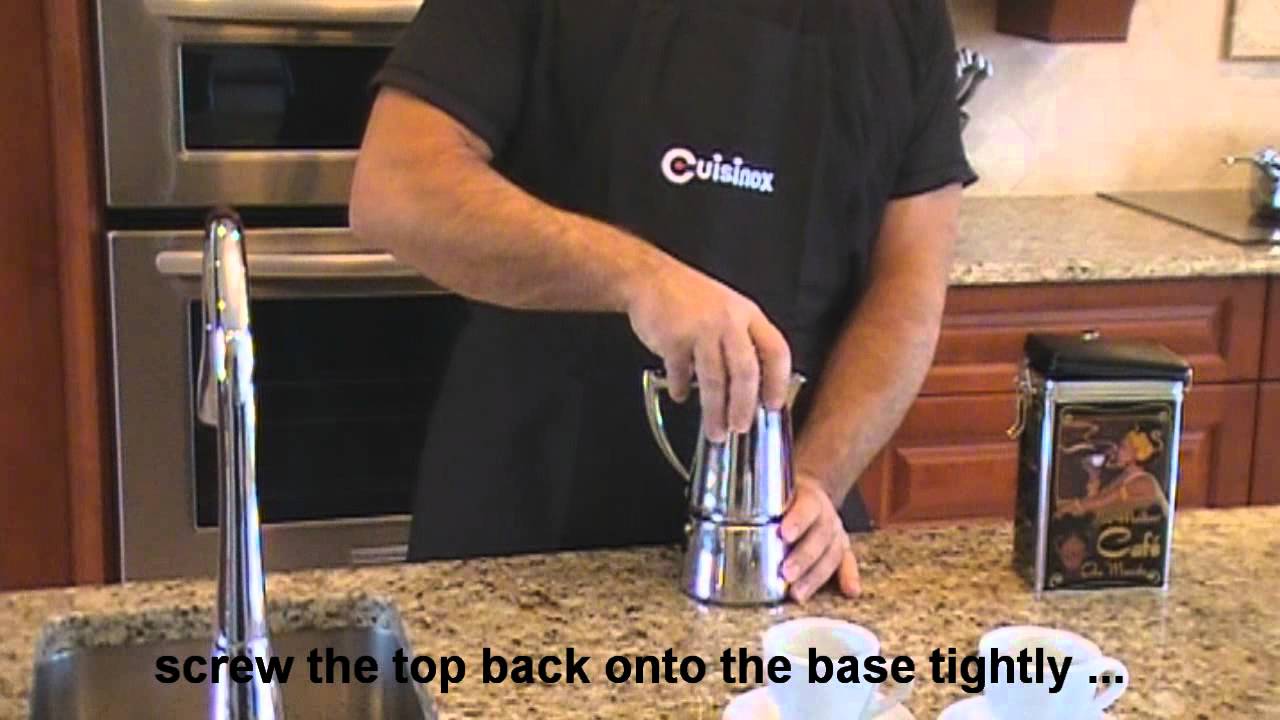
Screw the top chamber on tightly, but do not force it.
-
Set the moka pot on a small or medium burner.
-
Keep the handle away from direct flame.
-
Use low or medium heat.
-
Remove the pot when coffee begins to flow into the top chamber and you hear a soft hissing sound.
-
Cool the bottom chamber under a little running water if needed.
-
Stir the coffee in the top chamber before serving.
Do not tamp moka pot grounds like espresso grounds. Packed coffee can block water flow and increase pressure. The result may be bitter coffee, a damaged gasket, or a dangerous release of steam.
A moka pot makes concentrated coffee, not traditional drip coffee. You can drink it in a small cup or dilute it with hot water or steamed milk.
Choosing the right heat level
Heat control is one of the most important parts of learning how to use coffee maker on stove equipment. High heat may seem faster, but it often creates bitter coffee and increases safety risks.
Use these simple settings:
• Low heat works best for a moka pot after the coffee starts flowing.
• Medium heat works well for a stovetop percolator.
• High heat is rarely needed and may damage the handle, gasket, or finish.
Gas burners need extra care because flames can reach the handle. Keep the flame under the base of the pot, not around its sides.
On an electric or glass cooktop, use a burner that matches the base size. A burner that is too large can overheat the handle and outer walls. A burner that is too small may brew slowly but is usually safer.

How much coffee and water should you use?
Coffee strength depends on the water volume, grind size, brewing time, and coffee amount. Start with the basic measurements below and adjust slowly.
For a stovetop percolator:
• Use about 1 tablespoon of medium-ground coffee per 6 ounces of water.
• Use less coffee for a lighter cup.
• Use slightly more coffee for a stronger cup.
For a moka pot:
• Fill the water chamber to just below the safety valve.
• Fill the coffee basket completely.
• Do not compress the grounds.
Moka pots come in cup sizes based on small European coffee servings. A 3-cup moka pot may produce only 4 to 5 fluid ounces of strong coffee. It does not make three large American mugs.
Use filtered water if your tap water has a strong taste or high mineral content. Water makes up most of your coffee, so its flavor affects the final cup.

Common mistakes to avoid
Many poor results come from small errors. The following mistakes can affect both flavor and safety.
Using an electric coffee maker on a stove
Electric coffee makers are not designed for direct burner heat. Their parts can melt, short out, or start a fire. Only use equipment labeled for stovetop brewing.
Overfilling the water chamber
Leave the required space below the safety valve or fill line. Overfilling can block pressure relief features and cause hot water to escape.
Packing down the coffee
Do not tamp grounds in a moka pot. Pressed grounds restrict water flow and may create excess pressure.
Using high heat
High heat can scorch coffee and damage seals. Slow heating gives water more time to extract flavor evenly.
Letting the pot boil dry
Never leave a stovetop coffee maker unattended. A dry pot can damage the base, gasket, handle, or cooktop.
Touching the metal body
The pot becomes extremely hot. Hold only the handle, and use a dry oven mitt. A wet towel can quickly transfer heat and cause a steam burn.
Ignoring a damaged gasket
A cracked gasket or blocked filter can cause leaks. Replace worn parts before brewing again.
Safety tips for stovetop coffee brewing
Safety should come before speed. The United States Consumer Product Safety Commission warns that unattended cooking is a major source of home cooking fires, so remain near the stove while brewing.
Use these habits every time:
• Keep children and pets away from the burner.
• Place the handle away from the edge of the counter.
• Keep towels, paper, and packaging away from the flame.
• Never open a pressurized moka pot while it is hot.
• Let the pot cool before taking it apart.
• Do not use a damaged pot, loose handle, blocked valve, or cracked seal.
• Clean spilled coffee from the burner after the surface cools.
• Turn off the burner as soon as brewing ends.
If coffee sprays from the spout or valve, turn off the heat and step back. Let the pot cool completely before inspecting it. Never try to tighten or open a hot moka pot.

How to get better flavor
Once you understand how to use coffee maker on stove equipment, small changes can improve the taste.
Start with fresh beans. Coffee loses aroma after grinding, so grind only what you need when possible. Store beans in an airtight container away from light, heat, and moisture.
Use clean equipment. Old coffee oils can taste rancid and may overpower fresh coffee. Rinse the pot after each use and wash removable parts with warm water. Many moka pot makers recommend avoiding harsh soap because it can leave a scent, but follow the care instructions for your model.
Try these flavor adjustments:
• Bitter coffee: Lower the heat, shorten the brew, or use a slightly coarser grind.
• Weak coffee: Add a little more coffee or use a slightly finer grind.
• Burnt coffee: Remove the pot sooner and avoid high heat.
• Muddy coffee: Use a coarser grind or check the filter screen.
• Sour coffee: Use a little more heat or a finer grind, but change only one factor at a time.
The best method is simple testing. Change one thing, taste the result, and keep notes. Coffee brewing is less like a strict recipe and more like tuning a small instrument.
Cleaning and caring for your coffee maker
Clean your stovetop coffee maker after each use. Allow it to cool first, then separate the parts and discard the grounds.
Rinse the basket, tube, chamber, and lid. Wipe the outside with a soft cloth. Dry every part before reassembling the pot, especially if it is made from aluminum.
Check the gasket and filter screen often. Replace the gasket when it becomes hard, cracked, loose, or stained. A moka pot may also need a new filter plate if the holes become blocked.
Mineral buildup can affect water flow. If your model allows it, soak removable parts in warm water and a mild descaling solution. Avoid abrasive pads that can scratch the metal or remove protective finishes.
Do not store the pot tightly sealed while it is damp. Leave it separated so air can circulate. This helps prevent stale smells and corrosion.
Stovetop percolator versus moka pot
Both devices make strong coffee, but they suit different preferences.
A stovetop percolator may be better if you want:
• A larger pot of coffee
• A bold, classic brewing style
• Coffee that can stay warm for a short time
• A familiar cup similar to traditional brewed coffee
A moka pot may be better if you want:
• Small servings of concentrated coffee
• Coffee for lattes, cappuccinos, or Americanos
• A rich flavor without an electric machine
• A compact brewer for camping or travel
Neither device is a true espresso machine. A moka pot creates pressure, but it does not reach the same pressure or produce the same crema as a commercial espresso machine.
If you want a mild, large mug, a percolator may be more suitable. If you prefer strong coffee in a small serving, a moka pot is often the better choice.
Can you use a coffee maker on different stovetops?
Most stovetop coffee makers work on gas and electric burners. Glass and induction cooktops require more care.
A glass cooktop can work if the brewer has a flat, smooth base. Lift the pot instead of sliding it to help prevent scratches.
Induction cooktops only heat magnetic cookware. Stainless steel moka pots may work if they are induction-compatible, but many aluminum models will not. If you are unsure, check the manufacturer’s label or test the base with a magnet.
For induction use, you can also buy an induction adapter plate. The plate transfers heat from the cooktop to the coffee maker, but it may heat more slowly.
Always confirm that the coffee maker and cooktop are compatible before brewing. This is an important part of how to use coffee maker on stove equipment safely.
Frequently Asked Questions About How to Use Coffee Maker on Stove
Can I put a regular electric coffee maker on the stove?
No. A regular electric coffee maker is not designed for direct burner heat. Use only a stovetop percolator or another coffee maker clearly labeled for stove use.
How long does it take to use a coffee maker on the stove?
A stovetop percolator often takes about 7 to 10 minutes after brewing begins. A moka pot usually takes 4 to 8 minutes, depending on its size, water temperature, and heat level.
Should I use high heat when brewing coffee on the stove?
No. Low to medium heat is safer and usually produces better flavor. High heat can make coffee bitter and may damage the pot or its gasket.
Can I use ground coffee in a moka pot?
Yes. Use fine or medium-fine grounds, but do not tamp them down. Fill the basket evenly and leave the grounds loose enough for water to pass through.
Why does my stovetop coffee taste bitter?
Bitter coffee often comes from excessive heat, a long brew time, or coffee that is too finely ground. Lower the heat, remove the pot sooner, and adjust only one factor at a time.
How do I know when a moka pot is finished?
Coffee is nearly finished when it flows into the upper chamber and the pot makes a soft hissing sound. Remove it from the burner at that point to reduce the chance of burnt coffee.
Conclusion
Learning how to use coffee maker on stove equipment comes down to choosing the right brewer, using the correct coffee and water levels, and controlling the heat. A percolator makes a larger, bold pot, while a moka pot creates a small, concentrated brew.
Never place an electric coffee maker on a burner, and never ignore a damaged gasket, blocked valve, or loose handle. Start with medium or low heat, stay near the stove, and adjust your grind or coffee amount one change at a time.
Try the method that fits your morning routine, then share your favorite stovetop coffee tips or explore more home brewing guides.

Liora Pennings is a seasoned chef and kitchen enthusiast with a passion for turning everyday cooking into an effortless experience. With years of hands-on culinary expertise, she specializes in practical techniques, ingredient know-how, and smart kitchen solutions that help home cooks elevate their meals. At KitchFlair.com, Liora shares her best tips, time-saving tricks, and honest product reviews to guide readers toward a more efficient, enjoyable, and inspired cooking routine. Whether you’re a beginner or a seasoned home chef, Liora’s friendly, knowledge-packed insights make every visit to the kitchen a little easier—and a lot more delicious.