
How To Make Coffee Machine: Easy DIY Guide
You can make a simple coffee machine with a water tank, heater, pump, filter, and safe low-voltage control system.
Learning how to make coffee machine systems starts with one key idea: hot water must flow through ground coffee at a steady rate. A homemade drip coffee maker is a realistic project, while an espresso machine needs high pressure, precise temperature control, and stronger safety measures. This guide explains the parts, design, wiring, assembly, testing, and common mistakes so you can build a useful coffee machine with confidence.

How a Homemade Coffee Machine Works
A coffee machine follows a simple path. Water moves from a tank to a heating chamber, reaches the right temperature, and then passes through coffee grounds held in a filter.
Most basic drip machines use these parts:
• Water reservoir: Holds clean water for brewing.
• Heating chamber: Warms the water before brewing.
• Pump or gravity feed: Moves water toward the coffee filter.
• Showerhead: Spreads water over the coffee grounds.
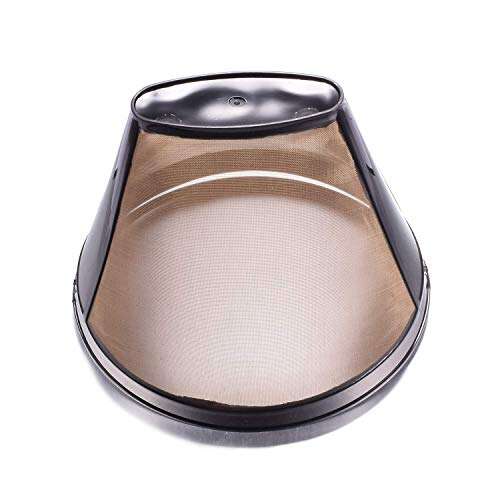
• Filter basket: Holds the paper or reusable coffee filter.
• Carafe or cup platform: Collects the brewed coffee.
• Control system: Turns heating and water flow on or off.
A good homemade design works like a small plumbing system. The reservoir is the supply tank, the heater is the boiler section, and the filter basket is the final brewing chamber.
The easiest way to learn how to make coffee machine equipment is to build a low-voltage drip brewer. It can use a small food-safe pump and a separate heating element. This design is safer and easier to control than a pressure-based espresso machine.
Water for drip coffee should usually reach about 195°F to 205°F. This range helps extract flavor without making the coffee taste flat or burnt. The Specialty Coffee Association commonly uses this range when discussing standard brewing conditions.

Parts You Need to Build a Coffee Machine
Before you learn how to make coffee machine hardware, gather every part and check that it is suitable for hot water and food contact. A coffee machine is not a good place for unknown plastic, weak tubing, or improvised electrical parts.
Main mechanical parts
• Food-safe water reservoir: Use stainless steel, glass, or certified food-grade plastic.
• Stainless steel heating tube: This warms water as it passes through the system.
• Small 12-volt diaphragm pump: Choose a pump rated for clean water and temperatures near your target brewing range.
• Food-grade silicone tubing: Use tubing designed for hot water.
• Filter basket: A reusable stainless steel basket or standard paper filter holder works well.
• Showerhead: A perforated stainless steel or food-safe plastic plate spreads the water.
• Heat-resistant carafe: Glass or stainless steel is best.
• One-way valve: This helps prevent hot water from flowing backward.
• Clamps and fittings: Use secure fittings that do not leak.
Electrical and control parts
• 12-volt DC power supply: Select a supply with enough current for the pump and controls.
• Temperature sensor: A waterproof thermistor or digital temperature probe can monitor water heat.
• Microcontroller or thermostat: This controls the heater and pump timing.
• Solid-state relay or suitable DC relay: Use a relay rated above the heater’s electrical load.
• Fuse: Add a fuse close to the power input.
• On/off switch: Choose a switch rated for the voltage and current.
• Food-safe enclosure: Keep water away from electrical connections.
Avoid using household wall power unless you understand electrical safety and local wiring rules. A mains-powered heater can cause electric shock, fire, or serious injury. For a first project, buy a certified low-voltage heating module or use a prebuilt thermal water unit inside a protected enclosure.

Choosing the Right Heating System
The heater is the most sensitive part of any homemade coffee machine. It must warm water quickly but should not create dangerous steam pressure.
There are two practical choices:
Inline heating tube
An inline heating tube warms water as it flows through a narrow metal passage. This design is compact and works well with a small pump.
Benefits include:
• Fast heating
• Small size
• Less stored hot water
• Easy control with a temperature sensor
The main limitation is flow control. If water moves too fast, it may remain too cool. If it moves too slowly, the heater can overheat.
Heated reservoir
A heated reservoir warms a larger amount of water before brewing. It is easier to understand but takes more time and stores more hot water.
This design needs:
• A thermostat
• An overheat cutoff
• A lid that does not create a sealed pressure chamber
• A heat-resistant tank
Never seal a heated water container. Steam pressure can build quickly and rupture the container.
A useful lesson from testing coffee systems is that temperature stability matters more than raw heating power. A powerful heater may sound impressive, but steady heat creates better coffee and safer operation.
How to Make Coffee Machine Plumbing
The water path should be short, clean, and easy to inspect. Each connection must fit tightly without blocking water flow.
Use this basic layout:
-
Place the reservoir above or beside the pump.
-
Connect the reservoir outlet to the pump inlet.
-
Add a one-way valve after the pump.
-
Route tubing through the heating chamber.
-
Connect the hot-water outlet to the showerhead.
-
Position the showerhead above the filter basket.
-
Place the carafe under the filter basket.
The pump should not run dry. A dry pump can overheat, wear out, or lose its seal. Add enough water to cover the inlet before switching it on.
Keep the hot section separate from the electrical section. Tubing should not touch exposed wires, circuit boards, or power terminals. Use cable glands and waterproof connectors where wires pass through the enclosure.
When learning how to make coffee machine plumbing, remember that leaks often start at small bends. Do not force silicone tubing over a fitting that is too large. Use the correct connector, clamp, and tube size instead.

How to Make Coffee Machine Controls
A basic control system can use a thermostat, timer, or microcontroller. A thermostat is the simplest option. A microcontroller gives you better control over temperature, pump timing, and safety checks.
A simple brewing sequence looks like this:
-
The user presses the start button.
-
The controller checks that water is present.
-
The heater warms the water.
-
The temperature sensor confirms the target range.
-
The pump sends water through the heater.
-
The showerhead wets the coffee grounds.
-
The pump stops after the programmed brew time.