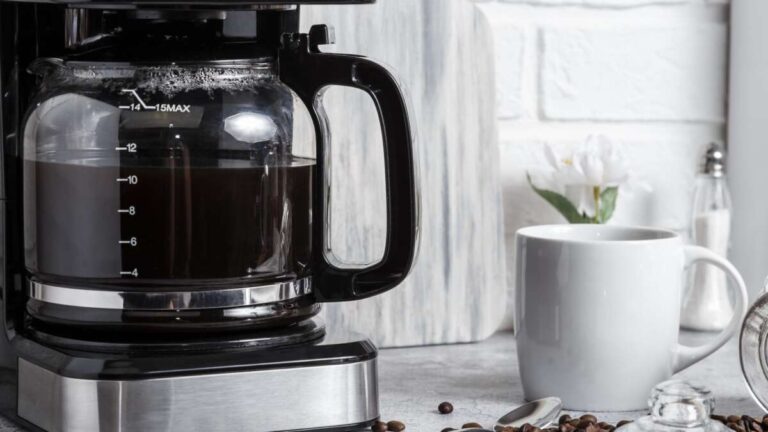
To work a Black and Decker coffee maker, add water and coffee, place the carafe, then press the brew button.
Learning how to work a Black and Decker coffee maker is simple once you understand its basic parts. Most models use the same routine: fill the water reservoir, add a paper filter and ground coffee, place the carafe correctly, and start the brew cycle. Some models also include programmable brewing, a brew strength setting, a Sneak-A-Cup feature, or an automatic cleaning reminder.
This guide explains how to work a Black and Decker coffee maker from setup to cleaning. It also covers common mistakes, brewing tips, troubleshooting steps, and differences between standard, programmable, thermal, and single-serve models.

What You Need Before Brewing
Before learning how to work a Black and Decker coffee maker, gather fresh water, ground coffee, and the correct filter. Most traditional Black and Decker drip coffee makers use a flat-bottom basket and a basket-style paper filter.
You will need:
• Fresh, cool drinking water
• Medium-ground coffee
• A paper coffee filter, if your model requires one
• The glass or thermal carafe
• A power outlet
Keep the coffee maker on a flat, dry surface. Leave space above it because hot steam rises during brewing.
Check the markings on the water reservoir or carafe. The numbers usually show coffee cups, but these “cups” are smaller than a standard 8-ounce measuring cup. On many coffee makers, one marked cup equals about 5 ounces.
A useful starting point is one level tablespoon of ground coffee per 5-ounce cup. You can use less for a lighter brew or more for stronger coffee. The ideal amount depends on the coffee bean, grind, and your taste.

How to Work a Black and Decker Coffee Maker Step by Step
The following steps explain how to work a Black and Decker coffee maker with a standard drip-brew model.
1. Clean the coffee maker before first use
If the machine is new, remove all packing materials, stickers, and plastic parts. Wash the removable filter basket and carafe with warm, soapy water.
Run one brewing cycle with plain water and no coffee. This removes dust or manufacturing residue and helps rinse the internal water path.
Do not place the main coffee maker body in water. Water should only go into the reservoir unless the user manual gives different instructions.
2. Fill the water reservoir
Remove the carafe lid if needed and fill the carafe with fresh water. Pour the water into the reservoir up to the amount you want to brew.
Avoid filling beyond the maximum line. Too much water can spill during brewing and may create a mess around the machine.
For better flavor, use filtered water if your tap water has a strong taste or high mineral content. Hard water can also leave mineral scale inside the heating system.
3. Add the filter
Open the filter basket and place the correct paper filter inside. Make sure the filter sits flat and does not fold over the basket edge.
Some Black and Decker models include a permanent washable filter. If yours has one, do not add a paper filter unless the manual specifically allows it.
A common mistake is using a filter that is too small. This can cause the grounds to overflow and enter the brewed coffee.
4. Add ground coffee
Add medium-ground coffee to the filter. Do not use whole beans unless the machine has a built-in grinder, which most standard Black and Decker drip models do not.
For a full pot, begin with one level tablespoon per marked cup. You can adjust the amount after tasting the coffee.
Do not press or pack the grounds. Packed coffee can slow water flow and may cause weak, bitter, or uneven results.
5. Place the carafe correctly
Put the empty carafe on the warming plate. Make sure it sits directly under the brew basket.
The carafe lid must usually be closed. On many drip coffee makers, the lid presses a small valve that allows coffee to flow into the carafe.
If the carafe is not fully in place, the brew basket may stop the flow. This can lead to overflowing coffee grounds or liquid inside the machine.
6. Plug in the coffee maker
Connect the power cord to a suitable outlet. Keep the cord away from the warming plate, water, and areas where it can be pulled.
If the display does not light up, check the outlet and the power connection. Avoid using a damaged cord or a loose extension cord.
7. Press the brew button
Press the Power, On/Off, Brew, or Start button, depending on your model. A light or display often shows that the brewing cycle has started.
The machine may make a few clicks or low heating sounds. This is normal as the water heats and moves through the coffee grounds.
A full pot often takes several minutes. Do not open the basket repeatedly while brewing because hot water and steam may escape.
8. Wait for brewing to finish
When the flow stops, the coffee maker may switch to a warming mode. Let the coffee drip fully before removing the carafe.
Use the carafe handle. The glass and coffee may be very hot.
Most models include a temporary pause feature that lets you pour a cup before the full cycle ends. Use this carefully and return the carafe quickly so coffee does not collect in the brew basket.
9. Turn off the machine
Turn off the coffee maker when you finish. Some models shut off automatically after a set time, but you should not rely on this feature if you are leaving home.
Remove the used filter and grounds after the basket cools. Leaving wet grounds inside can create a stale smell and encourage mold growth.
These steps cover how to work a Black and Decker coffee maker for everyday brewing.

How to Use the Programmable Features
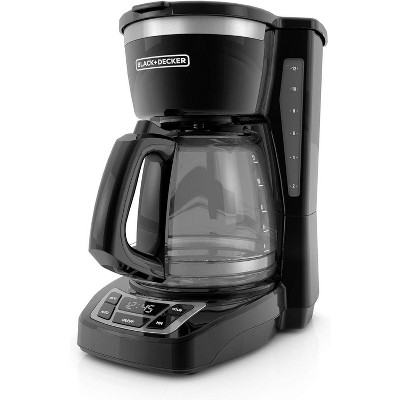
Many Black and Decker coffee makers include a digital clock and a programmable brew function. These features let you prepare the machine at night and set it to brew in the morning.
The exact button names vary by model, but the process is usually similar.
Set the clock
• Plug in the coffee maker.
• Press the Hour button until the correct hour appears.
• Press the Minute button until the correct minutes appear.
• Check whether the display uses AM and PM.
Set the current time carefully. A wrong AM or PM setting can make the machine brew 12 hours earlier or later than expected.
Set the automatic brew time
• Prepare the water, filter, coffee, and carafe.
• Press the Program or PROG button.
• Set the hour and minute for the desired brew time.
• Press Program again or wait for the display to save the setting.
• Confirm that the program indicator or clock icon appears.
The machine must remain plugged in for automatic brewing to work. Make sure the water reservoir contains enough water and that the filter basket has coffee before leaving it programmed.
Do not program the coffee maker with an empty reservoir. Do not leave used grounds in the basket overnight.
Use the brew strength setting
Some models offer Regular or Strong brew options. The Strong setting usually extends the contact time between water and coffee grounds.
Use this setting when you want a fuller taste. However, it cannot improve stale coffee, poor water, or the wrong grind.
If your coffee tastes bitter on Strong mode, return to Regular mode and use fresh, medium-ground coffee.
Use Sneak-A-Cup carefully
The Sneak-A-Cup feature pauses the flow briefly when you remove the carafe. This allows you to pour a cup before the full pot is ready.
Place the carafe back on the warming plate as soon as possible. If you leave it out too long, coffee may collect in the brew basket and spill over.
This feature is helpful, but it is not a replacement for allowing the full cycle to finish.

Coffee-to-Water Ratios That Work Well
Knowing how to work a Black and Decker coffee maker also means learning how to balance coffee and water. Too little coffee produces a weak drink. Too much coffee can make it harsh or wasteful.
Use this starting guide:
• 4 marked cups: 4 level tablespoons of coffee
• 6 marked cups: 6 level tablespoons of coffee
• 8 marked cups: 8 level tablespoons of coffee
• 10 marked cups: 10 level tablespoons of coffee
These amounts are starting points, not strict rules. Some coffee drinkers prefer one tablespoon per cup, while others prefer a slightly stronger ratio.
For more precise brewing, use weight instead of spoons. A common drip coffee starting point is about 55 to 60 grams of coffee per liter of water. Since Black and Decker cup markings may not equal standard measuring cups, adjust by taste.
Use medium-ground coffee for most drip models. Fine grounds may slow the flow and create a bitter cup. Coarse grounds may let water pass too quickly and produce weak coffee.
Freshly ground coffee usually gives a better flavor than coffee that has been open for months. Store it in a sealed container away from heat, light, and moisture.

How to Make Better Coffee in a Black and Decker Machine
A Black and Decker coffee maker is easy to use, but small details affect the final cup.
Use fresh water
Water makes up most of brewed coffee, so its taste matters. Use cold water from the tap or filtered water. Avoid using warm water from the faucet.
Fresh water also helps reduce stale flavors that can build up when water sits in the reservoir for a long time.
Use fresh coffee
Check the roast date when possible. Ground coffee loses aroma faster than whole beans because more of its surface touches air.
Keep the bag sealed between uses. If the coffee smells flat or tastes dull, the issue may be the coffee rather than the machine.
Warm the carafe
You can rinse the carafe with hot water before brewing. This may help the coffee stay warmer after it enters the pot.
Never preheat the glass carafe on a stove, inside an oven, or with another heating device. The carafe is designed for the coffee maker’s warming plate only.
Do not overfill the basket
Overfilling can cause grounds to expand and spill over the filter. It can also slow water movement.
If you need a large amount of strong coffee, brew a full pot at the correct ratio instead of packing extra grounds into the basket.
Serve coffee at the right time
The warming plate keeps coffee hot, but extended heating can change the flavor. Coffee may become stronger, flatter, or more bitter as it sits.
For the best taste, serve the coffee soon after brewing. Transfer it to a suitable thermal container if you need to keep it warm longer.

How to Clean a Black and Decker Coffee Maker
Regular cleaning is a key part of how to work a Black and Decker coffee maker safely. Coffee oils can leave a film, while minerals from water can build up inside the machine.
After every use:
• Turn off the coffee maker.
• Let the carafe and warming plate cool.
• Remove the used grounds and filter.
• Wash the filter basket and carafe with warm, soapy water.
• Wipe the warming plate and outside of the machine with a damp cloth.
Do not use abrasive pads on the carafe or warming plate. Scratches can weaken glass and damage the finish.
Run a cleaning cycle
Many models have a Clean button or a cleaning light. Follow the instructions for your exact model because the button sequence can differ.
If the manual permits it, use a coffee maker cleaning solution or a mixture intended for descaling. Some instructions allow diluted white vinegar, but vinegar is not suitable for every model or household plumbing system.
A general cleaning process is:
-
Empty the filter basket.
-
Add the approved cleaning solution to the water reservoir.
-
Place the empty carafe on the warming plate.
-
Start the Clean cycle or brew cycle.
-
Run one or more full cycles with fresh water afterward.
The water should run clear and free of cleaning odor before you brew coffee again. Never mix cleaning products, bleach, or other chemicals.
Hard water may require more frequent descaling. A cleaning light is a useful reminder, but visible scale, slow brewing, or a strange taste can also signal that cleaning is due.

Common Problems and Simple Fixes
Even when you know how to work a Black and Decker coffee maker, small problems can happen. Most are easy to correct.
The coffee maker will not turn on
Check that the plug is fully inserted and that the outlet works. If the display remains blank, try another outlet.
Do not use the machine if the cord, plug, or housing is damaged. Electrical repairs should be handled by a qualified professional.
The machine does not brew
Confirm that the reservoir contains water and that the carafe is correctly seated. Some models will not operate properly if the carafe is missing or the lid is not positioned correctly.
A clogged filter basket or mineral buildup can also slow or stop water flow. Clean the basket and run the approved cleaning cycle.
The coffee tastes weak
Use more coffee, fresh grounds, or the Strong setting if your model includes one. Also check that the grind is medium rather than very coarse.
Make sure the filter is not oversized or folded in a way that lets water bypass the grounds.
The coffee tastes bitter
Use slightly less coffee or switch from Strong to Regular mode. Bitter coffee may also result from very fine grounds, old coffee, or excessive time on the warming plate.
Cleaning the machine can help if old coffee oils or mineral deposits affect the taste.
The basket overflows
The most common causes are too many grounds, a collapsed filter, or a carafe that is not fully seated. Use the correct filter size and avoid pressing the coffee down.
If overflow continues, stop using the machine until you inspect the basket and follow the model-specific instructions.
The machine leaks
Check that the carafe is not cracked and that the filter basket is installed correctly. Also look for water above the maximum fill line.
Unplug the coffee maker if water leaks from the electrical housing. Do not continue using it until the problem is safely resolved.
Safety Tips for Daily Use
Hot coffee makers can cause burns, spills, and electrical hazards. Good habits make brewing safer.
• Keep children away from the hot carafe and warming plate.
• Do not touch the hot plate during or soon after brewing.
• Keep the coffee maker away from sink edges and standing water.
• Never immerse the electrical base, cord, or plug in water.
• Unplug the machine before cleaning the main body.
• Do not operate it with a cracked carafe.
• Do not leave the machine unattended for long periods unless the manual supports safe automatic operation.
• Use only replacement parts made for your model when possible.
The manufacturer’s manual remains the best reference for exact settings, cleaning products, and safety instructions. Black and Decker has many coffee maker models, so button names and features may differ.
Lessons From Real-World Use
One lesson people often learn when using a drip coffee maker is that the carafe is part of the brewing system, not just a container. If it is slightly out of position, coffee may not flow correctly.
Another common mistake is adding coffee before checking the filter basket. A folded filter or a basket that is not fully seated can create a spill before the user realizes what happened.
A simple routine prevents most problems:
-
Check the basket.
-
Add the filter and coffee.
-
Fill the water reservoir.
-
Seat the carafe.
-
Start the brew cycle.
-
Clean the basket after use.
This routine takes less than a minute once it becomes familiar. It also makes how to work a Black and Decker coffee maker feel almost automatic.
The biggest flavor lesson is to change one thing at a time. If coffee tastes weak, add a little more coffee first. If it tastes bitter, reduce the amount or shorten the warming time. Changing water, grind, coffee, and brew strength all at once makes it hard to know what helped.
Frequently Asked Questions About How to Work a Black and Decker Coffee Maker
How do you start a Black and Decker coffee maker?
Fill the reservoir, add a filter and ground coffee, place the carafe on the warming plate, and press the Power or Brew button. The exact button name may vary by model.
How much coffee should I use in a Black and Decker coffee maker?
Start with one level tablespoon of medium-ground coffee for each marked cup on the water reservoir. Adjust the amount based on whether you prefer lighter or stronger coffee.
Why is my Black and Decker coffee maker not brewing?
Check the power connection, water level, carafe position, and filter basket. Mineral buildup or a clogged basket may also block water flow, so an approved cleaning cycle may help.
Can I use ground coffee in a Black and Decker coffee maker?
Yes, standard drip models are designed for ground coffee. Use medium-ground coffee unless your model’s manual recommends another grind.
How do I use the timer on a Black and Decker coffee maker?
Set the current time with the Hour and Minute buttons, then press Program and choose the desired brew time. Leave the machine plugged in with water, coffee, and the carafe correctly positioned.
How often should I clean a Black and Decker coffee maker?
Wash the removable parts after each use and descale the internal system when the cleaning indicator appears or when you notice slow brewing, scale, or an unusual taste. Homes with hard water may need more frequent cleaning.
Why does my coffee maker overflow?
Overflow usually comes from too many grounds, an incorrect or folded filter, or a carafe that is not fully seated. Stop the machine if needed, let it cool, and check each part before brewing again.
Conclusion
Learning how to work a Black and Decker coffee maker comes down to a few reliable steps: use fresh water, add the right amount of medium-ground coffee, seat the filter and carafe correctly, then start the brew cycle. Programmable models add clock and timer settings, while regular cleaning protects flavor and helps prevent slow brewing.
Use the basic instructions first, then adjust the coffee amount and brew strength to match your taste. Keep your model’s manual nearby for feature-specific details, and share your favorite brewing tips or questions in the comments.

Liora Pennings is a seasoned chef and kitchen enthusiast with a passion for turning everyday cooking into an effortless experience. With years of hands-on culinary expertise, she specializes in practical techniques, ingredient know-how, and smart kitchen solutions that help home cooks elevate their meals. At KitchFlair.com, Liora shares her best tips, time-saving tricks, and honest product reviews to guide readers toward a more efficient, enjoyable, and inspired cooking routine. Whether you’re a beginner or a seasoned home chef, Liora’s friendly, knowledge-packed insights make every visit to the kitchen a little easier—and a lot more delicious.