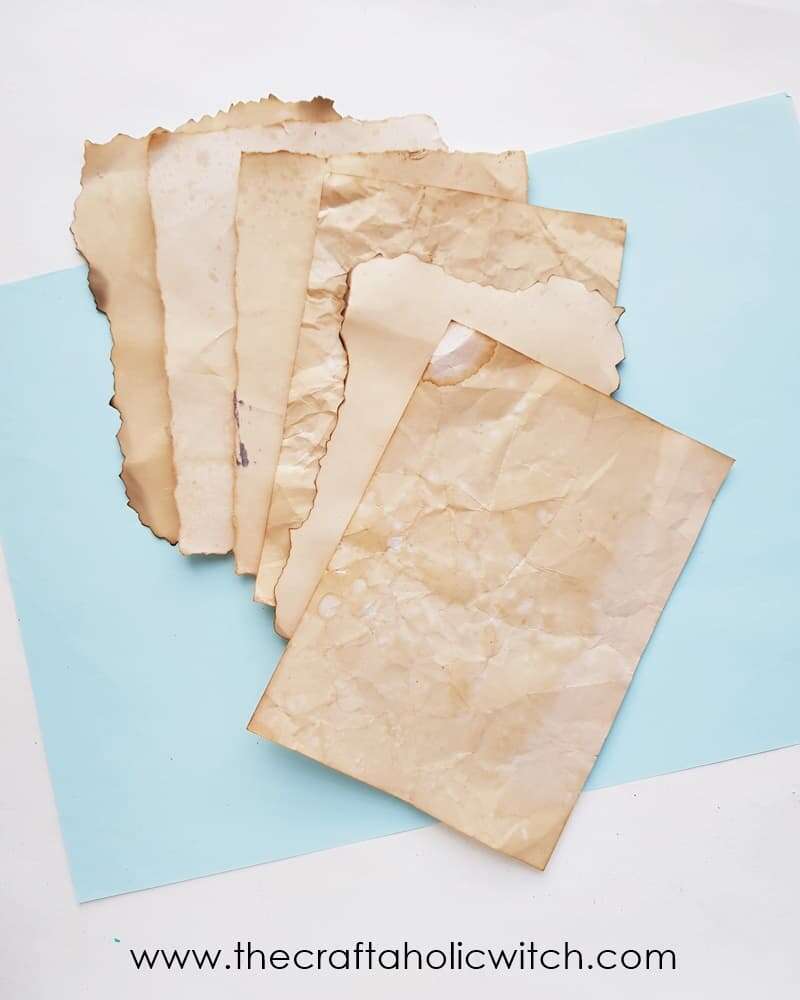
How To Make Paper Look Old With Coffee: Easy Guide
To make paper look old with coffee, stain it, dry it, and gently distress the edges for a natural aged finish.
Learning how to make paper look old with coffee is simple, affordable, and highly effective. As someone who has tested this method for journals, treasure maps, craft labels, and costume props, I have found that the best results come from using light layers instead of soaking the page all at once. This guide explains the tools, steps, drying methods, color choices, and mistakes to avoid.

Why coffee makes paper look old
Coffee gives paper a warm brown tone that resembles age. Its natural color compounds settle into the paper fibers and create soft stains, darker edges, and uneven marks.
The effect looks more realistic when the color is not perfectly even. Real old paper often has faded areas, stains, rough edges, and small changes in tone. Coffee helps copy this look without expensive dyes or special tools.
Freshly brewed coffee creates a light tan shade. Strong coffee or instant coffee mixed with less water creates a deeper brown. The type of paper also matters. Thin, porous paper absorbs color fast, while thick watercolor paper needs more liquid and drying time.
Paper aging with coffee works well for:
• Treasure maps
• Vintage letters
• Scrapbook pages
• Journal inserts
• Wedding décor
• School projects
• Theater props
• Handmade invitations
Coffee-stained paper is best for decorative use. It is not truly centuries old, and the color may change over time. Coffee contains acids and oils that can weaken paper if it stays damp or is stored in poor conditions.
Supplies you need
You do not need many materials to make paper look old with coffee. Gather everything before you begin so the wet sheet does not sit while you search for tools.
• Plain white or cream paper
• Brewed coffee or instant coffee
• A shallow tray or baking sheet
• A cup or bowl
• A sponge, brush, or clean cloth
• Paper towels
• An oven or flat drying surface
• Tongs, if you use an oven
• Fine sandpaper, optional
• A lighter or candle, optional and for adults only
Use plain printer paper for a quick craft. It is easy to find and works well for letters or school projects. For a more polished result, choose drawing paper, mixed-media paper, or watercolor paper.
Avoid glossy paper. Coffee may slide across its surface instead of soaking into the fibers. Coated paper can also dry with streaks and shiny spots.
For a gentle aged look, use medium-strength coffee. For a darker antique effect, make the coffee strong. Instant coffee is useful because you can control the color by adding more powder.
How to make paper look old with coffee step by step
This basic process gives paper a soft, uneven brown color. Work on a surface that can handle spills, since coffee can stain wood, fabric, and countertops.
1. Prepare the coffee
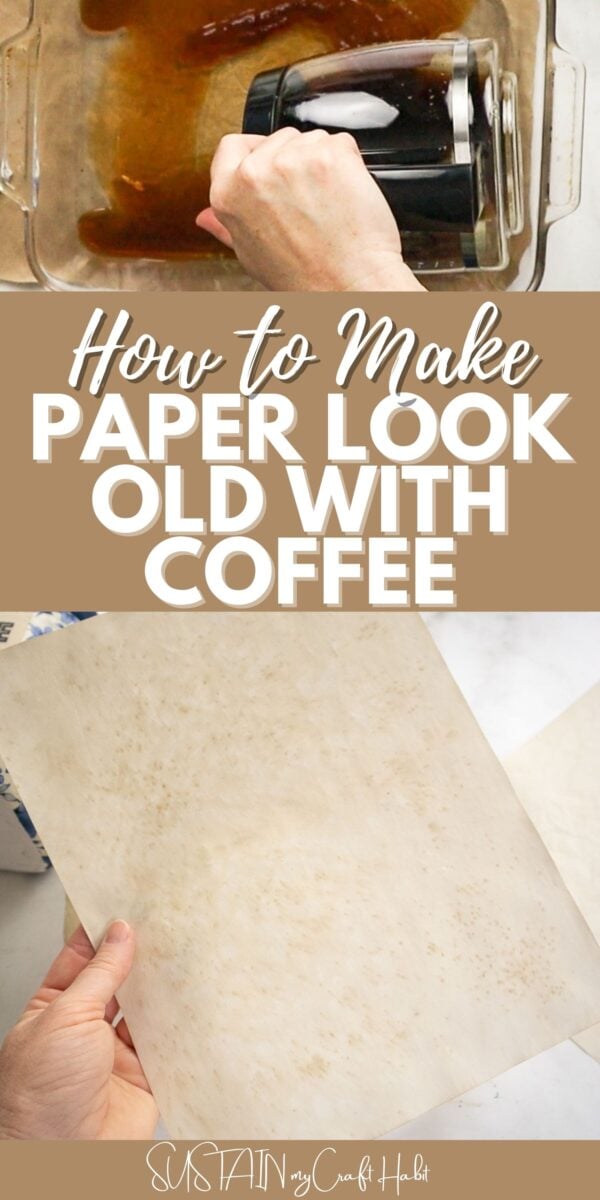
Brew one cup of coffee and let it cool. For a darker stain, use two teaspoons of instant coffee in half a cup of warm water.
Test the color on a scrap of the same paper. Coffee often looks darker while wet and lighter after it dries. This small test can save your main sheet from becoming too dark.
2. Protect your work area
Cover your table with a plastic bag, old towel, or sheet of cardboard. Place the paper inside a shallow tray or on a baking sheet.
If you plan to dry the paper in an oven, use a metal baking sheet. Do not place paper directly on an oven rack.
3. Apply the coffee
Pour a small amount of coffee into the tray. Lay the paper flat and let the coffee touch the surface.
You can also apply coffee with a sponge or brush. Dabbing creates spots, while brushing creates long streaks. A folded cloth gives a softer, more faded pattern.
Leave the coffee on the paper for:
• Two to five minutes for a pale stain
• Five to ten minutes for a medium brown tone
• Ten to fifteen minutes for a dark stain
Do not worry about perfect coverage. Uneven areas make the paper look more natural.
4. Add realistic marks
While the paper is still wet, add a few darker spots. Dip a toothbrush into coffee and tap it over the sheet. You can also press a damp tea bag onto selected areas.
Keep the marks random. Repeated patterns can make the paper look decorated instead of aged.
For darker edges, use a sponge around the border. Leave the center lighter to create a faded appearance. This technique works especially well for old letters and vintage-style certificates.
5. Remove extra liquid
Lift the paper carefully from the tray. Support it with both hands because wet paper tears easily.
Place it on a clean towel or baking sheet. Blot the surface with paper towels. Press gently instead of rubbing, since rubbing can remove wet fibers and leave rough patches.
6. Dry the paper
Air-drying gives the paper a soft, naturally wrinkled look. Lay it flat and let it dry for several hours.
For faster results, place it in an oven set to 200°F or lower. Dry it for about five to ten minutes, then check it often. Remove the sheet when it feels mostly dry.
Never leave paper unattended in an oven. Paper can scorch or catch fire if the temperature is too high or the drying time is too long.
7. Flatten the sheet
Coffee-stained paper often curls as it dries. Place the dry page between two clean sheets of paper and put a heavy book on top.
Leave it overnight. The next day, the paper should be flatter and easier to write on or use in a craft project.
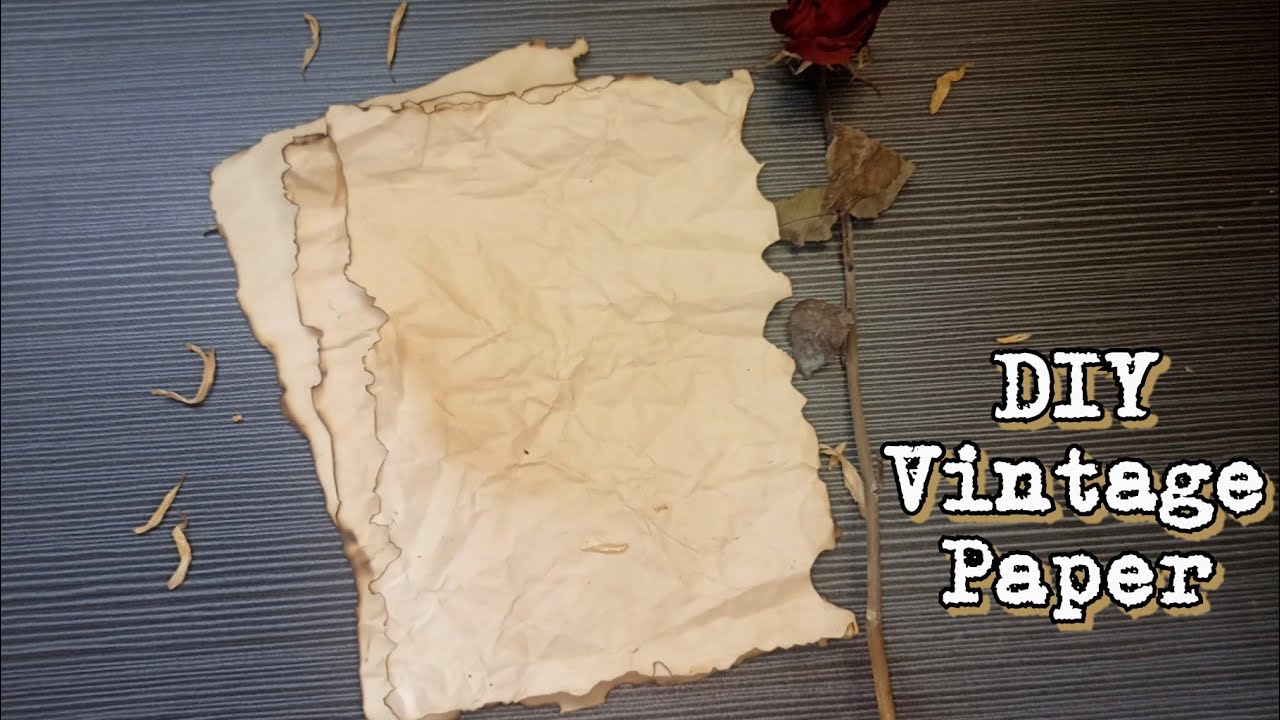
Ways to create a more realistic antique effect
The basic stain creates aged paper, but a few extra methods can make the result more convincing. Use one or two techniques at a time. Too many effects can make the paper look artificial.
Use several coffee shades
Make three small amounts of coffee:
• Weak coffee for pale areas
• Regular coffee for the main stain
• Strong coffee for the edges and spots
Apply the lightest shade first. Add darker coffee only after the first layer dries. This creates depth, much like adding thin paint layers to a picture.
Create wrinkles before staining
Crumple the dry paper into a loose ball. Open it carefully, then flatten it before applying coffee.
The creases will collect more liquid and become darker. This gives the sheet a naturally worn appearance. Do not crumple paper too hard, or the fibers may break.
Add darker edges
Dip a small sponge into strong coffee and dab the border. Focus on corners and areas near the edge.
Old paper does not always have evenly dark borders. Leave some gaps and vary the pressure as you work.
Use heat carefully
A warm oven can deepen the color and create faint golden spots. Keep the temperature low and check the paper often.
Do not use an open flame unless you are an adult working in a controlled space with water nearby. Burning the edges is risky, and the result is often less natural than using coffee.
Add small imperfections
For a believable vintage look, consider adding:
• A few small coffee splashes
• Light pencil marks
• Soft wrinkles
• Faded corners
• Tiny water rings
• A small tear along one edge
Avoid adding too many marks. A convincing antique effect usually has quiet variation rather than heavy damage.
Coffee staining methods compared
Different methods produce different results. Choose one based on the look you want.
Soaking
Soaking gives the most even color. It works well for a full-page background.
The drawback is that the paper becomes fragile and may tear during handling. Use thick paper if you want to soak it for more than a few minutes.
Brushing
Brushing gives you more control. You can keep the center pale and darken the edges.
This method is ideal for letters, maps, and pages that need a controlled design. Brush in different directions to avoid obvious brush lines.
Sponging
Sponging creates soft patches and cloudy color. It uses less coffee than soaking and makes the paper easier to control.
Use a nearly dry sponge for light marks. Press harder only when you want darker spots.
Spraying
Put coffee in a clean spray bottle and mist the page. This creates a fine, scattered pattern.
Test the bottle first. Some sprayers release large drops instead of a fine mist. Place the paper in a tray to catch drips.
Coffee grounds
Damp coffee grounds can create strong speckles. Sprinkle a small amount over wet paper, wait a few minutes, and brush them away.
Coffee grounds may leave rough marks or tiny bits behind. Use this method only when you want a heavily distressed finish.
Common mistakes to avoid
Many problems happen because the paper is handled too much while wet. Treat the wet sheet like thin fabric: move it slowly and support the whole surface.
Using too much liquid
A deep pool of coffee can make paper buckle, tear, or dry with harsh rings. Start with a small amount and add more if needed.
Choosing glossy paper
Glossy paper does not absorb coffee evenly. The stain may sit on top and wipe away when touched.
Making the color too dark
Coffee usually dries lighter than it looks when wet, but adding too much at once can still create a muddy brown page. Build the shade with thin layers.
Drying at high heat
High heat can curl, scorch, or ignite paper. A low oven temperature is safer, but air-drying gives the most control.
Rubbing the wet sheet
Rubbing can remove fibers and create holes. Blot with a paper towel instead.
Burning the edges
Open flames create a real safety hazard. They can also leave black, brittle edges that look more like a burned prop than old paper.
Storing the paper while damp
Moisture can lead to mold, odor, and further damage. Make sure the paper is fully dry before placing it in a book, box, or scrapbook.
How to make paper look old with coffee without an oven
You can make paper look old with coffee using only air-drying. This is the safest method for children, classrooms, and small indoor craft spaces.
Apply the coffee stain, blot away excess liquid, and place the paper on a towel. Turn it over after an hour so both sides can dry evenly.
For a flatter result, dry the paper between two absorbent sheets. Replace the sheets if they become wet. Once the paper is dry, press it under a book overnight.
Air-drying may take several hours, but it gives you more control than heat. It also reduces the chance of scorching the page.
How to make paper look old with coffee on different paper types
Paper weight changes how the coffee behaves. A method that works on printer paper may not work on thick art paper.
Printer paper
Printer paper stains quickly and dries fast. Use a light layer of coffee and avoid moving the page while wet.
Cardstock
Cardstock can handle more liquid and produces a firm finished sheet. It may need longer drying time because it holds more moisture.
Watercolor paper
Watercolor paper gives the best control for wet techniques. Its strong fibers resist tearing and allow several layers of coffee.
Handmade paper
Handmade paper often absorbs coffee unevenly. This can create a beautiful natural effect, but test a scrap first because some fibers may soften or shed.
Recycled paper
Recycled paper may already contain gray or brown fibers. Coffee can deepen its color and make the final result look especially warm.
How to preserve coffee-stained paper
Coffee-stained paper is decorative, not archival. Paper conservation experts generally recommend acid-free materials for items meant to last for many years.
Coffee can add acidity and may attract insects if residue remains. It can also continue to darken when exposed to light, heat, or moisture.
To protect your finished page:
• Let it dry completely
• Brush away loose coffee grounds
• Store it away from direct sunlight
• Keep it in a dry room
• Use an acid-free sleeve for long-term storage
• Avoid placing it next to valuable photographs or documents
If you are making a family keepsake, use coffee staining only for a reproduction or decorative layer. Do not use it on an original historical document.
Creative project ideas
Once you know how to make paper look old with coffee, you can use the technique for many projects.
Create a treasure map by staining the page, adding a simple hand-drawn route, and darkening the corners. For an old letter, use cream paper, a light coffee wash, and a few soft wrinkles.
You can also make:
• Vintage recipe cards
• Old-fashioned gift tags
• Fantasy game maps
• Travel journal pages
• Rustic table numbers
• Historical display labels
• Halloween invitations
Write on the paper only after it is dry. Gel pens, markers, and some inks may bleed if the surface still contains moisture.
In my own craft tests, a simple handwritten note often looks more convincing than a page covered with heavy stains. The paper should support the story, not distract from it.
Frequently Asked Questions About How to Make Paper Look Old With Coffee
How long should I soak paper in coffee?
Soak paper for about two to ten minutes, depending on the color you want. Thin paper needs less time, while thick paper can handle a longer soak.
Can I use instant coffee to age paper?
Yes, instant coffee works very well. Mix more powder with less water for a darker stain, and always test the mixture on scrap paper first.
How do I make coffee-stained paper look darker?
Apply a second layer after the first layer dries. You can also use stronger coffee around the edges and in selected spots.
Can I dry coffee-stained paper in the oven?
Yes, but use a low temperature of 200°F or lower and watch the paper closely. Never leave it unattended, and remove it as soon as it is mostly dry.
How can I flatten paper after staining it?
Place the dry sheet between clean sheets of paper and weigh it down with a heavy book. Leave it overnight for the best result.
Is coffee-stained paper safe for important documents?
No. Coffee can add acidity, weaken paper, and cause stains to change over time. Use this method for crafts, copies, and decorations rather than valuable originals.
Can I write on paper after aging it with coffee?
Yes, but wait until the paper is fully dry. Test your pen or ink on a corner first because some inks may spread across the stained surface.
Conclusion
Learning how to make paper look old with coffee takes only a few simple supplies and a little patience. Use cooled coffee, apply thin layers, darken the edges, blot gently, and let the page dry fully before flattening it.
The most realistic results come from small imperfections, not heavy staining. Test your method on scrap paper, work safely with heat, and store the finished page away from moisture and sunlight.
Try making your own coffee-aged sheet today, then use it for a map, letter, journal page, or handmade decoration. Share your favorite aging technique or explore more paper-craft ideas for your next project.

Liora Pennings is a seasoned chef and kitchen enthusiast with a passion for turning everyday cooking into an effortless experience. With years of hands-on culinary expertise, she specializes in practical techniques, ingredient know-how, and smart kitchen solutions that help home cooks elevate their meals. At KitchFlair.com, Liora shares her best tips, time-saving tricks, and honest product reviews to guide readers toward a more efficient, enjoyable, and inspired cooking routine. Whether you’re a beginner or a seasoned home chef, Liora’s friendly, knowledge-packed insights make every visit to the kitchen a little easier—and a lot more delicious.