How To Repair Vacuum Cleaner Nozzle Not Fitting: Quick Fix
Clean, realign, and replace worn seals or adapters to restore a snug nozzle fit quickly.
I’ve fixed dozens of vacuum nozzle issues in homes and workshops, and I know how frustrating a loose or misaligned attachment can be. This guide explains how to repair vacuum cleaner nozzle not fitting properly with clear steps, tools, and troubleshooting tips you can use today. I combine hands-on experience, common manufacturer guidance, and practical tips so you can diagnose the problem fast and get your vacuum working like new.

Common causes of a nozzle not fitting
A nozzle that won’t fit can come from many simple problems. Dirt and hair build-up where the nozzle meets the wand can stop it from seating. Worn or cracked plastic tabs and seals fail to lock parts together. Misalignment, wrong model parts, or deformed openings from knocks are other common causes.
I’ve seen lightweight plastic collars wear down after years of use, and a small crack in the cuff will happily stop lock tabs from catching. Knowing the cause helps you fix the problem without guessing.
Tools and parts you'll need
Before you start, gather a few basic tools and possible replacements. This speeds the repair and lowers the chance of damaging parts.
- Soft cloth and cotton swabs for cleaning
- Mild detergent and warm water for soaking cuffs
- Needle-nose pliers for small clips or tabs
- Super glue or plastic epoxy for minor plastic repairs
- Replacement seals, O-rings, or adapter sleeves specific to your model
- Sandpaper (fine grit) and a file for gentle reshaping
If you don’t know your vacuum model, check the label on the base or owner manual. Ordering the right replacement cuff or adapter is often the most durable fix.

Step-by-step: How to repair vacuum cleaner nozzle not fitting properly
Follow these clear steps. Work slowly and test the fit after each action so you don’t overdo the repair.
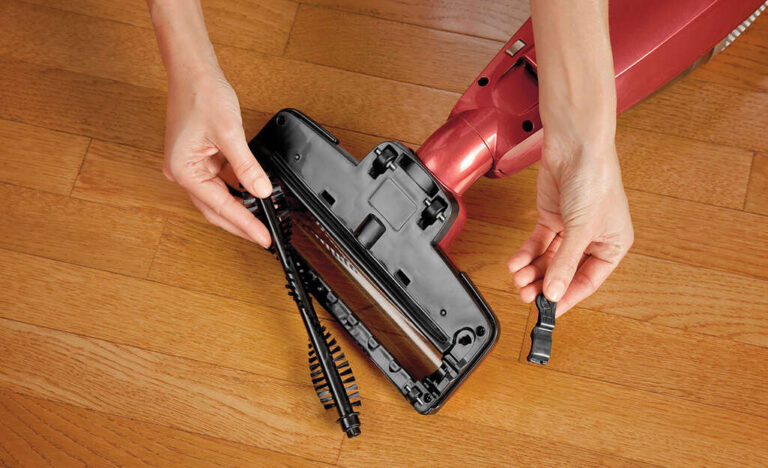
- Inspect and identify
- Remove the nozzle and look for debris, cracks, worn tabs, or misshapen rims.
- Check both male and female ends for damage. Many problems show on one side.
- Clean the connection points
- Wipe away dust with a soft cloth and use a cotton swab for inside grooves.
- Soak rubber cuffs in warm soapy water, rinse, and dry. Clean parts often restore fit immediately.
- Realign and test
- Press parts together gently and rotate to find a correct alignment or locking notch.
- If the nozzle fits in one position only, mark it with a small piece of tape for easy reassembly.
- Repair minor cracks or worn tabs
- For small plastic breaks, use a tiny dab of plastic epoxy, clamp to hold for cure time, then sand smooth.
- If a locking tab is shaved, use a small file to reshape its mate so they lock together again.
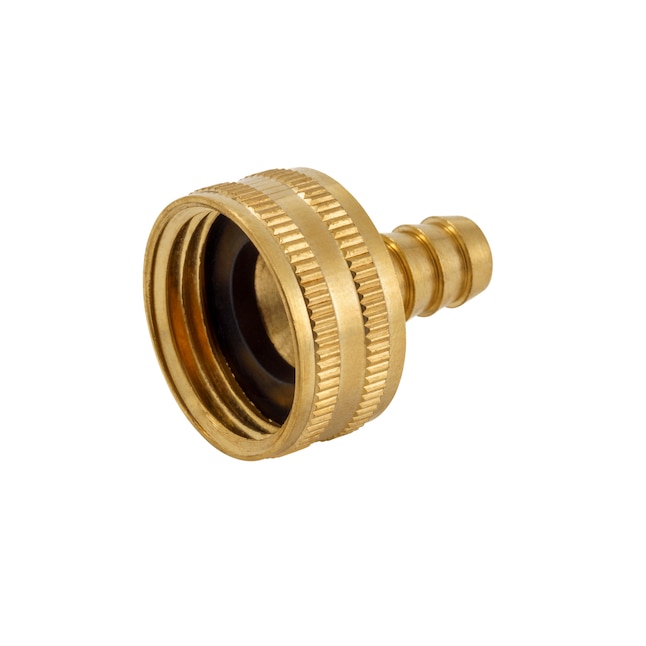
- Replace worn cuffs, sleeves, or adapters
- If rubber is stretched or brittle, replace it. New cuffs often restore a tight seal.
- Use OEM or high-quality third-party adapters designed for your model for best results.
- Add a temporary sleeve for a tight fit
- For a quick fix, wrap Teflon tape or a thin strip of rubber around the wand end. Test suction afterward to make sure airflow is not blocked.
- Reassemble and test under load
- Push the nozzle on until you hear or feel the click if there is one.
- Run the vacuum on low first to ensure the seal is good, then use normal suction to confirm durability.
I once fixed a loose nozzle on an older canister by sanding a slightly oversized rim and fitting a new rubber sleeve. The tool felt snug again and lasted years.

Troubleshooting and testing
If the nozzle still doesn’t fit after basic repairs, try these checks.
- Confirm model compatibility
- Check for hidden clips or screws that secure the cuff
- Inspect the wand for bends that stop proper alignment
- Test with another nozzle or wand to isolate the problem
Use a small piece of paper to test for suction loss at the joint. If suction drops significantly even with a snug fit, the seal is likely the issue.

When to replace the nozzle or call a pro
Some problems merit replacement or professional help. Consider this when:
- Large cracks or chunks of plastic are missing
- Manufacturer parts are no longer available and adapters won’t solve it
- Internal motor or airflow issues coincide with the loose nozzle
- You’re not comfortable using adhesives or tools on parts under warranty
A repair shop or the manufacturer can often supply the exact part and avoid trial-and-error fixes that might void warranties.
Preventive maintenance to avoid future fit issues
Routine care prevents most nozzle fit problems and extends the life of parts.
- Clean cuffs and tabs monthly
- Store the vacuum and attachments away from heat and direct sun
- Avoid forcing a nozzle onto the wrong-sized wand
- Replace rubber cuffs every few years if they show wear
Treat a nozzle like a shoe: gentle care keeps it fitting well and saves time later.
People also ask (PAA-style)
How long does it take to repair a nozzle that doesn’t fit?
Minor cleaning or a quick sleeve fix can take 10–30 minutes. Full part replacement or epoxy repairs can take a few hours if you need to order parts.
Can I use glue to fix a broken nozzle?
Yes, plastic epoxy works for small breaks, but avoid gaps that block airflow. For structural damage, replace the part instead.
Is it safe to force a nozzle into place?
No. Forcing parts can break tabs or crack plastic, making the problem worse. Always align and test gently.

Frequently Asked Questions of how to repair vacuum cleaner nozzle not fitting properly
What is the first thing I should check?
Look for dirt, hair, or debris in the cuff and wand connection. Cleaning often fixes the fit quickly.
Can a stretched rubber cuff be fixed without buying a new part?
You can try adding a thin rubber or Teflon layer to increase diameter, but replacement is more reliable and lasting.
How do I know if the nozzle is incompatible with my vacuum?
Check part numbers and model compatibility in your manual. If the nozzle slides loosely or never locks, it may not be the right design for your wand.
Will lubricating the cuff help it fit?
No. Lubricants can make fittings slip and weaken the lock. Clean and dry the surfaces instead.
Are there universal adapters that fix fit problems?
Yes, universal adapters exist and can bridge size differences, but choose a high-quality adapter to avoid airflow loss.
Conclusion
A loose or misfitting nozzle is usually fixable with simple cleaning, careful realignment, or replacing worn cuffs. Start with inspection, clean the connection, and move through small repairs before buying parts. If damage is severe or parts are unavailable, replacement or professional help is the safest route. Try the steps here and you’ll likely restore a secure fit today—leave a comment about your repair, subscribe for more DIY tips, or share your model for tailored advice.

Liora Pennings is a seasoned chef and kitchen enthusiast with a passion for turning everyday cooking into an effortless experience. With years of hands-on culinary expertise, she specializes in practical techniques, ingredient know-how, and smart kitchen solutions that help home cooks elevate their meals. At KitchFlair.com, Liora shares her best tips, time-saving tricks, and honest product reviews to guide readers toward a more efficient, enjoyable, and inspired cooking routine. Whether you’re a beginner or a seasoned home chef, Liora’s friendly, knowledge-packed insights make every visit to the kitchen a little easier—and a lot more delicious.