How To Make Coffee In An Electric Percolator: Easy Guide
Use medium-ground coffee, fresh water, and the percolator’s cycle to brew a rich, hot pot.
Learning how to make coffee in an electric percolator is simple once you understand the water tube, filter basket, and brewing cycle. I have used percolators for camping trips, family breakfasts, and large holiday meals, and small details such as grind size and brew time make a major difference. This guide explains how to make coffee in an electric percolator with clear steps, useful ratios, common fixes, and practical tips for a smoother cup.
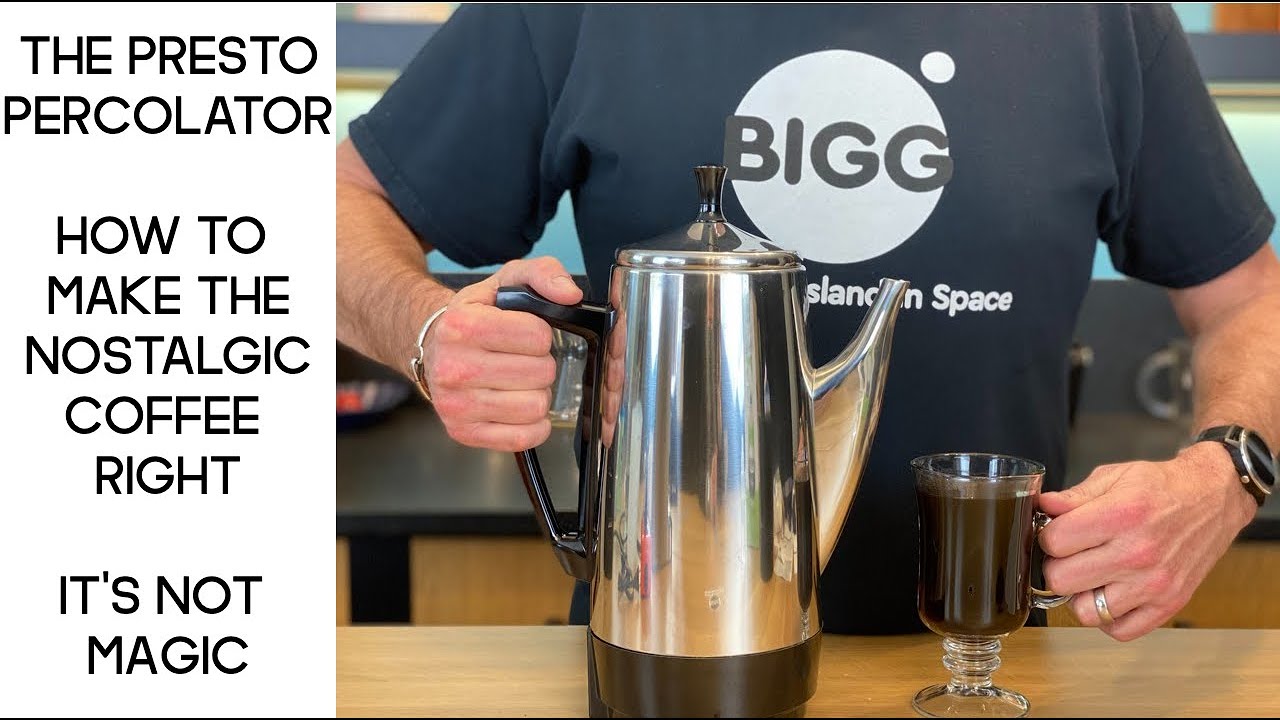
What Is an Electric Percolator?
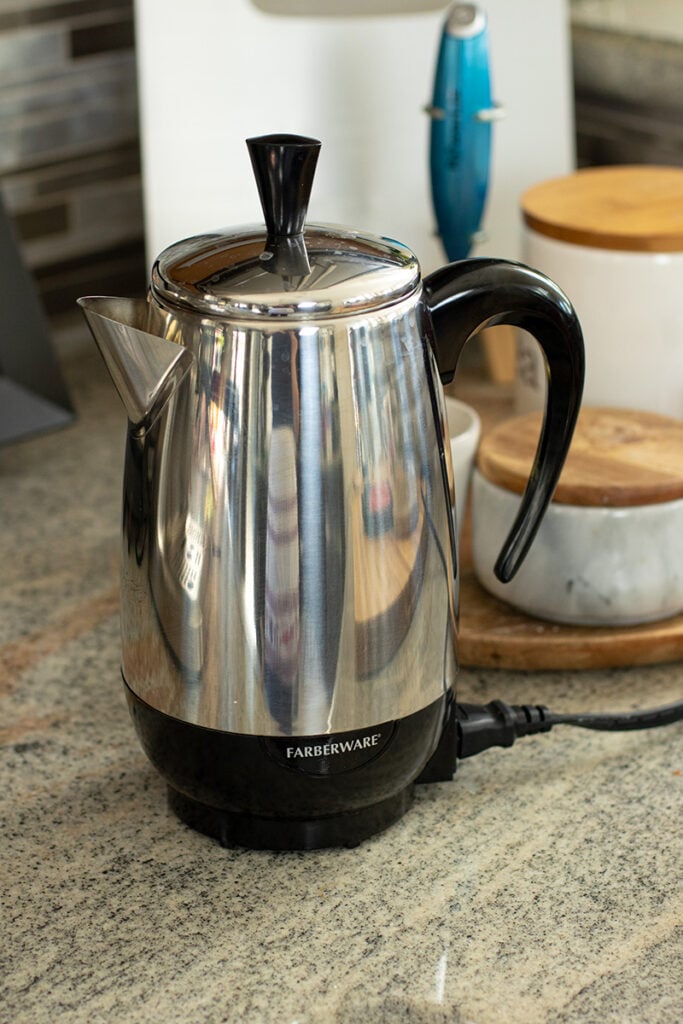
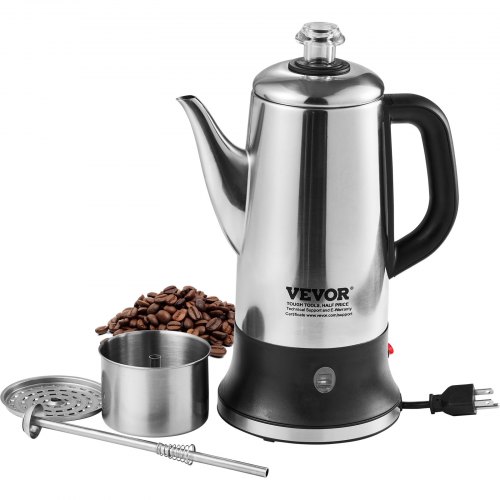
An electric percolator is a coffee maker that repeatedly moves hot water through coffee grounds. The machine heats water in its lower chamber, sends it up a central tube, and sprays it over coffee in a perforated basket.
The brewed coffee then drips back into the lower chamber. This cycle continues until the coffee reaches the desired strength or the unit switches to a keep-warm setting.
Unlike a drip coffee maker, an electric percolator often brews coffee at a higher heat for a longer time. That process creates a bold, full-bodied cup, but it can also produce bitter coffee if the grind is too fine or the brew runs too long.
Knowing how to make coffee in an electric percolator starts with learning the parts:
• Lower chamber: Holds the water and finished coffee.
• Central tube: Carries hot water to the top of the unit.
• Filter basket: Holds the ground coffee.
• Basket lid: Helps spread hot water over the grounds.
• Power base or cord: Heats the water and controls the brewing cycle.
How to Make Coffee in an Electric Percolator Step by Step
The process is easy, but careful preparation gives you better flavor. Follow these steps for a reliable pot.
1. Clean the Percolator
Wash the pot, lid, tube, and basket with warm water and mild dish soap. Rinse away all soap before brewing.
Old coffee oils can turn rancid. They may add a stale or burnt taste to a fresh batch. If the percolator has not been used in a while, check the tube and basket for mineral buildup.
2. Measure Fresh, Cold Water
Fill the lower chamber with cold, filtered water. Use the measurement marks inside the pot when available.
If your percolator has no clear markings, use about 6 fluid ounces of water for each standard cup of coffee. Keep the water below the maximum fill line.
Avoid filling the pot above its limit. Too much water can spill into the basket or weaken the coffee.
3. Add the Right Amount of Coffee
Use coarse or medium-coarse ground coffee. Fine coffee can pass through the basket holes and create a muddy cup.
A useful starting point is:
• 1 level tablespoon of coffee for each 6 fluid ounces of water.
• ¾ cup of ground coffee for a full 12-cup percolator.
• ½ cup of ground coffee for an 8-cup percolator.
You can add more coffee for a stronger brew or reduce the amount for a lighter cup. Coffee strength depends on the beans, roast, grind, water, and brewing time, so treat these amounts as a starting point.
4. Assemble the Parts
Place the central tube into the lower chamber. Set the coffee basket over the tube, then add the basket lid.
Make sure the tube sits firmly in its base. If it is loose or tilted, water may not rise correctly. Spread the grounds evenly in the basket, but do not press them down.
5. Secure the Lid and Start Brewing
Place the lid on the percolator and lock it if the model has a locking design. Plug the unit into a safe outlet and turn it on.
Most electric percolators begin heating right away. Many models have an indicator light that shows when the coffee is ready or when the unit shifts to warm mode.
6. Watch the Brewing Cycle
A glass knob on the lid may let you see the coffee bubbling. The bubbles show that water is moving through the coffee basket.
Do not remove the lid often. Each time you lift it, heat escapes and the brewing cycle slows. If the machine has an automatic shutoff, allow it to complete the cycle.
7. Let the Coffee Rest Briefly
When brewing ends, unplug the percolator unless it has a safe automatic keep-warm function. Let the coffee sit for about 2 to 5 minutes.
This short rest allows fine particles to settle. Pour slowly to keep sediment out of your cup.
These steps explain how to make coffee in an electric percolator without guesswork. The best results come from consistent measurements and careful timing.
How Long Should Coffee Percolate?
Most electric percolators take about 5 to 12 minutes to brew, depending on the size of the pot and the amount of water. A smaller batch may finish quickly, while a full pot can take longer.
Many experienced coffee makers use the color of the bubbling coffee as a guide. The liquid should look deep brown, not pale and watery. However, color alone is not a perfect measure of strength.
If your model includes an automatic brewing cycle, follow its instructions first. Electric percolators vary in design, wattage, and temperature control.
A good rule is to avoid letting the coffee continue boiling after the brewing cycle ends. Prolonged heat can extract too many bitter compounds and may make the coffee taste harsh.
When learning how to make coffee in an electric percolator, timing is one of the most important skills. Record what works for your model, coffee brand, and preferred strength.
Choosing Coffee, Grind, and Water
The coffee you choose has a direct effect on the final cup. Fresh beans usually taste brighter and more complex than old, pre-ground coffee.
For the best flavor, consider these choices:
• Coffee beans: Medium and dark roasts work well for a bold percolator brew. Light roasts can taste bright but may seem sharp when brewed for a long time.
• Grind size: Use coarse or medium-coarse grounds. The texture should resemble rough sand.
• Roast freshness: Use coffee within a reasonable period after roasting and store it in an airtight container.
• Water: Filtered water often gives cleaner flavor than heavily chlorinated tap water.
Water quality matters because coffee is mostly water. Very hard water may leave mineral deposits inside the machine and create a flat taste.
Avoid distilled water for regular brewing. It lacks many minerals that help coffee develop a balanced flavor. If your tap water tastes unpleasant on its own, it will likely taste unpleasant in coffee too.
Understanding these details makes how to make coffee in an electric percolator much easier. Good ingredients give the brewing process a fair chance.
:max_bytes(150000):strip_icc()/sea-kidisle-percolator-coffee-maker-irvin-lin-08-7f6d527b89e04c96a5f8f1dd6962bd4f.jpeg)
Coffee-to-Water Ratios for an Electric Percolator
A standard starting ratio is 1 tablespoon of ground coffee per 6 fluid ounces of water. Some coffee drinkers prefer 1 tablespoon per 4 to 5 fluid ounces for a stronger cup.
Percolator cup markings may not match the 8-ounce cup used in many American kitchens. In many machines, one “cup” means 5 or 6 fluid ounces.
Use this simple chart as a guide:
| Water | Ground coffee |
|---|---|
| 4 cups | 4 tablespoons |
| 6 cups | 6 tablespoons |
| 8 cups | 8 tablespoons |
| 10 cups | 10 tablespoons |
| 12 cups | 12 tablespoons |
Adjust the ratio after your first brew. If the coffee tastes weak, add more grounds next time. If it tastes bitter or heavy, use slightly less coffee or shorten the brewing time when your machine allows it.
Do not change several variables at once. For example, keep the same coffee and water amount while adjusting the grind. This helps you understand what improved the taste.
A measured approach is the most dependable way to learn how to make coffee in an electric percolator.
Common Mistakes to Avoid
Even a good percolator can make poor coffee when the setup is wrong. These common mistakes are easy to fix.
Using Fine-Ground Coffee
Fine grounds can clog the basket, pass into the coffee, or create a bitter taste. Coarse grounds are safer and produce a cleaner cup.
Packing the Coffee Basket
Do not press the grounds down. Water needs to move through them freely. A packed basket may slow the flow and lead to uneven extraction.
Overfilling the Pot
Too much water can cause spills and weak coffee. Stay below the maximum fill line.
Brewing for Too Long
Extended heat can make coffee bitter and dry. Remove the pot from the heat or unplug it when the brewing cycle ends.
Using Old Coffee
Stale coffee loses aroma and may taste flat. Buy smaller amounts if you do not brew every day.
Leaving Coffee in the Percolator
Coffee left on a hot plate can become strong and bitter. Transfer extra coffee to a thermal carafe if you plan to serve it later.
In my own testing, the most common mistake was adding more coffee when the real problem was an overly long brew. Changing the brewing time first often solved the issue without making the cup too strong.
:max_bytes(150000):strip_icc()/Percolators-group-Winners-Irvin-Lin-08-c042c711e1da4ee7a443020d4895ca72.jpeg)
How to Make Stronger or Milder Coffee
To make stronger coffee, use more grounds before increasing the brewing time. Add one extra tablespoon for a medium pot, then taste the result.
You can also use a darker roast, but roast level does not always mean more caffeine. Dark roasts often taste bolder because roasting creates deeper smoky and bittersweet flavors.
To make milder coffee:
• Reduce the grounds slightly.
• Use a medium roast instead of a dark roast.
• Stop the brewing cycle as soon as the coffee reaches a rich brown color.
• Add hot water to the finished coffee if the brew is too concentrated.
Adding hot water is often better than under-extracting the coffee. It lets you keep a smooth base while adjusting the strength in the cup.
When showing someone how to make coffee in an electric percolator, I suggest starting with a medium-strength batch. It is easier to make a balanced cup stronger than to rescue an overly bitter one.
Cleaning and Maintaining an Electric Percolator
Clean the percolator after each use. Unplug the unit, let it cool, and remove the coffee basket and tube.
Wash removable parts with warm water and mild soap. Wipe the inside of the main chamber with a soft sponge. Never immerse an electric base or cord in water unless the manufacturer clearly says it is safe.
Mineral scale can build up over time. To remove it, follow the care instructions for your specific model. Many manufacturers recommend a descaling solution or a water and vinegar process, but vinegar is not suitable for every machine.
After descaling, run several cycles of clean water. This removes any lingering taste or odor.
Check the small opening at the top of the central tube. A blockage can stop water from rising and may cause weak or uneven coffee.
Proper care improves both flavor and safety. It also helps your percolator last longer, which is useful if you make coffee in an electric percolator every day.
Troubleshooting Percolator Coffee
The Coffee Tastes Bitter
Bitter coffee often comes from too much heat, too much coffee, a fine grind, or an overly long brew. Try coarse grounds, a shorter cycle, or one less tablespoon of coffee.
The Coffee Tastes Weak
Weak coffee may result from too much water, too few grounds, or an incomplete brewing cycle. Confirm that the central tube is seated correctly and that the basket is not clogged.
There Are Grounds in the Cup
The grind may be too fine, or the basket may be damaged. Use a coarser grind and inspect the basket for cracks or oversized holes.
The Percolator Does Not Brew
Check that the unit is plugged in and that the outlet works. Make sure the tube is properly placed and that the water level is above the bottom of the tube.
The Coffee Tastes Metallic
A metallic taste may come from mineral buildup, old coffee oils, or a damaged interior surface. Clean the machine well and stop using it if the lining is peeling or badly corroded.
Safety comes first. Do not use a percolator with a frayed cord, cracked body, loose electrical connection, or damaged plug.
Electric Percolator Versus Drip Coffee Maker
An electric percolator is a good choice when you want hot, bold coffee and a large batch. It also works well for people who enjoy traditional brewing and do not mind a stronger flavor.
A drip coffee maker usually offers more precise control over water flow and brewing temperature. It may produce a cleaner and less intense cup, especially with a paper filter.
Choose a percolator if you prefer:
• Full-bodied coffee.
• A durable machine with few parts.
• Brewing several cups at once.
• A classic coffee-making method.
Choose a drip machine if you prefer:
• A lighter, cleaner cup.
• Paper-filtered coffee.
• Simple automatic timing.
• More control over brewing variables.
Neither method is automatically better. The right choice depends on your taste, routine, and equipment.
Frequently Asked Questions About How to Make Coffee in an Electric Percolator
How much coffee do you put in an electric percolator?
Start with 1 tablespoon of coarse or medium-coarse coffee for every 6 fluid ounces of water. Adjust the amount based on your preferred strength and the size of your percolator.
What grind is best for an electric percolator?
A coarse or medium-coarse grind works best. Fine grounds may pass through the basket, clog the tube, and create bitter or muddy coffee.
How long does coffee take in an electric percolator?
Most electric percolators brew coffee in about 5 to 12 minutes. The exact time depends on the machine size, water volume, and heating system.
Do you use hot or cold water in an electric percolator?
Use fresh, cold water unless your manufacturer gives different instructions. The percolator is designed to heat the water gradually during the brewing cycle.
Can you leave coffee in an electric percolator?
You can leave coffee in the machine briefly if it has a safe keep-warm setting. For better flavor, transfer extra coffee to a thermal carafe instead of keeping it on heat for a long time.
Why is my percolator coffee bitter?
Bitter coffee may come from a fine grind, too many grounds, very dark coffee, or excessive brewing time. Use a coarser grind, reduce the coffee slightly, and stop the cycle when the brew is ready.
Can I use paper filters in an electric percolator?
Some models accept special percolator filters, but many do not require them. Check the product instructions before adding a paper filter, since the wrong size can block water flow.
Conclusion
Making coffee in an electric percolator is easy when you use fresh water, coarse grounds, the right ratio, and a controlled brewing time. Start with 1 tablespoon of coffee per 6 fluid ounces of water, then adjust one variable at a time until the flavor suits you.
Keep the machine clean, avoid fine grounds, and do not let the finished coffee sit on heat for too long. Brew a small test batch today, note what you change, and use those results to create your ideal pot. Share your favorite percolator tips or coffee ratio in the comments.

Liora Pennings is a seasoned chef and kitchen enthusiast with a passion for turning everyday cooking into an effortless experience. With years of hands-on culinary expertise, she specializes in practical techniques, ingredient know-how, and smart kitchen solutions that help home cooks elevate their meals. At KitchFlair.com, Liora shares her best tips, time-saving tricks, and honest product reviews to guide readers toward a more efficient, enjoyable, and inspired cooking routine. Whether you’re a beginner or a seasoned home chef, Liora’s friendly, knowledge-packed insights make every visit to the kitchen a little easier—and a lot more delicious.