How To Make Stovetop Popcorn: Easy, Crispy Recipe
Use a heavy pot, oil, popcorn kernels, and steady heat to make crisp stovetop popcorn in minutes.
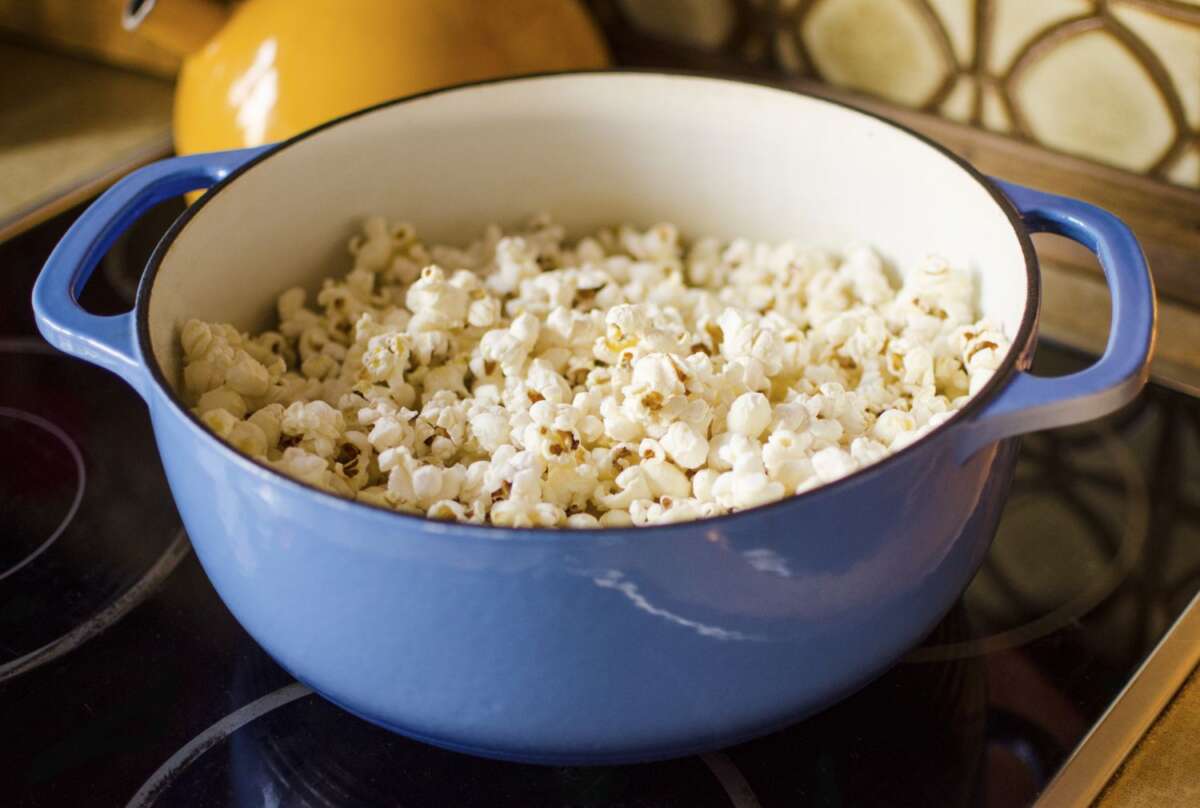
Learning how to make stovetop popcorn is simple, affordable, and far more rewarding than most people expect. With the right pot, proper heat, and a little patience, you can make fluffy popcorn with fewer burnt kernels and better flavor than many microwave versions. This guide explains each step, shares practical kitchen-tested tips, and covers common mistakes so your next bowl turns out light, crisp, and evenly popped.
Why Make Popcorn on the Stovetop?
Stovetop popcorn gives you control over the oil, salt, heat, and flavor. You can make a fresh bowl in about 10 minutes without relying on a prepackaged seasoning pouch.
Fresh popcorn also offers a pleasant texture. The kernels pop in hot oil, which helps create crisp shells and tender centers. You can then add melted butter, cheese, herbs, spices, or nutritional yeast.
A serving of air-popped popcorn is naturally low in calories and provides fiber. However, oil, butter, caramel, and heavy toppings can raise the calorie and sodium content. The cooking method is not automatically healthier; the ingredients and portions still matter.
When I test stovetop popcorn, the biggest difference comes from heat control. High heat may seem faster, but it often burns the oil or leaves scorched kernels at the bottom. Medium or medium-high heat gives the kernels time to warm and pop evenly.
Ingredients and Equipment You Need
You do not need special tools for stovetop popcorn. A few basic items are enough.
Ingredients
For about 8 cups of popped popcorn, use:
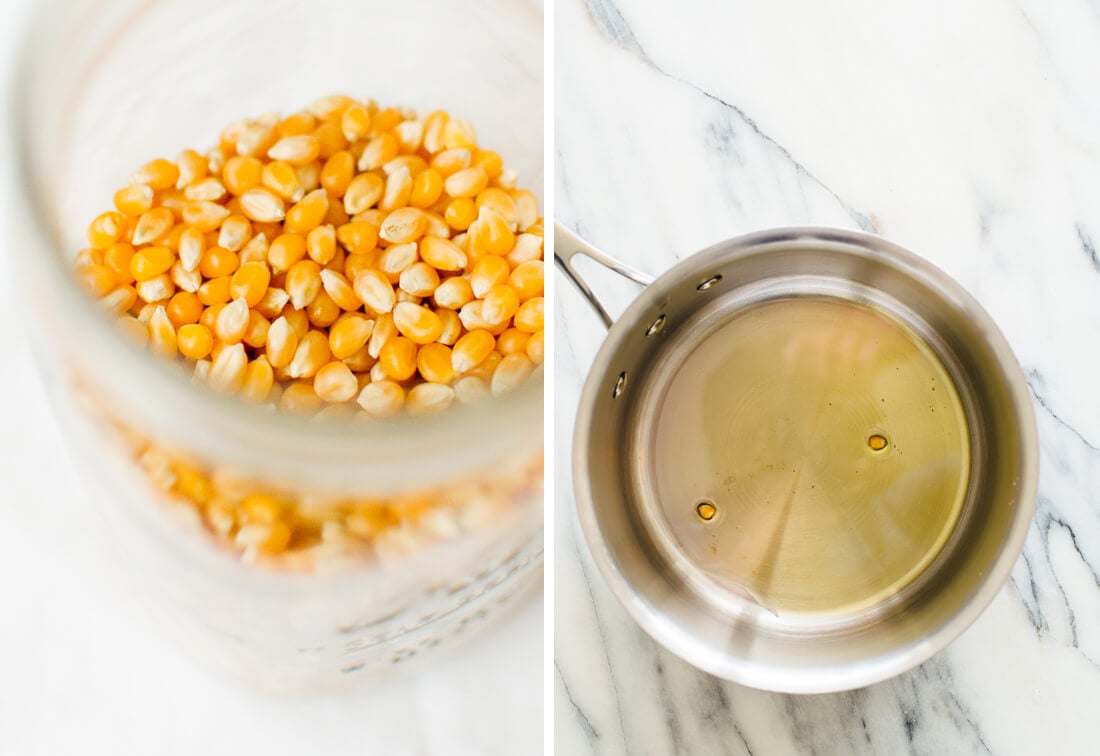
- ½ cup popcorn kernels
- 2 to 3 tablespoons cooking oil
- ½ teaspoon fine salt, or more to taste
- 1 to 2 tablespoons melted butter, optional
Choose a neutral oil with a high smoke point. Canola, vegetable, grapeseed, avocado, and refined coconut oil all work well. Extra-virgin olive oil can work over moderate heat, but it may add a stronger flavor and can smoke if overheated.
Equipment
Use:
- A heavy-bottomed pot or Dutch oven
- A lid that fits well
- A large bowl
- Oven mitts or a dry kitchen towel
- A large spoon or measuring cup
A heavy pot spreads heat more evenly than a thin saucepan. This reduces hot spots, which are a major cause of burnt popcorn.
Avoid filling the pot with too many kernels. The kernels need room to move and release steam. A crowded pot can create uneven popping and chewy popcorn.

How to Make Stovetop Popcorn Step by Step
The process is easy, but timing matters. Follow these steps for consistent results.
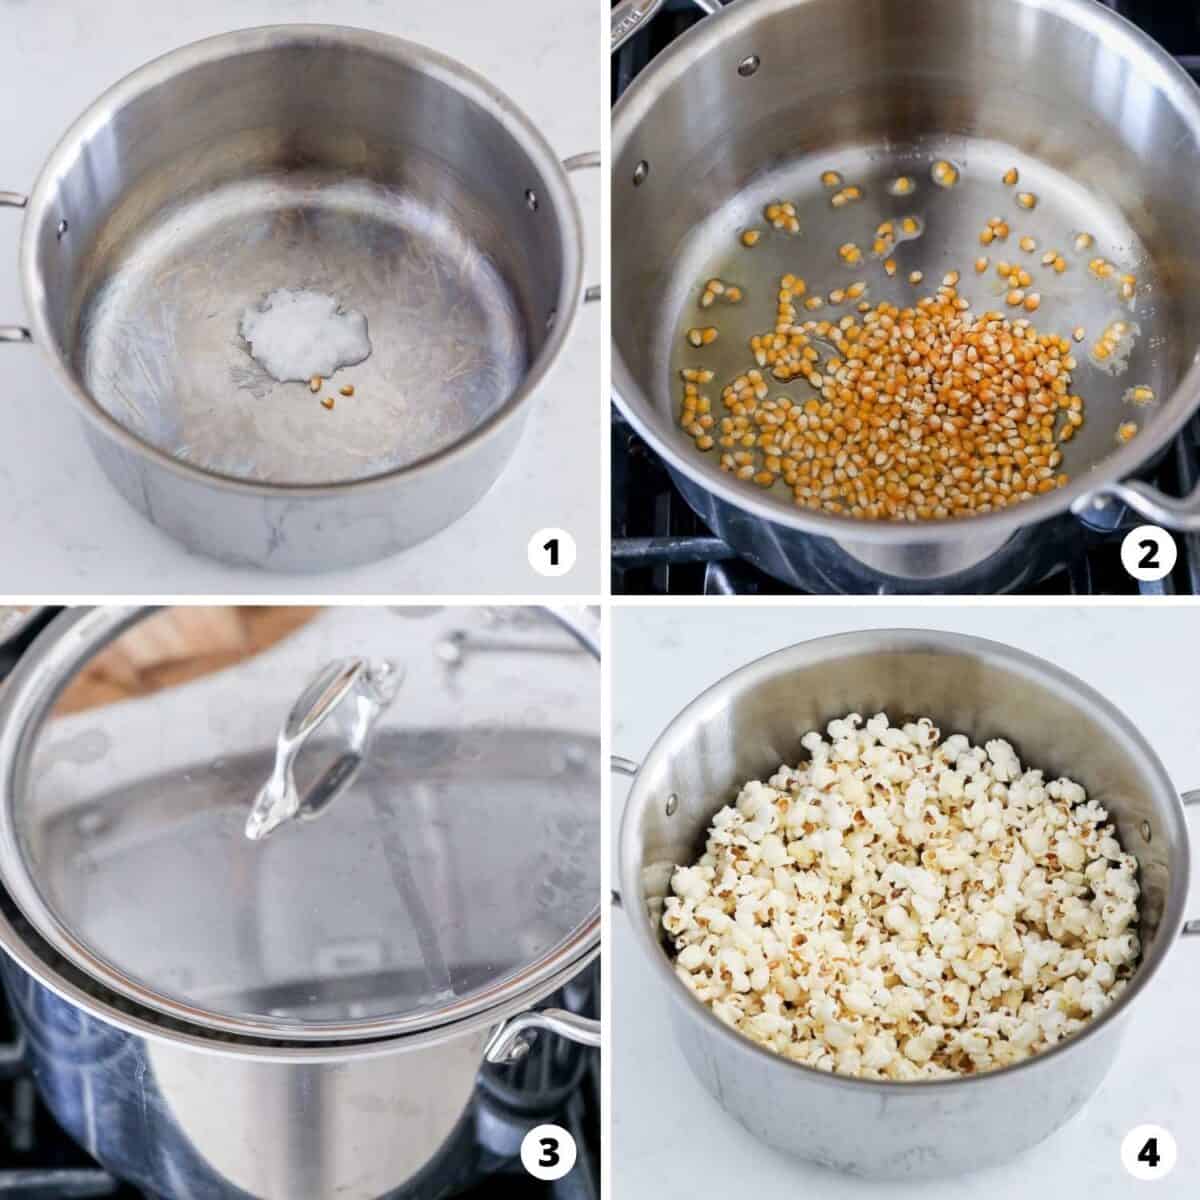
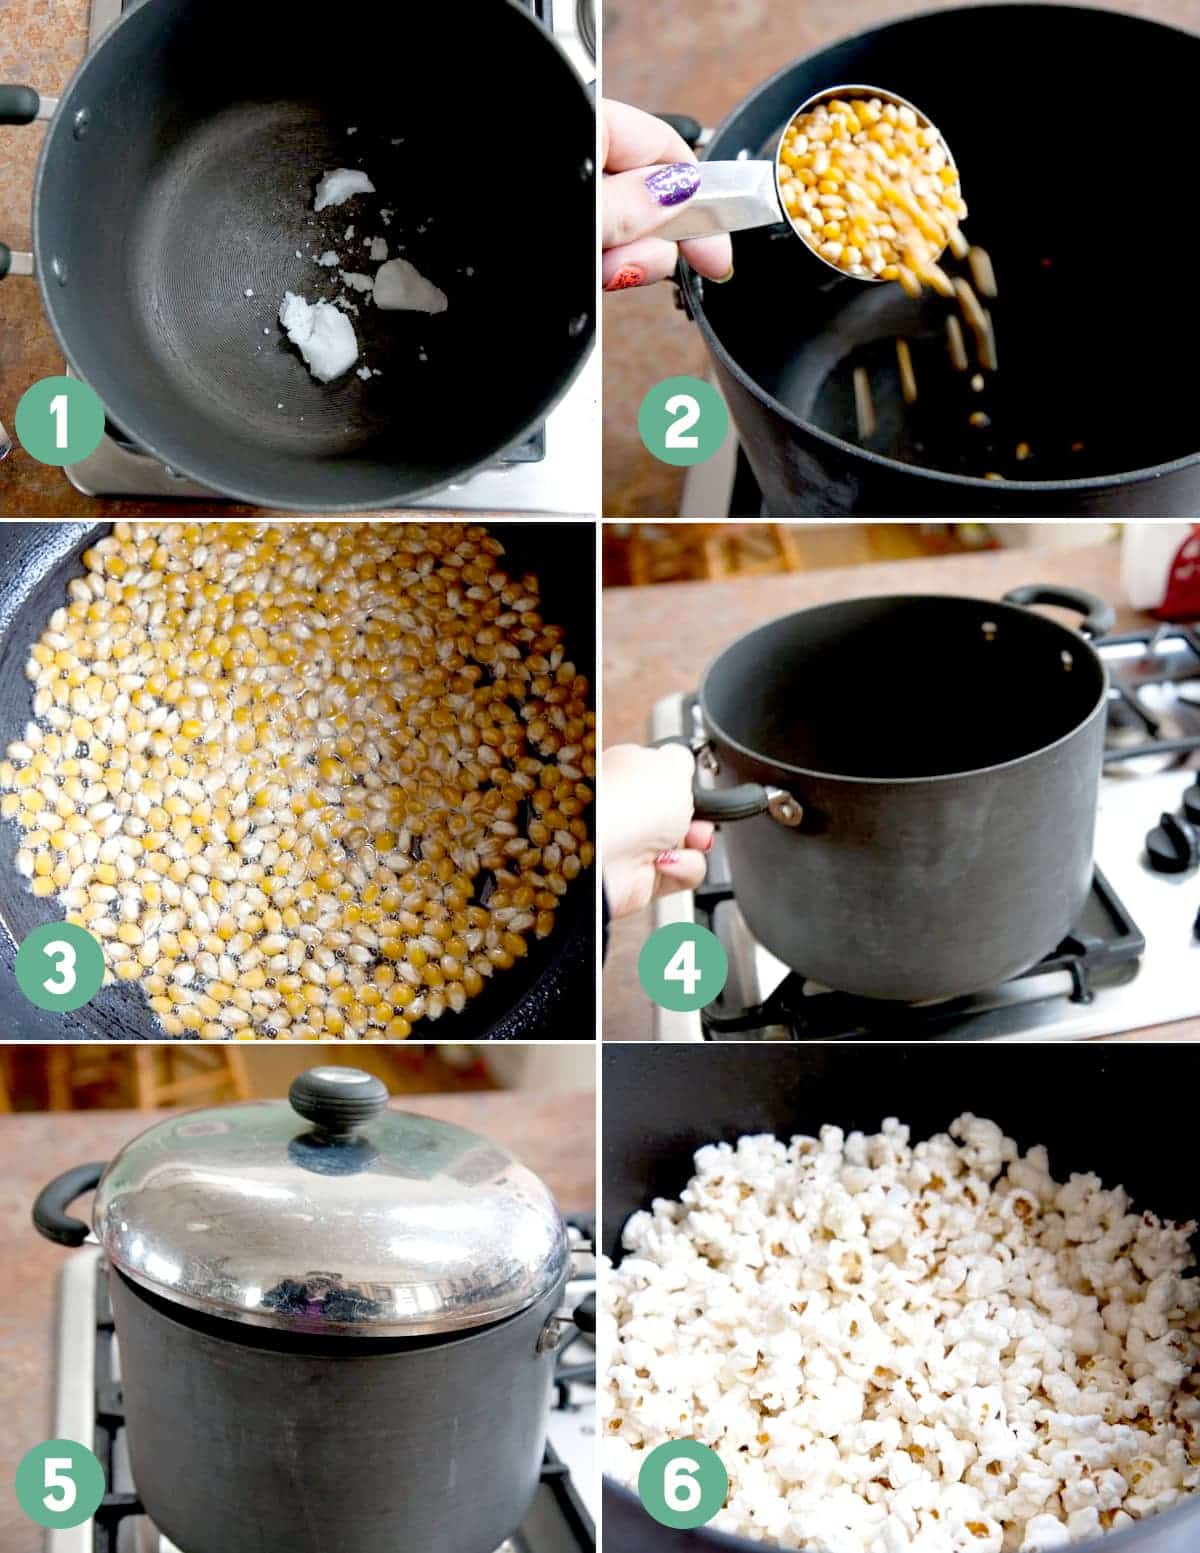
1. Add the oil and test kernels
Pour the oil into the pot. Add two or three popcorn kernels, cover the pot, and place it over medium heat.
Wait until the test kernels pop. This shows that the oil has reached a useful popping temperature. Most popcorn pops when the moisture inside each kernel turns to steam and creates enough pressure to split the hull.
2. Add the remaining kernels
Remove the pot from the heat for about 30 seconds. Add the remaining kernels, spread them into one layer, and cover the pot again.
This short pause helps the kernels warm more evenly. It is one of the best tricks for reducing unpopped kernels.
3. Return the pot to the burner
Place the covered pot back over medium heat. Gently shake it every few seconds while keeping the lid secure.
Use a back-and-forth motion rather than lifting the pot too often. This helps prevent kernels from sitting on one hot spot. Keep the lid slightly vented if it has a steam release opening. If it does not, briefly tilt the lid once or twice to let steam escape, while keeping it close enough to stop popping kernels.
4. Listen for the popping to slow
As the popcorn expands, the popping sound will become slower. When you hear about two seconds between pops, remove the pot from the heat.
Do not wait for every kernel to pop. If you chase the final few kernels, the first ones may burn. A small number of unpopped kernels is normal.
5. Season the popcorn
Pour the popcorn into a large bowl. Add salt while the popcorn is warm, then toss it well.
For buttered popcorn, drizzle on melted butter in a thin stream while tossing. This spreads the butter more evenly and prevents a few pieces from becoming soggy.
The basic stovetop popcorn method works because it balances three things: hot oil, dry kernels, and moving heat. If one part is off, the texture suffers.
:max_bytes(150000):strip_icc()/stovetoppopcorn-twenty20_4823be7a-4854-4a49-a0a8-8e048f230efb-598e40fcc41244001174c0e9.jpg)
How to Get Light, Crisp Popcorn
Good stovetop popcorn should feel crisp, not soft or rubbery. Steam is usually the main reason popcorn turns chewy.
Use fresh, properly stored kernels. Popcorn kernels contain a small amount of water inside the hard shell. If the kernels become too dry, they may not build enough steam to pop well. If they absorb too much moisture, the popped corn can become soft.
Follow these tips for better texture:
- Keep the lid slightly open when safe so steam can escape.
- Do not pour warm popcorn into a tightly sealed container.
- Serve it soon after cooking.
- Use a wide bowl so steam can spread out.
- Avoid adding too much liquid butter at once.
- Store leftover popcorn in an airtight container after it cools.
If your popcorn tastes chewy, try reducing the amount of butter and venting the lid more carefully. If it tastes burnt, lower the heat and remove the pot sooner.
In my kitchen tests, shaking the pot lightly every few seconds works better than constant vigorous shaking. Too much movement can make the pot harder to control and may cause oil to splash beneath the lid.

Common Stovetop Popcorn Mistakes
Even a simple recipe has a few traps. Most problems are easy to fix.
Using too much heat
High heat may pop the kernels quickly, but it also raises the risk of burning the oil and popcorn. Medium heat is usually the safer choice.
Overfilling the pot
Kernels expand dramatically. Half a cup of kernels can produce roughly 8 to 12 cups of popcorn, depending on the kernel type and popping conditions.
If the popped corn presses against the lid, transfer it to a bowl as soon as there is room. This prevents later batches from steaming.
Adding salt too early
Salt added to the oil can settle at the bottom and season the pot more than the popcorn. Add most of the salt after popping, when the warm surface can help it stick.
Using a loose lid
A loose lid can allow hot oil and popcorn to escape. Always use a secure lid, keep your face and hands away from the opening, and use oven mitts when handling the pot.
Leaving the pot unattended
Popcorn changes from perfect to burnt very quickly. Stay near the stove and listen to the popping sound.
Using damp seasonings
Fresh herbs, wet sauces, and some cheese toppings can add moisture. Add them just before serving, and expect the popcorn to soften faster.
Food safety agencies advise caution with hot oil and steam. Never pour water into a pot of hot oil, and keep children away from the burner during cooking.
Best Oils for Stovetop Popcorn
The best oil depends on the flavor you want and the heat you use.
Canola oil
Canola oil has a mild flavor and works well for everyday popcorn. It is affordable and easy to find.
Vegetable oil
Vegetable oil is also neutral and reliable. It is a common choice for classic movie-style popcorn.
Coconut oil
Refined coconut oil gives popcorn a familiar theater-style taste without a strong coconut flavor. Unrefined coconut oil has a more noticeable flavor and a lower smoke point.
Avocado oil
Refined avocado oil handles higher heat well and has a mild taste. It can cost more than other options.
Olive oil
Light or refined olive oil can work for stovetop popcorn over moderate heat. Extra-virgin olive oil adds a grassy flavor, which can be pleasant with herbs but may smoke if the pan becomes too hot.
Use enough oil to lightly coat the bottom of the pot. Too little oil can create dry, uneven cooking. Too much oil can make the popcorn greasy.

Flavor Ideas for Homemade Popcorn
Once you know how to make stovetop popcorn, you can create many flavors with the same basic method.
Classic butter and salt
Use melted butter and fine salt. Fine salt clings better than coarse salt, especially when the popcorn is lightly coated with butter.
Garlic herb popcorn
Toss warm popcorn with melted butter, garlic powder, dried parsley, and a small pinch of salt. Use garlic powder rather than fresh garlic for a dry, even coating.
Parmesan popcorn
Add finely grated Parmesan cheese, black pepper, and a little dried oregano. Apply the cheese while the popcorn is warm.
Spicy popcorn
Mix smoked paprika, chili powder, cumin, and salt. Add a small amount first, then adjust the heat.
Nutritional yeast popcorn
Nutritional yeast gives popcorn a savory, cheese-like flavor. It works well with garlic powder and black pepper.
Sweet cinnamon popcorn
Toss popcorn with melted butter, cinnamon, and a small amount of sugar. Add sugar carefully, since too much can make the popcorn sticky.
For a balanced seasoning, start with a small amount. It is easy to add more, but difficult to rescue popcorn that has become too salty or spicy.
How to Store Popcorn and Kernels
Fresh popcorn tastes best right away, but you can store it for later.
Let the popcorn cool fully before placing it in an airtight container. If you seal it while warm, trapped steam can soften the pieces.
Store plain popcorn at room temperature for up to a few days. Popcorn with butter or other moist toppings will lose its crisp texture faster.
Keep unpopped kernels in a sealed container in a cool, dry cupboard. Do not refrigerate them unless the package specifically recommends it. Extreme moisture changes can affect how well the kernels pop.
If many kernels remain unpopped, check the following:
- The oil may not have been hot enough.
- The kernels may be old or too dry.
- The pot may have been too crowded.
- The heat may have been too low.
- The kernels may not have moved across the bottom.
A few unpopped kernels are normal. A large number suggests a problem with heat, storage, or kernel quality.

Frequently Asked Questions About How to Make Stovetop Popcorn
How much oil do you need for stovetop popcorn?
Use about 2 to 3 tablespoons of oil for ½ cup of popcorn kernels. The oil should lightly cover the bottom of the pot without creating a deep layer.
What is the best pot for stovetop popcorn?
A heavy-bottomed pot or Dutch oven with a secure lid is ideal. It spreads heat well and helps prevent kernels from burning in hot spots.
Why is my stovetop popcorn chewy?
Chewy popcorn usually contains trapped steam or too much liquid topping. Vent the lid slightly while popping, let the popcorn breathe in a wide bowl, and add butter just before serving.
Why does my popcorn burn before all the kernels pop?
The heat may be too high, or you may be waiting too long for the final kernels. Remove the pot when the popping slows to about one pop every two seconds.
Should you soak popcorn kernels before popping?
No. Soaking kernels can add excess moisture and may cause sputtering or uneven popping. Store kernels in a dry, sealed container instead.
Can you make stovetop popcorn without oil?
Yes, but oil-free popcorn requires close attention and a suitable pot. Use medium heat, shake the pot often, and expect a slightly different texture than oil-popped popcorn.
How do you make popcorn taste like movie theater popcorn?
Use refined coconut oil or another neutral oil, fine salt, and a light butter topping. Toss the popcorn well so the seasoning spreads across the entire bowl.
Conclusion
Learning how to make stovetop popcorn takes only a few ingredients and a little attention. Use a heavy pot, warm the oil with test kernels, shake the pan gently, vent excess steam, and remove it when the popping slows.
Start with classic butter and salt, then try herbs, spices, Parmesan, or nutritional yeast. Make a batch tonight, adjust the heat and seasoning to your taste, and share your favorite popcorn flavor in the comments.

Liora Pennings is a seasoned chef and kitchen enthusiast with a passion for turning everyday cooking into an effortless experience. With years of hands-on culinary expertise, she specializes in practical techniques, ingredient know-how, and smart kitchen solutions that help home cooks elevate their meals. At KitchFlair.com, Liora shares her best tips, time-saving tricks, and honest product reviews to guide readers toward a more efficient, enjoyable, and inspired cooking routine. Whether you’re a beginner or a seasoned home chef, Liora’s friendly, knowledge-packed insights make every visit to the kitchen a little easier—and a lot more delicious.