How To Fix Vacuum Cleaner Losing Power Gradually Problem: Fix
Clean filters, clear clogs, check the belt or battery, and test the motor to regain steady power.
I’ve fixed dozens of vacuums over the last decade, so I know why a vacuum cleaner losing power gradually is frustrating and often repairable at home. This guide walks you through clear causes, step-by-step fixes, tools, and prevention tips so you can diagnose and fix a vacuum cleaner losing power gradually without guesswork. Read on for actionable steps, safety notes, and smart choices that save time and money.

What causes a vacuum cleaner losing power gradually?
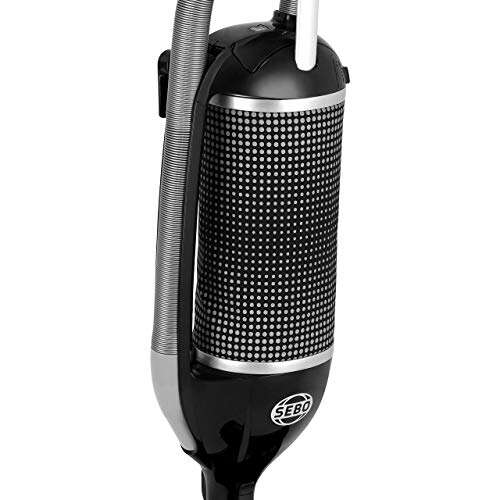
A vacuum cleaner losing power gradually usually points to airflow or electrical issues. Over time, small problems stack up and reduce suction or motor output. Common causes include clogged filters, full dust bins, blocked hoses, worn belts, dying batteries (for cordless units), and failing motor components. Understanding the root cause helps you choose the right fix and avoid wasted effort.

Tools, safety, and quick checks
Before you start, gather simple tools and follow safety basics. You’ll need screwdrivers, pliers, a soft brush, canned air or low-pressure air, a multimeter for electrical checks, replacement belts, and new filters or batteries if needed. Unplug corded vacuums and remove batteries for cordless models before you work. Wear gloves and eye protection when cleaning dusty parts.
Quick checks to run first:
- Check the power outlet and cord for damage or loose plugs.
- Empty the dustbin or bag and remove visible clogs.
- Inspect the brushroll and air path for hair and debris.
These quick checks often fix a vacuum cleaner losing power gradually in minutes.

Step-by-step fixes: a practical guide
Start simple and escalate to deeper repairs. Follow these steps in order to diagnose and fix a vacuum cleaner losing power gradually.
1. Confirm the power source
Check the outlet with another device or use a known-good extension cord. For cordless models, fully charge the battery and note run time. If the vacuum runs fine at first then fades, the battery or thermal protection could be at fault. Low voltage at the plug can mimic internal failure.
2. Empty and clean dust collection parts
Empty the dustbin or replace the bag. Wipe filters and housings with a dry cloth. A full dustbin or clogged bag restricts airflow and causes gradual power loss. Clean or replace filters per the manufacturer’s schedule.
3. Clean or replace filters
Remove pre-motor and post-motor filters. Wash washable filters with soap and water, then air dry completely. Replace non-washable or heavily worn filters. Dirty filters are one of the most common reasons for a vacuum cleaner losing power gradually.
4. Check hoses, wand, and attachments for clogs
Detach the hose, wand, and tools. Shine a light and pull out blockages with pliers or a long brush. Even a small obstruction can reduce suction step by step. Test airflow by blowing compressed air from the opposite end.
5. Inspect the brushroll and belt
Remove hair and fibers wrapped around the brushroll. Check the belt for cracks, stretching, or slippage. Replace a worn belt. A slipping or broken belt will make the vacuum feel weak and ineffective.
6. Test motor brushes and bearings
If your vacuum has accessible carbon brushes, inspect them for wear. Short brushes or noisy bearings can reduce motor output. Replace brushes if worn and lubricate bearings only if the manufacturer allows it. This step requires some skill; stop if you are unsure.
7. Check electrical connections and capacitors
Look for loose wires, burnt insulation, or corroded connectors. Use a multimeter to check continuity and voltage at the motor (only if you are comfortable and safe working with live circuits). Faulty capacitors or damaged windings can cause a vacuum cleaner losing power gradually and usually need professional repair.
8. Consider battery replacement for cordless models
If a cordless vacuum starts strong then fades, the battery may be degrading. Replace the battery pack with an official or compatible unit. Batteries lose capacity over time and are a frequent cause of performance decline.
9. Final test and verification
Reassemble the vacuum and run it on multiple settings. Test suction at the cleaning head and at the hose end. If power is restored, schedule regular maintenance. If not, document symptoms and consider professional help.

Preventive maintenance to avoid power loss
A little care prevents many breakdowns. Set a simple routine to keep your vacuum working well and avoid a vacuum cleaner losing power gradually.
Maintenance checklist:
- Empty the bin after each use or when half-full.
- Clean filters monthly and replace them annually or per the manual.
- Remove hair from brushroll after every few uses.
- Inspect belts and hoses every three months.
- Store batteries in a cool area and follow charging tips.
My experience: I once saw a high-end vacuum fail after months of ignoring a tiny clog in the wand. A 10-minute clean saved a $400 motor repair. Small routines prevent big bills.

When to call a professional or replace the vacuum
Some issues need expert care or replacement. Call a technician if you find burnt windings, a seized motor, or complex electrical faults. If repair costs exceed half the price of a new vacuum, replacing may be smarter.
Signs to seek pro service or replace:
- Burning smell during operation
- Loud grinding or metallic noises
- Intermittent power with no visible cause
- Motor not running despite good power input
- Failed motor brushes or damaged stator
Be transparent with the repair shop. Describe steps you took and the symptoms. That saves time and money.

Two quick PAA-style questions
Q: How long does filter cleaning take?
A: Washing and fully drying a washable filter takes 24 hours, but rinsing and a quick air-clean can help short-term. Replace non-washable filters as recommended.
Q: Can a clogged hose permanently damage the motor?
A: Yes, prolonged airflow restriction can overheat and stress the motor. Fix clogs quickly to avoid permanent damage.

Frequently Asked Questions of how to fix vacuum cleaner losing power gradually problem
Why is my vacuum cleaner losing power gradually?
Often a buildup of dust, a clogged filter, or a constricted hose reduces airflow. Check those first and replace worn belts or batteries if needed.
How often should I replace vacuum filters?
Replace filters every 6 to 12 months for heavy use, or per your manual. Washable filters should be cleaned monthly and fully dried before reuse.
Can a battery cause gradual power loss?
Yes. Cordless vacuum batteries lose capacity with age and charging cycles, causing the vacuum to run strong then weaken. Replacing the battery usually fixes it.
Will a broken belt make the vacuum feel weak?
Yes. A worn or slipping belt reduces brushroll rotation and can make the vacuum seem to lose power gradually. Replacing the belt is a low-cost fix.
Is it safe to open the motor housing myself?
Only if you have basic electrical skills and the manufacturer allows it. If you see burnt components or smell burning, stop and consult a pro.
Conclusion
You can solve most cases of a vacuum cleaner losing power gradually by working through power checks, cleaning filters, clearing clogs, and replacing simple parts like belts or batteries. My advice: start with the easy fixes and keep a basic maintenance routine to avoid repeat problems. If repairs become complex or costly, get professional help or consider replacement. Try these steps today, keep notes on what you checked, and leave a comment about your results or questions.

Liora Pennings is a seasoned chef and kitchen enthusiast with a passion for turning everyday cooking into an effortless experience. With years of hands-on culinary expertise, she specializes in practical techniques, ingredient know-how, and smart kitchen solutions that help home cooks elevate their meals. At KitchFlair.com, Liora shares her best tips, time-saving tricks, and honest product reviews to guide readers toward a more efficient, enjoyable, and inspired cooking routine. Whether you’re a beginner or a seasoned home chef, Liora’s friendly, knowledge-packed insights make every visit to the kitchen a little easier—and a lot more delicious.