How To Clean A Popcorn Maker: Easy Cleaning Guide
Unplug the popcorn maker, let it cool, then wipe removable parts with warm soapy water.
Learning how to clean a popcorn maker is simple when you use the right method for its design. A kettle popcorn machine, countertop popper, and hot-air popper each need a slightly different approach. This guide explains how to remove oil, butter, salt, and burnt kernels without damaging the machine or creating an electrical hazard.
Why cleaning a popcorn maker matters
A popcorn maker collects more than loose kernels. Oil can form a sticky film, butter can turn rancid, and small crumbs can settle around the heating area. If you leave this buildup in place, it may create smoke, bad odors, uneven popping, or even a fire risk.
Regular cleaning also helps protect the machine’s moving parts. A clean kettle can heat more evenly, while a clean chute allows popped corn to fall without blocking the flow. Food equipment guidance commonly stresses the value of removing grease and food debris soon after use because old residue is harder to clean and may support bacteria.
Cleaning frequency depends on use:
• Clean light household use after every two or three sessions.
• Wipe the machine after every use if you add oil or butter.
• Clean a commercial popcorn maker at the end of each workday.
• Perform a deeper clean whenever you notice smoke, sticky surfaces, or a stale smell.

What you need before cleaning
Gather simple supplies before you start. Avoid harsh products unless the manufacturer specifically approves them. Strong chemicals may damage stainless steel, plastic windows, painted surfaces, or food-safe coatings.
You will need:
• A soft microfiber cloth
• Warm water
• Mild dish soap
• A soft sponge
• A nonabrasive nylon brush
• Paper towels or clean kitchen towels
• A small bowl
• A plastic scraper or old gift card
• Food-safe sanitizer, if the manual allows it
• Clean cotton swabs for small corners
Do not use steel wool, rough scouring pads, oven cleaner, or bleach on food-contact parts unless the manufacturer gives clear instructions. These products can scratch surfaces, leave harmful residue, or weaken finishes.
Before you begin, read the care label or owner’s manual. Some popcorn makers have dishwasher-safe trays, while others contain parts that can warp or lose their coating in high heat.

How to clean a popcorn maker safely
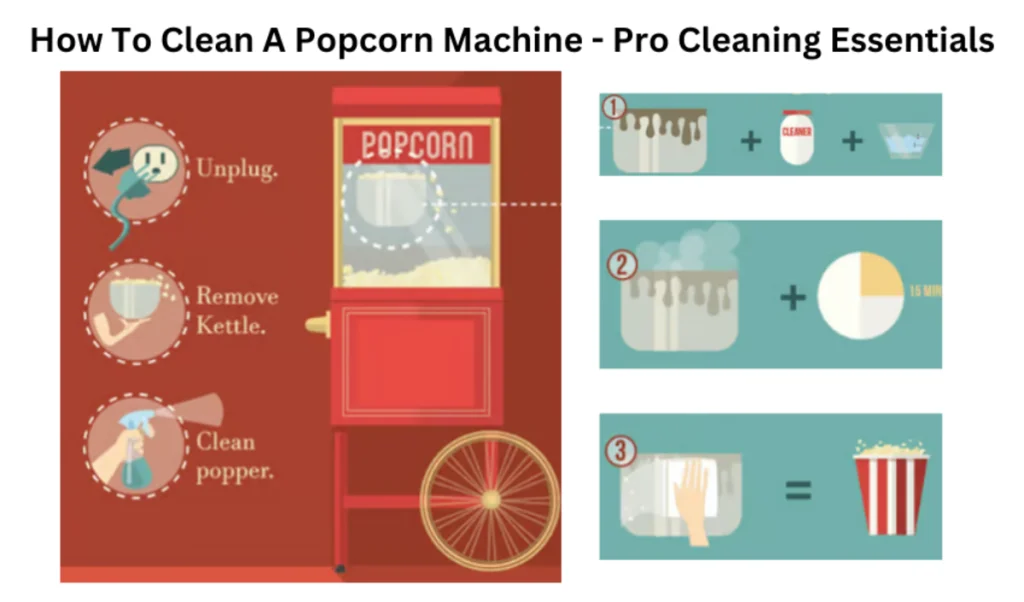
Safety comes first, especially with electric popcorn machines. Water and electricity are a dangerous pair, so never rush this step.
-
Turn off the machine and unplug it from the outlet.
-
Let the popcorn maker cool completely. A kettle can remain hot well after the last batch finishes.
-
Remove any unpopped kernels, popped corn, and loose crumbs.
-
Take out removable trays, doors, measuring cups, stirring parts, and serving pans.
-
Keep the electrical base, motor, heating controls, and power cord away from water.
-
Check the manual before removing a kettle or heating assembly.
-
Place a towel under the machine if you expect drips during wiping.
A common mistake is cleaning while the kettle is still warm. Warm residue may seem easier to wipe, but it can burn your skin and spread grease across a larger area. For most home machines, cool is safer than hot.
Another mistake is spraying cleaner directly onto the appliance. Spray the cleaner onto a cloth instead. This keeps liquid away from vents, switches, wiring, and the heating element.
How to clean a countertop popcorn maker
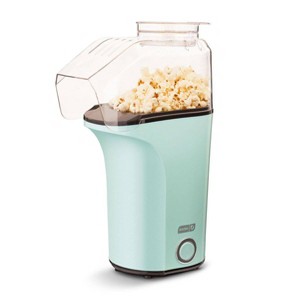
Countertop poppers often include a popping chamber, a lid, a chute, and a removable bowl. These parts are usually easier to clean than a kettle machine, but crumbs can still hide around seams.
Follow these steps:
-
Empty the popping chamber.
-
Remove the lid, measuring cup, and collection bowl.
-
Shake loose crumbs into a trash can.
-
Wash removable plastic or metal parts with warm water and mild dish soap.
-
Use a soft brush to clean around the chute and lid vents.
-
Wipe the inside of the chamber with a barely damp cloth.
-
Wipe the outside with a clean soapy cloth.
-
Remove soap with a second damp cloth.
-
Dry every part fully before putting the machine back together.
Never pour water into the popping chamber. Even if the chamber looks open and simple, water may reach the heating system or collect in hidden spaces.
For hot-air poppers, avoid adding oil during cleaning. These machines use hot air rather than a greased kettle, so oily cleaners may leave a film that attracts dust. A dry cloth followed by a lightly damp cloth is often enough.
How to clean a popcorn maker kettle
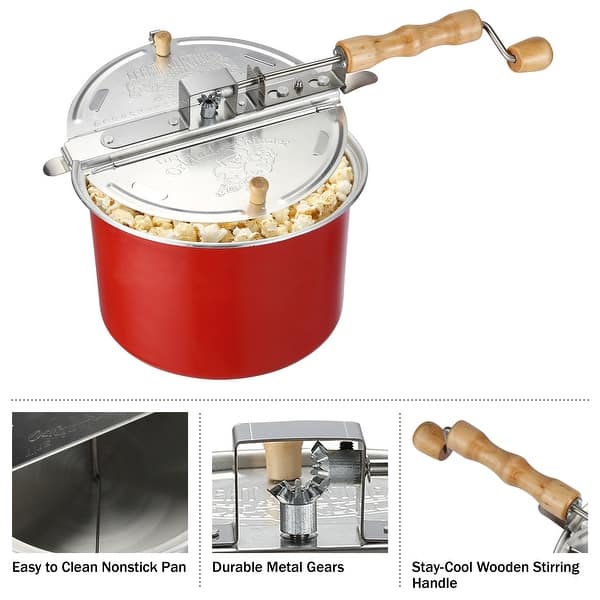
The kettle is usually the dirtiest part of a popcorn machine. Oil, salt, sugar, and flavoring can cook onto the metal surface like a thin layer of varnish. The key is to soften the residue instead of scraping hard.
Use this method:
-
Unplug the machine and allow the kettle to cool.
-
Remove loose popcorn and kernels.
-
Wipe out excess oil with paper towels.
-
Add a small amount of warm water and mild dish soap to a cloth or sponge.
-
Wipe the inside of the kettle gently.
-
Use a nylon brush for corners and seams.
-
Wipe the kettle again with a clean, damp cloth.
-
Dry it with a soft towel.
If the kettle is removable and the manual allows washing, clean it in a sink with warm soapy water. Do not soak a kettle that contains wiring, heating controls, or electrical connections. Many commercial kettles must be wiped in place rather than submerged.
For stubborn grease, place a warm, damp cloth over the residue for several minutes. This works like a gentle compress. Once the grease softens, lift it with a plastic scraper, then wipe the area clean.
Do not use an oven cleaner on a popcorn kettle. Oven cleaners can be too harsh for food-contact surfaces and may damage coatings. They may also leave residue that affects the taste and safety of future batches.
How to remove burnt popcorn and hard grease
Burnt popcorn creates a sharp smell and a dark crust. Hard grease usually forms when oil is heated again and again without a full wipe-down. Both problems need patience.
Start by removing all loose material. Then apply a warm, damp cloth with a little dish soap and leave it on the spot for five to ten minutes. Wipe gently and repeat if needed.
For a small burnt patch, use a plastic scraper or nylon brush. Keep the tool flat and use light pressure. Never use a knife, razor blade, or metal spoon because it can scratch the kettle and create a place where residue collects.
For a removable stainless steel part, you may use a paste made from baking soda and a small amount of water if the manual permits it. Test the paste on a hidden area first, rinse well, and dry the surface. Avoid baking soda on delicate coatings or printed surfaces unless the maker approves it.
If the burnt smell remains after cleaning, inspect the heating area and air vents. A hidden kernel or oil drop may still be burning. If smoke continues during the next use, stop operating the appliance and contact the manufacturer or a qualified repair professional.

How to clean the glass, doors, and exterior
Clear glass panels show fingerprints, butter mist, and grease quickly. Clean them with a soft cloth and diluted dish soap. Wipe with plain water afterward so no soap film remains.
For a streak-free finish:
• Remove crumbs before using a damp cloth.
• Wipe in one direction rather than scrubbing in circles.
• Dry the glass with a lint-free towel.
• Clean plastic windows gently because they scratch more easily than glass.
• Do not use abrasive powder or rough paper towels.
Clean the exterior from top to bottom. Pay close attention to handles, hinges, knobs, and the lower edges of doors. These areas receive frequent contact and can hold grease.
Do not spray liquid through vents or around switches. If the outside has thick grease, use several light passes rather than soaking the surface. A clean machine should look fresh without being wet inside.

How to clean the stirring arm and removable parts
The stirring arm helps spread kernels and oil, so it can collect a thick coating. Remove it only if the owner’s manual says it is removable. Some arms connect to a motor or heating assembly and should only be wiped in place.
For a removable stirring arm:
-
Scrape away loose buildup with a plastic tool.
-
Wash it in warm water with mild dish soap.
-
Brush around the joints and ends.
-
Rinse away all soap.
-
Dry it completely before reinstalling it.
Check small parts for cracks, loose screws, or worn coatings. A damaged part may shed material into the popcorn or fail during operation. Replace it with an approved part instead of using a homemade substitute.
Wash measuring cups and serving trays after each use. Even a thin layer of oil can become sticky when exposed to air. Dry these parts before storage to prevent stale odors.