How Do You Take Apart A Shark Vacuum Cleaner: Safely
Unplug the Shark vacuum, remove its dust cup and filters, then release each attachment before opening the main body.
Learning how do you take apart a Shark vacuum cleaner is much easier when you treat the machine like a small, labeled system. Shark makes many models, including upright, stick, canister, and cordless vacuums, so clips and screws may differ. This guide explains the safe method, common trouble spots, cleaning steps, and the point where a repair should go to a professional.
Before You Take Apart a Shark Vacuum Cleaner
Start by checking the model number. You can usually find it on a label near the dust cup, on the underside of the vacuum, or behind the brush roll. The model number matters because a Shark Navigator, Rotator, Lift-Away, Vertex, and cordless model may use different filters and fasteners.
Unplug corded models from the wall. For cordless models, turn the vacuum off and remove the battery if the battery is designed to come out. Never work on a powered vacuum, even if you only plan to remove the brush roll.
Prepare a clean work area. A light-colored towel helps you find small screws and shows where each part belongs.
Useful tools may include:
• A Phillips screwdriver
• A small flat screwdriver or plastic trim tool
• A soft brush or old toothbrush
• A dry microfiber cloth
• A bowl for screws
• A phone camera for taking progress photos
• A pair of scissors for cutting hair from the brush roll
Do not use a metal tool to force a plastic clip. Shark vacuum housings can crack when twisted. If a cover will not move, look for a hidden screw, release tab, or locking mark.

How Do You Take Apart a Shark Vacuum Cleaner Safely?
The safest answer to how do you take apart a Shark vacuum cleaner is to begin with removable parts and stop before opening sealed electrical sections. Most routine cleaning needs only partial disassembly.
Follow these steps:
-
Turn off and unplug the vacuum. Remove the battery from compatible cordless models.
-
Remove the hose and accessories. Press the release buttons where the hose, wand, crevice tool, and cleaning head connect.
-
Take off the dust cup. Press the dust cup release button, then lift the cup away from the main body.
-
Empty the dust cup. Open the bottom door over a trash can. Remove packed dust with a dry cloth.
-
Remove the filters. Most Shark vacuums have foam and felt filters near the motor inlet. Some also have a post-motor filter near the exhaust.
-
Detach the floor nozzle. Press the nozzle release button or unlock the wand connection.
-
Open the brush-roll cover if needed. Look for marked tabs, latches, or screws on the bottom plate.
-
Remove visible screws only. Keep screws in separate groups and note their locations.
-
Separate the outer housing carefully. Use gentle pressure along the seam. Do not pull the halves apart if a wire or hose still connects them.
-
Stop at the motor or circuit board. internal electrical repairs require proper testing and replacement parts.
A useful rule is to remove only the parts needed for the job. For example, you do not need to open the motor housing to clear hair from a brush roll.
Removing the Dust Cup, Filters, and Hose
The dust cup is usually the easiest part to remove. Hold the vacuum steady, press the release button, and lift the cup straight out. Avoid shaking it while attached, because fine dust can move toward the motor filter.
To remove the filters, open the filter door or lift the filter cover. Shark commonly uses washable foam and felt filters before the motor. Some models also use a washable or replaceable filter after the motor.
Wash washable filters in cool or lukewarm water. Do not use soap unless the model instructions allow it. Squeeze the filters gently instead of twisting them, then leave them out for at least 24 hours.
A damp filter can damage the motor or cause a musty smell. This is one of the most common mistakes people make when they search for how do you take apart a Shark vacuum cleaner. The filter may feel dry on the outside while the center is still wet.
The hose often has a release button at each end. Press the button and pull the hose from the port. Check inside the hose with a flashlight. A clog near the bend may look like a motor problem, but it can reduce suction just as much.

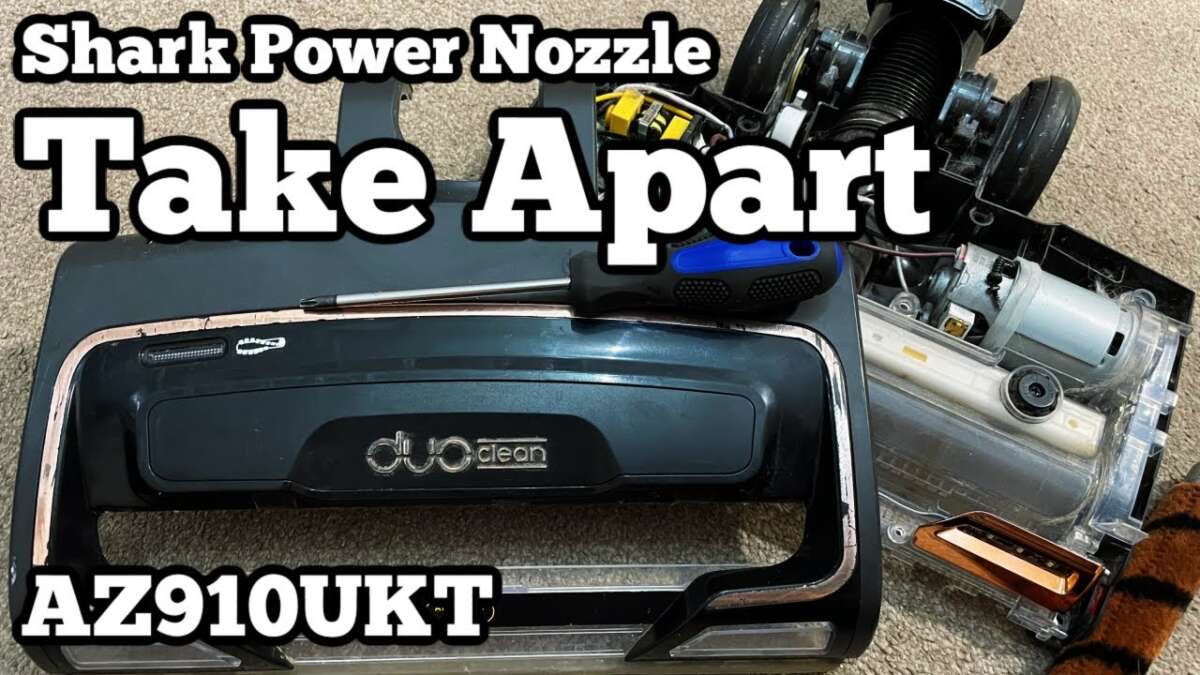
Taking Apart the Shark Floor Nozzle
The floor nozzle holds the brush roll, belt system, lights, and sometimes a small motor. You can often clean this section without removing the entire vacuum body.
Place the nozzle upside down on a towel. Look for a brush-roll access door, rotating lock, or screws. Some Shark models use a small coin slot or twist lock rather than standard screws.
Remove visible debris first. Use scissors to cut wrapped hair along the brush roll. Keep the scissors away from the brush bristles, belt, and electrical wires.
If the brush roll lifts out, note its direction before removal. One end may have a square drive, gear, or keyed shape. Take a photo before pulling it out.
Check these areas:
• The ends of the brush roll
• The air path behind the roll
• The belt or belt guard
• The nozzle wheels
• The red or green indicator system
• The small intake opening near the wand
Do not wash the motorized floor nozzle unless the manual specifically says it is safe. Water can reach the motor and cause an electrical fault. Use a dry brush and a lightly damp cloth on the outer plastic only.

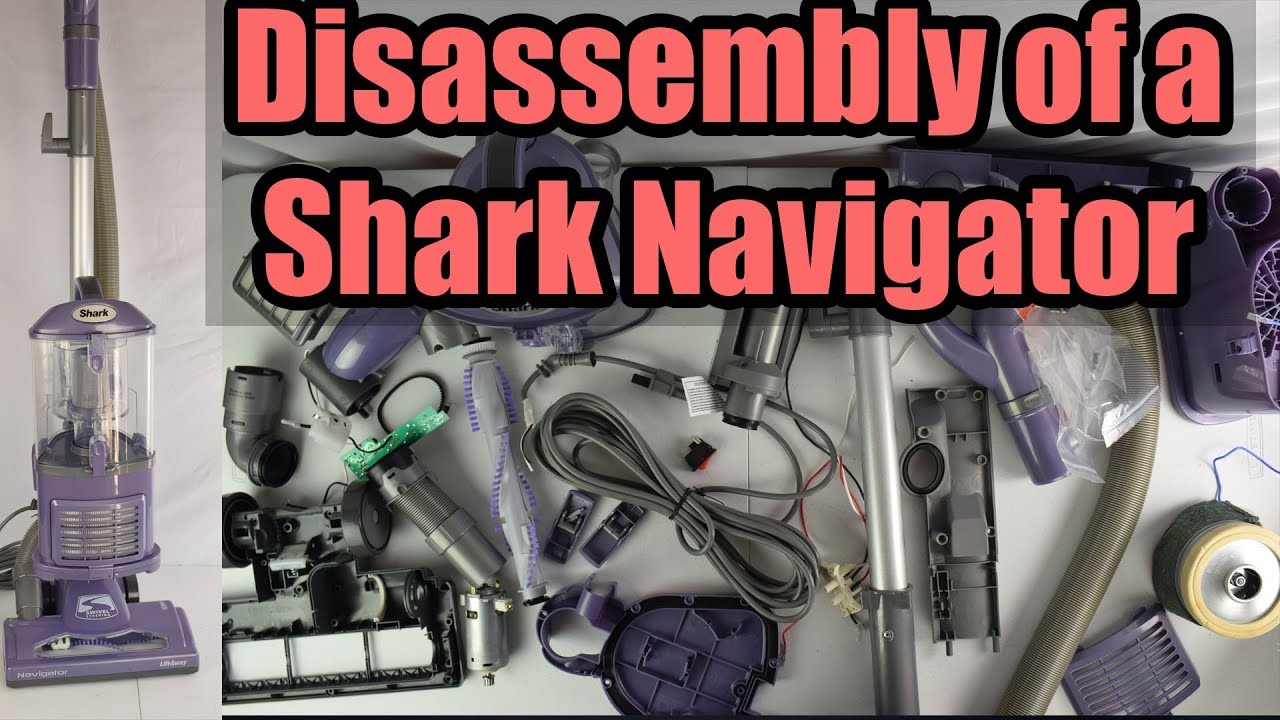
Opening the Main Shark Vacuum Housing
Opening the main housing is more advanced than removing a dust cup or brush roll. It may expose wires, switches, sharp plastic edges, and moving parts. It can also affect warranty coverage.
After removing the dust cup, hose, wand, floor nozzle, and filters, inspect the body seam. Look for recessed screws under labels, rubber feet, covers, or small plastic plugs. Do not remove random screws until you know which panel they hold.
Use this process:
-
Take photos of the vacuum from every side.
-
Place each screw beside a note that identifies its location.
-
Remove screws from the outer cover.
-
Insert a plastic trim tool into the seam.
-
Release clips one at a time.
-
Lift the cover slowly.
-
Photograph wires before disconnecting anything.
-
Disconnect only plugs with a clear release tab.
Never pull a wire by the cable. Grip the plastic connector instead. If the housing resists, stop and inspect it again. A hidden screw is safer to find than a broken clip.
Many Shark vacuum cleaners contain a motor assembly that is not intended for home servicing. If the motor smells burnt, sparks, overheats, or makes a grinding noise, reassemble the vacuum and contact Shark support or a qualified repair technician.

How to Clean the Parts After Disassembly
Once you understand how do you take apart a Shark vacuum cleaner, cleaning the parts becomes more effective. Remove loose dust outdoors if possible. Fine particles can spread through a room and may bother people with allergies.
Clean each part according to its material:
• Plastic dust cup: Rinse with water and let it dry fully.
• Foam filters: Rinse with cool water and air-dry completely.
• Felt filters: Rinse gently if the manual permits it, then air-dry.
• Brush roll: Cut away hair and thread with scissors.
• Hose: Clear clogs with a flexible, non-sharp tool.
• Outer housing: Wipe with a dry or slightly damp cloth.
• Motor area: Use a dry brush or compressed air with care.
Avoid bleach, strong cleaners, boiling water, and scented oils. These products can damage plastic, leave residue, or create fumes when the vacuum heats up.
Clean the filter seats as well as the filters. Dust around the filter edge can create an air leak. If the vacuum still has weak suction after cleaning, check the hose, wand, floor nozzle, and intake path before blaming the motor.

Reassembling a Shark Vacuum Cleaner
Reassembly is the reverse of disassembly, but rushing this stage can cause new problems. Make sure every filter is completely dry and seated in the correct direction.
Start with the internal parts you removed last. Then install the outer housing, dust cup, hose, wand, and floor nozzle. Listen for each plastic clip to snap into place.
Before plugging in the vacuum, check the following:
• No wires are pinched by the housing
• No screws are missing
• The filters are dry
• The brush roll spins freely
• The hose is fully connected
• The dust cup latch closes
• The floor nozzle locks onto the wand
• No plastic tabs are bent or cracked
Test the vacuum for only a few seconds at first. Listen for unusual rattling, scraping, clicking, or electrical buzzing. Turn it off immediately if you smell burning or see sparks.
A loose brush roll cover can create vibration. A poorly seated filter can create a loud whistle. A pinched wire can create a serious safety risk. Careful reassembly is just as important as knowing how do you take apart a Shark vacuum cleaner.

Common Mistakes to Avoid
People often search how do you take apart a Shark vacuum cleaner after a loss of suction, but full disassembly is not always the answer. A blocked hose or dirty filter is more common than a failed motor.
Avoid these mistakes:
• Forcing a locked panel: Check for hidden screws and release tabs first.
• Washing non-washable parts: Keep motors, circuit boards, and powered nozzles dry.
• Using the vacuum with a wet filter: Allow at least 24 hours of air-drying time.
• Mixing screw sizes: A long screw in the wrong hole can damage internal parts.
• Pulling wires: Disconnect plugs by their plastic connectors.
• Ignoring the brush-roll ends: Hair often hides behind the end caps.
• Testing without the filter: Dust can enter the motor, and some models may not operate correctly.
• Opening a sealed battery pack: Lithium-ion battery repairs can cause fire or injury.
One practical lesson is to take a photo before every major step. It takes seconds and can prevent an hour of guesswork. Another good habit is to record a short video of how a belt, brush roll, or wire sits before removal.

When You Should Not Take Apart the Vacuum
Basic maintenance is usually safe, but some repairs need professional help. Stop if the vacuum has a burning smell, smoke, melted plastic, repeated electrical shutdowns, or visible damage to the power cord.
Do not open a lithium-ion battery pack. Do not bypass a switch, thermal fuse, safety sensor, or circuit board. These parts protect you from shock, overheating, and fire.
You should also consider warranty service. Opening the main body may make it harder to receive support, depending on the warranty terms and the repair involved. Check the model guide or contact the manufacturer before removing sealed panels.
The best approach to how do you take apart a Shark vacuum cleaner is not to dismantle everything. It is to perform the smallest safe repair that solves the problem.

PAA-Style Questions About Shark Vacuum Disassembly
Can I take apart a Shark vacuum without special tools?
Yes, most routine maintenance needs only a Phillips screwdriver, a soft brush, scissors, and a plastic trim tool. Tool needs vary by model, so check the model number and avoid forcing unusual fasteners.