How To Repair Vacuum Cleaner Overheating: Motor Fix Guide
Clean clogged airflow, replace worn brushes or bearings, and test the motor; replace if windings are shorted.
I’ve fixed dozens of overheated vacuums and I’ll walk you through clear, safe steps to diagnose and repair vacuum cleaner overheating due to motor fault. You’ll learn how to spot common motor problems, run simple tests with a multimeter, replace wearable parts, and decide when a full motor replacement or professional repair is the right call. I write from hands-on experience working on consumer and workshop vacuums, so expect practical advice you can trust and use today.
Why vacuum cleaners overheat: core causes and how they relate to the motor
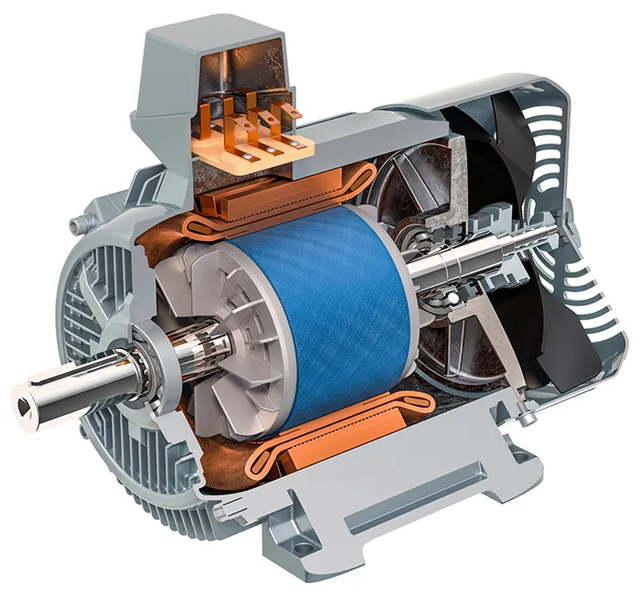
Vacuum overheating starts when the motor works harder than designed. Heat builds when airflow is blocked or internal parts fail. Here are the main causes tied to motor faults.
- Blocked airflow or clogged filters. A motor needs steady cooling air. Blockage raises motor temperature quickly.
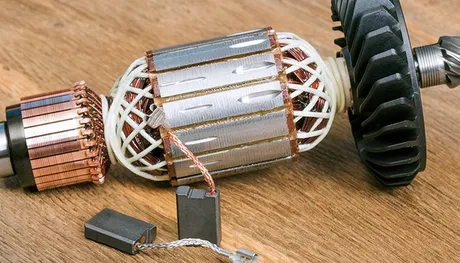
- Worn carbon brushes. Short brushes reduce contact and increase sparking and heat.
- Seized or worn bearings. Bearings that bind create friction and overload the motor.
- Damaged armature or shorted windings. Electrical faults cause excess current and heat.
- Faulty thermal cutouts or safety switches. If these fail, the motor can run hot without shutting off.
- Mechanical jams and belt problems. A jammed brush roll or tight belt strains the motor.
Knowing these causes helps you focus on the motor-related fixes. If your interest is how to repair vacuum cleaner overheating due to motor fault, start by testing airflow and brushes.
Safety first and tools you’ll need
Safety matters. Unplug the vacuum before you touch anything. Work in a well-lit area and use safety glasses and gloves.
Essential tools
- Multimeter for continuity and resistance tests.
- Small screwdrivers and nut drivers.
- Long-nose pliers and a soft brush.
- Compressed air or shop vacuum for cleaning.
- Replacement brushes, bearings, or thermal cutouts as needed.
- Lubricant designed for electric motors, if applicable.
Keep parts organized. Label screws and small parts. If you’re unsure about wiring or insulation testing, stop and call a pro. This avoids costly mistakes and safety risks.
Diagnosis: step-by-step checks to pinpoint motor fault
A focused diagnosis saves time and money. Follow these steps to find the motor fault causing overheating.
- Check for simple airflow issues first. Empty the dust bin, clean or replace filters, and inspect hoses for blockages. If airflow returns, run the vacuum briefly to see if overheating stops.
- Inspect the brush roll and belt. Remove tangled hair and debris. A slipping or tight belt increases motor load.
- Listen and smell. Grinding, squealing, or a burnt smell point to bearings or windings. These signs are strong motor-fault indicators.
- Test the motor brushes. Remove the brush caps and measure brush length. If brushes are shorter than the manufacturer’s spec or sparking heavily, replace them.
- Check bearing play and wheel spin. Spin the motor fan or rotor by hand. It should turn smoothly. Any roughness suggests bad bearings.
- Electrical testing with a multimeter. Check continuity of the armature and field coils. Measure resistance; much lower or higher than expected suggests winding faults. Also check for short to chassis (insulation failure).
- Test thermal cutout and switches. Use a meter to confirm they open and close correctly. A stuck-closed thermal cutout can hide overheating issues.
Keep notes. Record readings and observations. These make it easier to decide repairs or replacement.

How to repair vacuum cleaner overheating due to motor fault — detailed repair steps
This is the hands-on section on how to repair vacuum cleaner overheating due to motor fault. Work slowly and follow safety steps.
Step 1: Restore airflow and test
- Clean filters, bags, hoses, and intake ports. Replace disposable filters.
- Run vacuum briefly to check if overheating continues. If it stops, maintenance solved it.
Step 2: Fix brush roll and belt issues
- Remove the brush roll. Clear hair and debris from bristles.
- Inspect the belt for stretching or cracks. Replace if worn.
- Reassemble and test motor load.
Step 3: Replace worn carbon brushes
- Access the brush holders. Remove old brushes carefully.
- Check brush springs and holders for corrosion.
- Fit matched replacement brushes. Use manufacturer specs for correct type.
- Reassemble and test. New brushes often fix overheating caused by poor electrical contact.
Step 4: Lubricate or replace bearings
- If bearings are serviceable, clean and apply a light, motor-grade lubricant.
- If bearings are noisy, rough, or seized, replace them. Press-fit bearings require care or a press tool.
- After replacing bearings, check rotor spin and balance.
Step 5: Clean the cooling fan and motor vents
- Remove dust from the fan blades and motor housing.
- Ensure vents are clear and the fan is undamaged. A bent fan can cause imbalance and heat.
Step 6: Test windings and repair or replace the motor
- Use the multimeter to test coil resistance and insulation for shorts. If windings show short circuits or large discrepancies, the motor likely needs rewinding or replacement.
- Rewinding is a specialized job. It can be cost-effective for high-end motors, but for low-cost consumer vacuums, motor replacement is usually better.
Step 7: Replace thermal cutouts and switches if needed
- Replace any faulty thermal cutoff devices. These are inexpensive and can prevent future overheating.
- Ensure wiring and connectors are tight and insulated.
Step 8: Final reassembly and runtime test
- Reassemble the vacuum carefully. Keep screws tight but avoid over-torquing.
- Run the vacuum under normal load for 10–15 minutes. Monitor temperature and listen for unusual noise.
When to stop and call a pro
- If windings are burnt or shorted.
- If the motor requires rewinding and you lack tools.
- If internal wiring or insulation is damaged.
These steps explain how to repair vacuum cleaner overheating due to motor fault in a methodical and safe way.

Parts, costs, time estimates, and choosing repair vs replace
Understanding cost helps you decide. Here are typical ranges and timelines.
- Replacement carbon brushes
- Cost: low. Usually $5–$20 per pair.
- Time: 15–30 minutes.
- Bearings or shafts
- Cost: $10–$50 depending on model.
- Time: 30–90 minutes, more if pressing bearings.
- Motor replacement
- Cost: $50–$300 for parts; labor adds more.
- Time: 1–3 hours to install and test.
- Motor rewind
- Cost: $100–$250 and up, plus turnaround time.
- Time: several days if you send it out.
Repair vs replace rules of thumb
- Repair if the vacuum is high quality and motor repairs cost less than half of a new unit.
- Replace if repair cost approaches or exceeds the value of a new vacuum.
- Always factor in warranty coverage and environmental impact.
I once repaired a mid-range shop vacuum by replacing worn brushes and bearings. Total cost was small and the unit worked like new. For a cheap stick vacuum with burnt windings, replacement was the better option. Lessons learned: evaluate parts cost, labor time, and expected lifespan before committing.

Preventive maintenance to avoid future overheating
Prevention saves time and extends motor life. Do these simple checks regularly.
- Empty dust bin and clean filters monthly. Replace HEPA and foam filters as recommended.
- Remove hair and threads from the brush roll weekly in busy homes.
- Check belt tension and condition every few months.
- Listen for bearing noise and replace early.
- Store the vacuum in a dry, cool area to protect wiring and insulation.
A short routine prevents many motor faults and reduces the need to learn how to repair vacuum cleaner overheating due to motor fault later.
Quick PAA-style questions
Can new brushes stop my vacuum from overheating?
Yes. Worn brushes cause poor contact and sparking. Replacing them often reduces heat and restores normal operation.
Is motor rewinding worth it for a cheap vacuum?
Usually not. Rewinding costs can exceed the vacuum’s value. Consider replacement unless the vacuum is high quality.
How long should a vacuum motor run before overheating?
A healthy motor should run for long cleaning sessions without overheating. If it heats noticeably within minutes, that indicates a fault.
Frequently Asked Questions of how to repair vacuum cleaner overheating due to motor fault
What are the first signs of a motor fault causing overheating?
Unusual noise, burning smell, reduced suction, and the motor shutting off suddenly are common early signs.
Can I test the motor myself with a multimeter?
Yes. You can check continuity, resistance, and shorts to chassis. If readings are out of spec, the motor likely has winding or insulation issues.
How often should I replace carbon brushes?
Replace brushes when they reach the manufacturer’s minimum length or show heavy sparking. For heavy use, check every 6–12 months.
Will oiling a motor fix overheating?
Oiling bearings can reduce friction and heat if bearings are serviceable. It won’t fix electrical winding issues or burnt components.
When should I choose professional repair?
Choose a pro if windings are damaged, if rewinding is needed, or if electrical insulation tests fail. Certified technicians handle complex motor repairs safely.
Conclusion
You can fix many cases of vacuum cleaner overheating due to motor fault by following clear diagnostic steps, replacing worn brushes and bearings, cleaning airflow paths, and testing motor windings. Start with simple maintenance, use a multimeter for basic checks, and be honest about repair vs replacement costs. If the motor windings are damaged, seek professional help. Put these tips into practice, protect your vacuum with routine care, and leave a comment with your model and symptoms if you want tailored advice.

Liora Pennings is a seasoned chef and kitchen enthusiast with a passion for turning everyday cooking into an effortless experience. With years of hands-on culinary expertise, she specializes in practical techniques, ingredient know-how, and smart kitchen solutions that help home cooks elevate their meals. At KitchFlair.com, Liora shares her best tips, time-saving tricks, and honest product reviews to guide readers toward a more efficient, enjoyable, and inspired cooking routine. Whether you’re a beginner or a seasoned home chef, Liora’s friendly, knowledge-packed insights make every visit to the kitchen a little easier—and a lot more delicious.