How To Charge Electrolux Vacuum Cleaner: Easy Guide
If you own an Electrolux cordless vacuum in the United States, charge it with the supplied Electrolux charger or charging stand. Place the vacuum on its dock, or connect the charger to the charging port, then plug the charger into a suitable wall outlet. A light or display should show that charging has started.
The exact steps depend on your model. Electrolux has made several cordless vacuum lines, including stick, handheld, and 2-in-1 models. Some use a wall adapter. Others charge through a floor stand or wall-mounted dock. A corded Electrolux vacuum does not need charging.

Before You Charge Your Electrolux Vacuum
First, check whether your vacuum is cordless. A corded vacuum runs from a wall outlet and has no rechargeable battery. A cordless model has a battery, charging port, charging base, or power adapter.


Find the model number before you begin. In the United States, it is often printed:
- On a label near the dust cup
- Under the vacuum body
- Behind or below the battery
- On the charger or charging base
- On the product box or receipt
The model number matters because charging parts are not always interchangeable. Do not use a charger from another vacuum unless Electrolux lists it as compatible with your model.
Check the charger and battery
Before charging, inspect these parts:
- The charger plug
- The power cord
- The charging port
- The charging contacts on the vacuum
- The battery pack
- The charging stand, if supplied
Do not charge the vacuum if the battery is swollen, cracked, leaking, very hot, or damaged. Move it away from flammable items and contact Electrolux support or a qualified service provider. Do not open a lithium-ion battery pack yourself.
Use a dry area with good airflow. Keep the vacuum away from sinks, wet floors, heaters, stoves, and direct sunlight.

How to Charge an Electrolux Cordless Vacuum
Use the method that matches your Electrolux model. The two common methods are a charging dock and a direct charger connection.
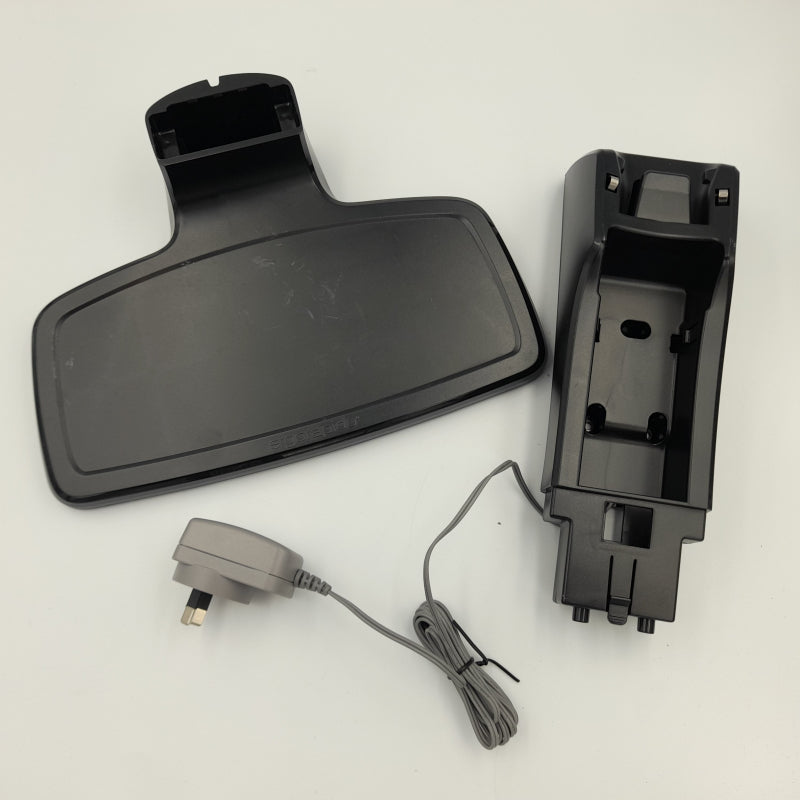
Method 1: Charge it on the docking station
- Place the charging stand on a flat, stable surface.
- Connect the charger to the charging stand.
- Plug the charger into the wall outlet.
- Make sure the stand sits upright and does not move.
- Place the vacuum on the stand.
- Align the charging contacts on the vacuum with the contacts on the dock.
- Push the vacuum into place until it sits firmly.
- Check for a charging light or battery symbol.
Some Electrolux stands hold the vacuum in an upright position. Others support the vacuum at an angle. If the vacuum does not show a charging signal, remove it and place it back on the stand. Check that no dust or plastic film blocks the metal contacts.
Method 2: Charge it with the power adapter
Some Electrolux cordless vacuums charge through a small port on the body or battery.
- Turn the vacuum off.
- Find the charging port.
- Insert the Electrolux charging plug fully.
- Plug the adapter into the wall outlet.
- Look for a light, screen, or battery icon.
- Leave the vacuum in a cool, dry place while it charges.
Do not pull the cord to remove the plug. Hold the plug itself. Do not force the connector into the port. A plug that does not fit may be the wrong charger.
How do you know the vacuum is charging?
Signs of charging may include:


- A blinking light
- A steady light
- A battery icon on a display
- A progress bar
- A sound or brief light when the charger connects
The light pattern varies by model. On some vacuums, the light flashes during charging and turns off when the battery is full. On others, the light stays on or changes color. The owner’s manual is the best source for your model’s exact light codes.
How long should an Electrolux vacuum charge?
The charge time depends on the model, battery size, battery age, and room temperature. Do not use a general time as a guarantee. Check the manual for the rated charge time for your specific vacuum.
When the battery is full, unplug the charger if the manual tells you to do so. Many modern chargers stop or reduce the charge when the battery reaches full capacity, but the manual still sets the correct storage and charging method.

How to Charge an Electrolux Handheld Vacuum
A small Electrolux handheld vacuum may use a wall charger, a charging base, or a removable battery. The basic process is similar:
- Empty the dust cup if it is full.
- Turn the handheld vacuum off.
- Connect the correct Electrolux charger.
- Plug the charger into a wall outlet.
- Confirm the charging light or battery display.
- Let the battery charge for the time listed in the manual.
Do not run the vacuum while it is charging unless Electrolux specifically designed that model for use with the charger. Most cordless vacuums are meant to remain off during charging.
If the handheld vacuum has a removable battery, charge it only with the approved charger. Do not place a loose battery on a charging base unless the base is made for that battery.

What to Do If Your Electrolux Vacuum Will Not Charge
Check the simple and safe causes first. Do not take apart the vacuum before these checks are complete.
1. Confirm that the outlet works
Plug a lamp or another small device into the same outlet. If it does not work, reset the circuit breaker or use another outlet.
Do not use a damaged outlet, loose power strip, or frayed extension cord. A wall outlet is usually the safest choice for the supplied charger.
2. Check the charger connection
Make sure:
- The charger is fully inserted into the dock
- The dock is connected to the wall adapter
- The wall adapter is plugged in
- The charging plug is fully inserted into the vacuum
- The vacuum is seated correctly on the dock
Some docks look connected even when the contacts are slightly misaligned.
3. Clean the charging contacts
Dust can block the metal contacts. Unplug the charger first. Wipe the contacts with a clean, dry cloth.
Do not spray cleaner into the charging port. Do not scrape the contacts with a knife or other metal tool. If the contacts are burned, bent, loose, or badly corroded, stop using the charger.


4. Let a hot vacuum cool
A battery may not charge when it is too hot. This can happen after long use, especially in a warm room or when the filter is blocked.
Turn off the vacuum and let it cool at room temperature. Do not cool it with ice, water, a freezer, or a fan placed very close to the battery.
5. Check for a blocked filter or brush roll
A blocked filter or brush roll can make the motor work harder. That can reduce run time and may make the vacuum feel hot.
Clean the filter as the manual directs. Remove hair from the brush roll. Let washable parts dry fully before putting them back. Never charge the vacuum with a wet filter installed.
6. Test the charger, not just the vacuum
If the vacuum still shows no charging light, the fault may involve:
- The wall outlet
- The adapter
- The dock
- The charging port
- The battery
- The vacuum’s control board
Do not test a charger with random voltage tools unless you know how to use them safely. Contact Electrolux support with the model number and the symptoms.
| Symptom | Likely checks | Safe next step |
|---|---|---|
| No light at all | Outlet, adapter, dock, contacts | Try the correct outlet and reseat the vacuum |
| Light flashes but battery stays low | Battery, blocked airflow, poor contact | Clean contacts and filter; check the manual |
| Vacuum stops soon after charging | Battery age, high-power mode, blockage | Clean the vacuum and check battery service options |
| Charger or battery gets very hot | Fault, poor airflow, damaged battery | Unplug it and stop charging |
| Vacuum charges only in one position | Dock alignment or damaged contacts | Inspect the dock and contact points |
| Battery will not charge after months of storage | Deep discharge or failed battery | Ask Electrolux about battery replacement |

Charging Safety for Electrolux Lithium-Ion Batteries
Many cordless vacuums use lithium-ion batteries. These batteries store a large amount of energy in a small pack. Use the supplied charger and follow the model manual.
Keep these rules in mind:
- Do not use a charger with a damaged cord or plug.
- Do not cover the charger or vacuum while charging.
- Do not charge the vacuum on a bed, sofa, or pile of clothing.
- Keep the battery away from heat and water.
- Do not use a swollen, cracked, leaking, or burnt battery.
- Do not burn or crush the battery.
- Do not modify the battery or charger.
- Keep loose batteries away from coins, keys, and other metal objects.
- Recycle the battery through an approved battery collection program.
If you smell a sharp chemical odor, see smoke, hear popping, or feel extreme heat, move away from the vacuum and call emergency services if there is an active fire. Do not handle a smoking or burning battery.
The U.S. Fire Administration and other U.S. safety agencies advise careful handling of lithium-ion batteries because damaged or overheated cells can catch fire. Their guidance supports using the correct charger, avoiding heat, and stopping use when a battery shows damage.

How to Maintain the Battery and Get Better Run Time
Good care can help the vacuum work as designed, but it cannot restore a battery that has reached the end of its service life.
Clean the filter on the schedule in the manual. A dirty filter can restrict airflow and make the motor work harder. Empty the dust cup before it becomes packed. Remove hair and thread from the brush roll.
Use the lowest useful power setting for routine cleaning. Turbo or maximum mode uses more energy and can shorten each cleaning session. Heavy carpet, thick rugs, pet hair, and blocked airflow can also reduce run time.


Store the vacuum in a dry indoor space. Avoid hot garages, unheated outdoor sheds, and places where temperatures change sharply. If you will not use the vacuum for a long period, follow the storage instructions for your model.
A battery that runs for much less time than it did when new may be worn. Battery life depends on use, storage, temperature, and charge cycles. A replacement battery may solve the problem, but only use a part approved for the exact Electrolux model.
Common Charging Mistakes to Avoid
The most common mistake is using the wrong charger. A plug may fit while the charger still has the wrong electrical output. Use the original charger or a replacement listed by Electrolux for your model.
Another mistake is leaving the vacuum on a dock with dirty contacts. The vacuum may look seated but receive no power. Clean and dry the contacts, then check for the charging signal.
Do not wash the vacuum body or battery. Wash only parts that the manual identifies as washable. A filter must be fully dry before use.
Do not assume a blinking light means a fault. On many models, blinking means normal charging. Check the manual for the meaning of each light pattern before replacing parts.

When to Contact Electrolux Support
Contact Electrolux or an authorized service provider when:
- The correct charger does not work
- The battery becomes unusually hot
- The battery is swollen or damaged
- The vacuum shuts off during normal use
- The charging port is loose or damaged
- The dock or adapter smells burnt
- The vacuum will not charge after basic checks
- You need a replacement battery or charger
Have the model number, purchase date, charger details, and symptoms ready. If the vacuum is under warranty, unauthorized battery repairs or disassembly may affect warranty service.
For U.S. owners, start with Electrolux customer support and the manual for the exact model. The general Electrolux U.S. support page is electrolux.com/en-us/support. Product manuals provide the final word on charging time, light codes, storage, and approved accessories.

Frequently Asked Questions
Can I leave my Electrolux vacuum on the charger overnight?
Many cordless vacuums are designed to remain on their charging dock, but the correct answer depends on the model. Check the owner’s manual. Keep the dock in a cool, open area and use only the supplied or approved charger.
Why is my Electrolux vacuum blinking while charging?
A blinking light often indicates active charging. It may also signal a battery, contact, or temperature issue. Compare the light pattern with the manual for your model.
Can I charge an Electrolux vacuum without its dock?
Only if the vacuum has a charging port or the manufacturer provides another approved method. Do not connect wires directly to the battery or use a universal charger without confirmed compatibility.


Why does my Electrolux vacuum charge but run for only a few minutes?
A clogged filter, blocked brush roll, high-power mode, cold or hot storage, or an aging battery can cause short run time. Clean the vacuum first. If the problem remains, the battery may need service or replacement.
Can I use a different Electrolux charger?
Use a different charger only when Electrolux lists it as compatible with your exact model. Similar plugs do not prove that chargers are electrically safe to interchange.
Conclusion
To charge an Electrolux cordless vacuum, use the correct Electrolux charger or dock, seat the vacuum correctly, and confirm the charging light or battery icon. Keep the charger and battery dry, cool, and free from damage.
If charging fails, check the outlet, connections, dock alignment, and clean charging contacts. Stop using the vacuum if the battery swells, leaks, smokes, or becomes extremely hot. The model manual remains the most reliable source for charging time, light codes, and replacement parts.

Liora Pennings is a seasoned chef and kitchen enthusiast with a passion for turning everyday cooking into an effortless experience. With years of hands-on culinary expertise, she specializes in practical techniques, ingredient know-how, and smart kitchen solutions that help home cooks elevate their meals. At KitchFlair.com, Liora shares her best tips, time-saving tricks, and honest product reviews to guide readers toward a more efficient, enjoyable, and inspired cooking routine. Whether you’re a beginner or a seasoned home chef, Liora’s friendly, knowledge-packed insights make every visit to the kitchen a little easier—and a lot more delicious.