How To Clean A Keurig Coffee Maker: Quick Cleaning Guide
Clean the removable parts, descale with vinegar or solution, and unclog the needles.
I’ve cleaned dozens of machines, and I’ll walk you through exactly how to clean a Keurig coffee maker. This guide shows simple steps, real tips, and the safest ways to remove scale, mold, and clogs. Read on to learn how to clean a Keurig coffee maker thoroughly, keep it brewing great coffee, and avoid common mistakes.

Why cleaning a Keurig matters
A clean machine makes better coffee. Scale, oil, and mold change taste and slow brewing. Knowing how to clean a Keurig coffee maker keeps flavor bright. It also protects parts and extends the machine’s life.
I once let scale build up for months. The brewer clogged and the coffee was weak. A proper clean fixed both problems fast.

What you’ll need before you start
Prepare these items before cleaning a Keurig coffee maker. Gathering them saves time and avoids mistakes.
- White vinegar or a Keurig descaling solution. Vinegar is cheap and works well.
- Clean water for rinsing and flushing the machine.
- Mild dish soap for removable parts.
- Small brush, paper clip, or the Keurig needle cleaning tool to clear clogs.
- Soft cloth or sponge to wipe the exterior.
- Gloves if you prefer to avoid contact with vinegar or dirt.

Quick daily and weekly cleaning steps
These short routines help you keep your Keurig in good shape. Follow them to avoid heavy buildup.
Daily steps
- Empty and rinse the drip tray and pod holder after use.
- Rinse the water reservoir and refill with fresh water.
- Wipe the exterior and the pod lid with a damp cloth.
Weekly steps
- Remove the pod holder and rinse it under warm, soapy water.
- Clean the drip tray and dry it before returning.
- Check the entrance and exit needles for residue and clear with a paper clip if needed.
Doing these tasks routine helps a deep clean go faster. Learning how to clean a Keurig coffee maker starts with short, regular care.

How to descale a Keurig coffee maker (deep clean)
Descaling removes mineral scale from internal parts. Follow these steps to descale safely.
- Empty the water reservoir.
- Add one part white vinegar to one part water, or use the Keurig descaling solution per instructions.
- Fill the reservoir with the solution.
- Run brew cycles without a K-Cup until the reservoir is empty, using the largest cup size.
- Let the machine sit for 20–30 minutes to let the solution work on scale.
- Fill the reservoir with fresh water and run 3–5 full reservoirs through to rinse all vinegar or solution.
Notes and safety
- Vinegar is effective and widely available. Some people prefer citric acid powder; it’s gentler on seals.
- Always rinse well. Any leftover vinegar will affect coffee flavor.
- Descale every 3–6 months depending on water hardness and usage.
This is the heart of knowing how to clean a Keurig coffee maker. Descaling fixes slow brews and odd tastes.

Cleaning the needles and pod holder
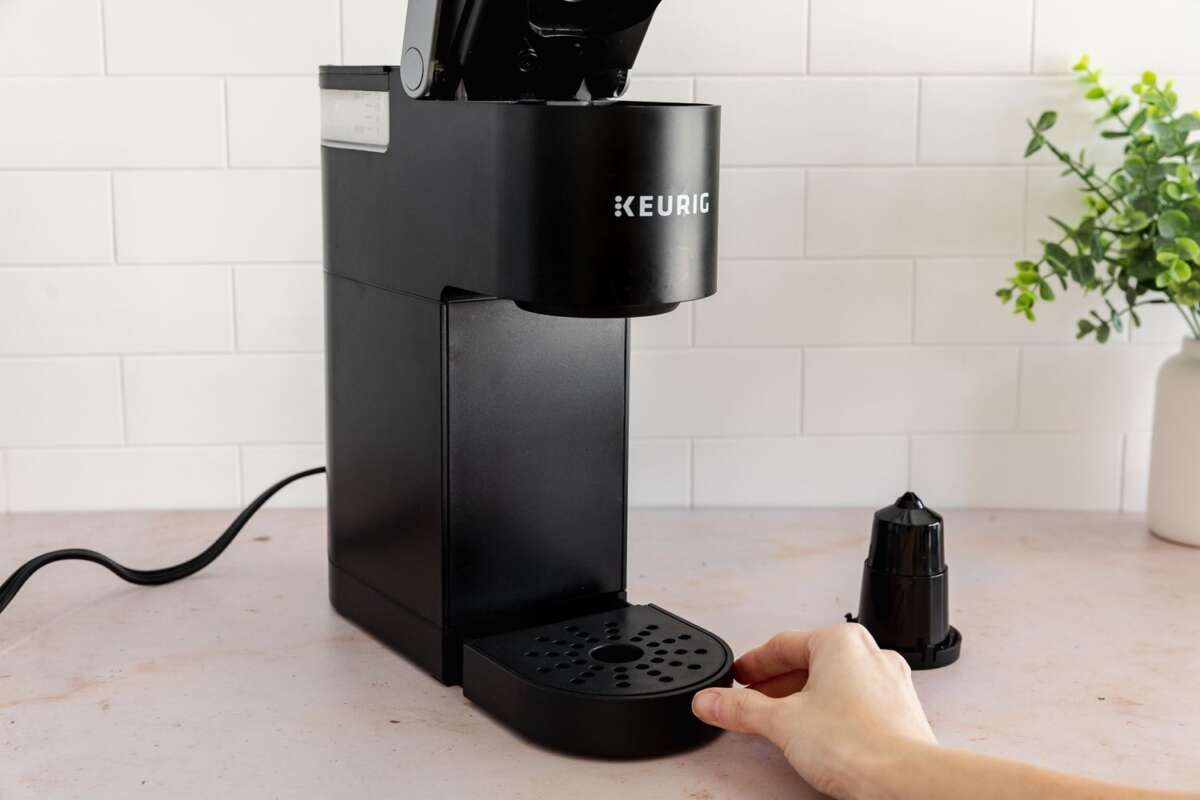
Clogs at the needles are common. They make coffee weak or stop flow. Here’s a simple method I use often.
- Unplug the machine and remove the pod holder.
- Use a paper clip or the provided needle tool to clear both the top and bottom entrance needles.
- Rinse the pod holder and funnel in warm, soapy water, then dry.
- Reassemble and run a water-only brew to confirm flow is restored.
Tip from experience
- After a long travel break, always check needles first. They fill with grounds and dust quickly.
:max_bytes(150000):strip_icc()/how-to-clean-and-descale-keurig-mini-6834333-08-d7a5e53dbd4a490189dffa03a01df1bf.jpg)
Cleaning the water reservoir and lid
A cloudy reservoir may harbor deposits or mold. Clean it often and dry it between uses.
- Remove the reservoir and wash with warm, soapy water.
- Use a soft brush to reach corners and the filler tube.
- Rinse thoroughly and air dry before reattaching.
If you see cloudiness or slime, do a stronger clean with 1 cup vinegar and 3 cups water in the reservoir, run a few cycles, then rinse thoroughly. Regular care keeps your Keurig sanitary and tasting fresh.

Exterior care and drip tray cleaning
The outside of the machine collects splashes and oils. Keep it clean to look and smell fresh.
- Wipe the exterior with a damp cloth and mild soap.
- Remove drip tray and wash in warm, soapy water. Dry completely.
- Clean any removable plastic parts in the top rack of the dishwasher only if manufacturer instructions allow.
A spotless exterior is easier to maintain than a sticky one. It also helps you spot leaks early.
Troubleshooting common issues after cleaning
If problems persist after cleaning, try these checks. They fix most post-clean issues.
- Weak coffee: Check needle clogs and descale again if water still runs slowly.
- No brew: Ensure the reservoir seats correctly and the pump is primed by running a few water cycles.
- Strange taste: Run multiple rinse cycles to remove residual vinegar or cleaning solution.
If you still have trouble, consult your model’s manual. Some issues need parts or service.

Maintenance schedule and tips
A simple schedule keeps your Keurig reliable and tasty. Follow this plan for best results.
- Daily: Rinse reservoir, empty drip tray, wipe exterior.
- Weekly: Clean pod holder and needles, wash removable parts.
- Every 3 months: Descale if you use filtered or soft water.
- Every 1–2 months: Descale if you use hard water or brew many cups.
Extra tips
- Use filtered water to slow scale buildup.
- Store the machine with the reservoir open to air dry if not used for days.
- Replace water filters per Keurig recommendations.
These habits make learning how to clean a Keurig coffee maker easy and effective.
Frequently Asked Questions of how to clean a keurig coffee maker
How often should I descale my Keurig?
Descale every 3–6 months depending on water hardness and use. If you see slow flow or taste changes, descale sooner.
Can I use vinegar to clean my Keurig?
Yes. White vinegar mixed with water is effective for descaling. Rinse thoroughly after to remove the vinegar smell.
How do I clean the Keurig needles safely?
Unplug the machine, remove the pod holder, and use a paper clip or needle tool to clear both needles. Rinse the pod holder before reassembly.
Is it safe to put Keurig parts in the dishwasher?
Some removable parts are dishwasher-safe on the top rack, but check your model’s manual. When in doubt, wash by hand.
Why does my Keurig taste bad after cleaning?
Leftover vinegar or descaling solution can cause off-flavors. Run multiple rinse cycles with fresh water until the smell is gone.
Can I use citric acid instead of vinegar?
Yes, citric acid is a gentler alternative that removes scale well. Follow package instructions for safe dilution.
Conclusion
Keeping your brewer clean delivers better coffee, fewer repairs, and a longer machine life. Use short daily routines and regular descaling to avoid common problems. Start today by rinsing the reservoir and checking the needles, then schedule a full descale soon. If this guide helped, try the steps and leave a comment or subscribe for more coffee care tips.

Liora Pennings is a seasoned chef and kitchen enthusiast with a passion for turning everyday cooking into an effortless experience. With years of hands-on culinary expertise, she specializes in practical techniques, ingredient know-how, and smart kitchen solutions that help home cooks elevate their meals. At KitchFlair.com, Liora shares her best tips, time-saving tricks, and honest product reviews to guide readers toward a more efficient, enjoyable, and inspired cooking routine. Whether you’re a beginner or a seasoned home chef, Liora’s friendly, knowledge-packed insights make every visit to the kitchen a little easier—and a lot more delicious.