How To Repair Vacuum Cleaner Airflow Blockage: Step Guide
Clear the blockage by checking the hose, filters, brush roll, and air path step by step.
I have repaired hundreds of vacuums and I will walk you through how to repair vacuum cleaner airflow blockage step by step. I explain simple checks, safe tools, and clear steps you can do at home. Read on to fix suction loss fast and keep your vacuum working well.
Why airflow gets blocked
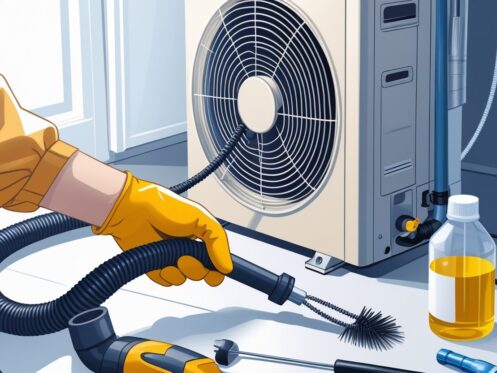
Airflow can drop for many simple reasons. Most blockages come from hair, dust bunnies, bits of fabric, and small objects stuck in the hose or brush. Filters that are dirty or clogged cut suction. A collapsed or pinched hose also slows air. Bugs or nesting material can also block older machines.
Knowing how to repair vacuum cleaner airflow blockage step by step helps you spot the cause fast. When you know the likely spots, you avoid trial and error. In my work as a tech, I found that cleaners fixed the problem faster when they followed a clear order. That order is what you will use here.
Signs your vacuum has airflow blockage
You can often tell before you open the machine. Watch for these signs:
- Weak suction on carpets and hard floors.
- Noisy motor or a higher pitch than usual.
- The vacuum heats up faster.
- The dust bag fills oddly or filters clog quickly.
- The brush bar spins but picks up little debris.
These signs tell you when to learn how to repair vacuum cleaner airflow blockage step by step. Note them so you can describe the issue if you call for help.
Tools and safety checklist
Before you start, gather a few items:
- Basic screwdriver set for shell screws.
- A flexible brush or bottle brush for hoses.
- Needle-nose pliers for extracting debris.
- A flashlight to look inside tight spots.
- Soft cloth and mild soap for cleaning filters and surfaces.
- Gloves and eye protection if you expect dust or pests.
Safety tips:
- Unplug the vacuum before you open it.
- Empty dust bins outdoors to avoid spreading dust.
- Do not poke into motor vents or electrical parts.
- If a part smells burned, stop and consult a pro.
Knowing how to repair vacuum cleaner airflow blockage step by step includes safe work. Take your time and stay cautious.
Step-by-step repair guide
Follow this clear order. Work from simple to complex. This saves time and avoids needless disassembly.
- Quick checks
- Unplug the vacuum and empty the dust cup or bag.
- Remove the hose and look through it. Bend and shake it to move clogs.
- Check the wand and attachments for blockages.
- Clean or replace filters
- Remove pre-motor and post-motor filters.
- Rinse washable filters with water and let them air dry completely.
- Replace non-washable filters if they look dark and compressed.
- Inspect the brush roll and nozzle
- Remove hair and string wrapped around the brush bar.
- Use scissors or a seam ripper to cut away tight tangles.
- Check the nozzle plate for dents or foreign objects.
- Check the hose and internal air path
- Shine a flashlight through the hose to spot blockages.
- Use a broom handle or flexible brush to push debris out from the inlet end.
- Remove the hose from the base if the clog is deep.
- Open the unit if needed
- Follow the manual to remove the shell or base cover.
- Check the air channel to the motor for debris and lint.
- Clear the path gently. Avoid touching motor windings or electrical parts.
- Reassemble and test
- Reattach filters, hose, and brushes once dry.
- Run the vacuum and test suction on a towel or carpet.
- If suction is still weak, repeat the checks or move to pro service.
This step-by-step list shows how to repair vacuum cleaner airflow blockage step by step from start to finish. I used it many times in my workshop and it works for most brands.
Troubleshooting tips and quick fixes
If the problem persists, try these quick tests:
- Check seals and gaskets around the dust bin for cracks. A leak reduces suction.
- Swap a suspected clogged hose with a spare hose to isolate the issue.
- Listen for rattles: a broken fan blade or foreign object in the motor can cut airflow.
- Reset thermal cut-outs; if the motor tripped, let it cool for an hour before restarting.
Small fixes often solve most airflow problems. Knowing how to repair vacuum cleaner airflow blockage step by step means you test common faults fast.
Preventive maintenance to avoid future blockages
Routine care prevents most problems. Add these simple habits:
- Empty the dust bin after every use.
- Wash or replace filters every 1–3 months, depending on use.
- Remove hair from the brush roll weekly in homes with pets.
- Check hoses and attachments monthly for small obstructions.
- Service the vacuum yearly if you use it a lot.
These steps reduce the chance you must learn how to repair vacuum cleaner airflow blockage step by step again. In my garage, regular cleaning cut service calls by half.
Common mistakes to avoid
People often make the same errors. Avoid these:
- Trying to clear the motor area while the unit is plugged in.
- Using water on non-washable filters.
- Forcing debris into the motor chamber.
- Reassembling parts while filters are still wet.
I once melted a filter by running the motor with a clogged fan. Don’t rush. Follow the steps and check twice.
When to call a professional
Some problems need a pro. Call help if:
- The motor smells burned or won’t run at all.
- You find a damaged fan blade or broken bearings.
- The vacuum was exposed to water or large objects.
- You are unsure how to reassemble the unit safely.
A pro can test motor windings and replace sealed parts. Knowing when to stop is part of how to repair vacuum cleaner airflow blockage step by step.
Frequently Asked Questions of how to repair vacuum cleaner airflow blockage step by step
How do I know if the hose is clogged?
Shine a flashlight through the hose or blow through it. If air does not pass easily, the hose is likely clogged.
Can I use water to clean all vacuum filters?
No. Only wash filters rated as washable. Check the manual. Let washable filters dry fully before use.
How often should I check for airflow blockages?
Check for blockages monthly if you use the vacuum often. High-pet homes may need checks weekly.
Will a clogged filter damage the motor?
Yes. A clogged filter makes the motor work harder and may overheat or fail over time.
What if suction returns but the brush roll still fails to pick up debris?
Check brush height and belt tension. A loose belt or wrong height reduces the brush’s effectiveness even with good suction.
Conclusion
You can fix most suction problems at home by following clear steps. Start with simple checks, then clean filters, clear hoses, and inspect the brush roll. When you follow how to repair vacuum cleaner airflow blockage step by step, you save money and extend your vacuum’s life. Try the steps today, and share what worked for you in the comments or ask for help if you need it.

Liora Pennings is a seasoned chef and kitchen enthusiast with a passion for turning everyday cooking into an effortless experience. With years of hands-on culinary expertise, she specializes in practical techniques, ingredient know-how, and smart kitchen solutions that help home cooks elevate their meals. At KitchFlair.com, Liora shares her best tips, time-saving tricks, and honest product reviews to guide readers toward a more efficient, enjoyable, and inspired cooking routine. Whether you’re a beginner or a seasoned home chef, Liora’s friendly, knowledge-packed insights make every visit to the kitchen a little easier—and a lot more delicious.