How To Repair Vacuum Suction Loss Due To Filter: Quick Fix
Clean or replace clogged filters, then inspect seals and airflow to restore suction fast and safely.
I’ve spent years fixing household vacuums and training techs on maintenance. If you want clear, trusted steps on how to repair vacuum cleaner suction loss due to filter issues, you’re in the right place. This guide covers causes, safe cleaning, filter replacement, troubleshooting tips, and real-world mistakes I’ve seen — all in plain language so you can fix the problem without guesswork.

Why filters cause suction loss and what to look for
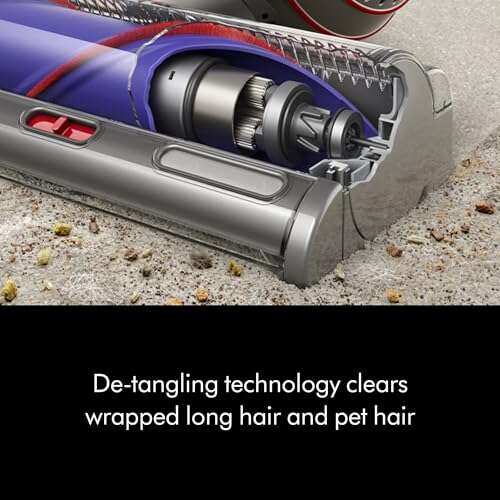
A filter’s job is to trap dust while letting air pass. When that balance fails, airflow drops and suction goes with it. Filters clog with fine dust, pet hair, grease, and debris. Some filters also trap damp particles and then compact, making airflow worse.
Common filter types and how they affect suction:
- Foam or sponge filters: Good for large debris but clog fast.
- Paper or cartridge filters: Capture fine dust. Often non-washable.
- HEPA filters: Dense and highly effective, but slow airflow when dirty.
- Pre-filters and post-filters: Pre-filters protect motors. Post-filters clean exhaust. A clogged pre-filter hits suction directly.
Signs a filter is the cause:
- Vacuum sounds muffled or strained.
- Suction drops suddenly after a few minutes of use.
- Dust escapes from the exhaust or filter area.
- You cleaned the hose and brush but nothing changed.
If you’re wondering how to repair vacuum cleaner suction loss due to filter, start here: identify the filter type, inspect visually, and check airflow with and without the filter in place. That tells you if the filter is the culprit.

Tools and parts you’ll need
Having the right tools saves time and prevents damage. Most fixes are simple and take 15–45 minutes.
Essential items:
- Screwdrivers (Phillips and flat).
- Soft brush or toothbrush.
- Compressed air canister or small hand pump.
- Mild dish soap and a basin for washable filters.
- Clean towels and a warm, ventilated place for drying.
- Replacement filters compatible with your model.
- Mask and gloves if you are sensitive to dust.
Optional helpful tools:
- Small flashlight for inspection.
- Replacement gasket or rubber seals.
- Vacuum parts diagram or manual from the manufacturer.
Knowing what to gather before you start helps you follow safe steps for how to repair vacuum cleaner suction loss due to filter problems.

Step-by-step: clean, test, and replace filters safely
Follow these steps one at a time. Unplug the vacuum before any work. Take pictures during disassembly to make reassembly easy.
- Power down and empty the dust bin.
- Turn off and unplug the machine.
- Remove and empty the dust cup into a trash bag.
- Remove the filter(s) and inspect.
- Check pre-filter, main filter, and HEPA if present.
- Look for compacted dust, stains, or holes in the filter media.
- Clean washable filters.
- Tap gently over a trash bin to remove loose dust.
- Rinse under cool water until runs clear. Use mild soap only if manufacturer allows.
- Squeeze water out gently. Do not wring fragile filters.
- Dry filters completely.
- Air dry in a warm, ventilated area for at least 24 hours.
- Never reinstall a damp filter. Moisture harms the motor and promotes mold.
- Replace non-washable or damaged filters.
- Install OEM or high-quality compatible filters.
- Replace seals and gaskets if worn.
- Check seals and filter housings.
- Inspect rubber gaskets and the filter cage for cracks.
- Clean the housing and remove trapped hair or lint.
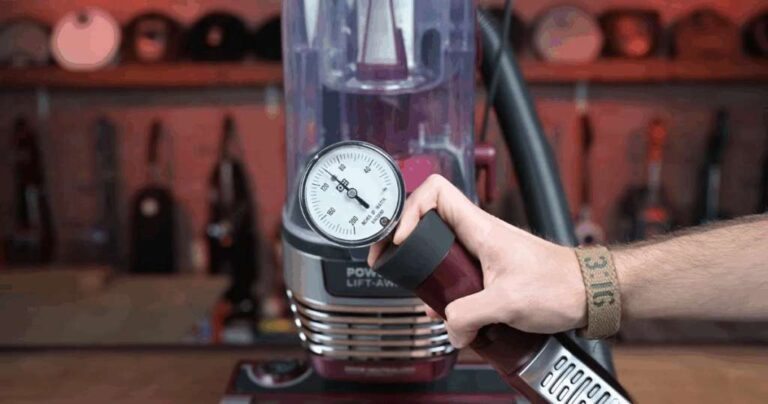
- Test suction and airflow.
- Reassemble and run the vacuum on a floor surface.
- Compare suction to before. If improvement is limited, test with the filter removed briefly to isolate the issue.
- Advanced checks if suction still low.
- Inspect hose, wand, and brush roll for clogs.
- Check motor filter or carbon filters behind the motor.
- If airflow is blocked inside the motor housing, consult a professional.
Following these steps shows you exactly how to repair vacuum cleaner suction loss due to filter clogging, and when to escalate to more advanced repairs.

When to clean versus replace your filter
Cleaning works for washable filters and light buildup. Replace filters when they are:
- Torn, damaged, or permanently discolored.
- Non-washable paper or cartridge filters.
- Heavily compacted and won’t regain shape.
- Past their recommended lifespan (often 6–12 months for frequently used machines).
Signs it’s time to replace:
- Continued odor after cleaning.
- Dust exiting the exhaust.
- Filter feels rigid, brittle, or misshapen.
If you’re unsure, swapping in a new filter is a fast test. Replacing a filter is often cheaper than repairing motor damage caused by long-term airflow restriction. This is a direct and practical path for how to repair vacuum cleaner suction loss due to filter failure.
Preventive maintenance to avoid future suction loss
A small routine prevents big problems. I recommend these habits from my experience working on many vacuums.
Weekly or biweekly:
- Empty the dust cup after each use or when half full.
- Check the brush roll and remove hair.
Monthly:
- Inspect and clean pre-filters.
- Wash foam filters and let them dry completely.
Every 6 to 12 months:
- Replace HEPA or cartridge filters based on use and manufacturer guidance.
- Inspect seals, hoses, and gaskets.
Other tips:
- Do not vacuum liquids unless the machine is designed for it.
- Avoid sucking up fine ash, drywall dust, or plaster without proper filters.
- Keep spare filters on hand if you use your vacuum a lot.
These steps make how to repair vacuum cleaner suction loss due to filter issues rare instead of routine.

Personal experience, common mistakes, and lessons learned
I once helped a client who used a vacuum to clean a workshop. He ignored a clogged pre-filter for months. The motor ran hot and the machine lost suction permanently. We replaced the motor after trying everything else. That taught me two things:
- A clogged filter can damage the motor quickly.
- Regular simple care prevents costly repairs.
Common mistakes I see:
- Reinstalling a damp filter: this causes mold and motor issues.
- Using the wrong replacement filter: poor fit means air leaks.
- Relying on compressed air alone: it can push dust deeper into the machine.
Practical tip: when testing, compare suction with and without the filter briefly. If suction is good without the filter, the filter is your issue. If not, check hoses and motor intake. This approach is a hands-on way to learn how to repair vacuum cleaner suction loss due to filter problems without wasting money.

Frequently Asked Questions of how to repair vacuum cleaner suction loss due to filter
What is the first thing to check when suction drops?
Always unplug the vacuum and empty the dust cup first. Then remove and inspect the filters for visible clogs or damage.
Can I wash all vacuum filters?
No. Only wash filters labeled washable. Paper and some cartridge filters must be replaced, not washed, or they will be damaged.
How long should a HEPA filter last?
A HEPA filter typically lasts 6 to 12 months with normal use, but high dust loads can shorten that life. Replace sooner if you notice reduced suction or odors.
Will compressed air fix a clogged filter?
Compressed air can dislodge loose dust but won’t fix compacted or oily residue and can push dust deeper into the system. Washing or replacing the filter is usually better.
How do I know if loss of suction is not the filter?
Remove the filter and run the vacuum briefly; if suction improves significantly, the filter is the problem. If not, check hoses, brush roll, and motor intake for blockages.
Is it safe to use aftermarket filters?
Quality aftermarket filters can work well, but poor-fit filters cause air leaks and reduce suction. Choose well-reviewed filters that match your model.
Can a clogged filter damage the motor?
Yes. Restricted airflow makes the motor work harder and run hotter, which can shorten its life or cause failure. Replace filters before that happens.
Conclusion
Fixing suction loss caused by filters is usually quick and affordable when you follow safe steps. Inspect, clean, dry, or replace filters as needed, check seals and housings, and test airflow methodically. Start a simple maintenance routine and keep spare filters handy to avoid surprises.
Take action now: check your vacuum’s filter and follow the cleaning or replacement steps above. If this guide helped, subscribe for more practical home repair tips or leave a comment with your vacuum model and problem.

Liora Pennings is a seasoned chef and kitchen enthusiast with a passion for turning everyday cooking into an effortless experience. With years of hands-on culinary expertise, she specializes in practical techniques, ingredient know-how, and smart kitchen solutions that help home cooks elevate their meals. At KitchFlair.com, Liora shares her best tips, time-saving tricks, and honest product reviews to guide readers toward a more efficient, enjoyable, and inspired cooking routine. Whether you’re a beginner or a seasoned home chef, Liora’s friendly, knowledge-packed insights make every visit to the kitchen a little easier—and a lot more delicious.