How To Fix Vacuum Cleaner Hose Connection Loose Issue: Fix
Tighten the cuff, clean the fittings, or use a clamp—simple fixes stop a loose vacuum hose connection fast.
I’ve spent years repairing vacuums and training homeowners on simple fixes. If you’re wondering how to fix vacuum cleaner hose connection loose issue, this guide walks you through clear diagnosis, the best repair methods, and lasting prevention. You’ll get step-by-step instructions, tools to keep on hand, real-world tips I’ve learned on the job, and quick checks to know when to replace parts or call a pro. Read on and you’ll have a snug hose in under 30 minutes.

Understand the problem and common symptoms
A loose hose connection lets air leak, cutting suction and making cleaning inefficient. Knowing how to fix vacuum cleaner hose connection loose issue starts with spotting the signs early.
- You hear a whistling or hissing sound near the cuff.
- Suction drops noticeably on floors or upholstery.
- The hose wiggles or separates when you pull or bend it.
- Dust or debris escapes around the connection.
Why this matters: a leaking connection strains the motor and reduces cleaning performance. Learning how to fix vacuum cleaner hose connection loose issue prevents bigger repairs and keeps your machine efficient.

Common causes of a loose hose connection
Understanding the root cause helps pick the right fix for how to fix vacuum cleaner hose connection loose issue.
- Worn rubber cuff or gasket
- Cracked or warped hose ends
- Missing or broken locking tabs or clips
- Debris or hardened dirt in the cuff
- Incorrect hose size or a non‑OEM replacement
- Loose internal collar or screw on models with threaded fittings
Most problems boil down to wear or poor sealing. Fix the seal first. Replace parts only when they are cracked or badly worn.

Tools and materials you’ll need
Gather simple tools before you start fixing how to fix vacuum cleaner hose connection loose issue.
- Soft cloth and mild cleaner
- Rubbing alcohol
- Screwdriver set (flat and Phillips)
- Hose clamps (worm gear clamps) in various sizes
- Replacement rubber cuff, O‑ring, or hose end
- Utility knife or scissors
- Heat‑shrink tubing (large diameter) or adhesive tape
- Epoxy or plastic weld kit (for permanent repairs)
- Safety gloves and eye protection
Having parts and a clamp ready saves time. I keep one universal cuff and a few clamps in my home repair kit.

Step-by-step fixes (from simple to permanent)
Below are practical fixes ranked from easy to durable. Pick the one that fits your skill level and the damage you find.
1. Clean and reseat the hose (fast test)
- Turn off and unplug the vacuum.
- Remove the hose and inspect both ends for dirt or hardened dust.
- Wipe both surfaces with rubbing alcohol.
- Push the hose firmly into the cuff until you hear a click or feel resistance.
This often resolves mild leaks and is the first step when learning how to fix vacuum cleaner hose connection loose issue.
2. Replace the rubber cuff or O‑ring
- Buy a compatible replacement cuff or O‑ring for your model.
- Remove the old cuff by pulling or cutting it off carefully.
- Slide the new cuff into place and press firmly.
- Test suction and fit.
Replacing the cuff gives a seal that lasts longer than temporary fixes.
3. Use a hose clamp for a secure hold
- Slide an appropriately sized worm‑gear clamp over the hose end.
- Push the hose onto the vacuum fitting.
- Tighten the clamp until snug; don’t overtighten and damage the hose.
Clamps are low cost and reliable for how to fix vacuum cleaner hose connection loose issue, especially on smooth plastic fittings.
4. Heat‑shrink tubing or reinforced tape (semi‑permanent)
- Slide heat‑shrink tubing over the hose end and fitting.
- Apply heat evenly until it contracts for a tight fit.
- Or wrap a few tight layers of high‑quality duct tape where the hose meets the fitting.
This works well for slightly irregular shapes or when you need a tidy, low‑cost repair.
5. Plastic welding or epoxy (permanent repair)
- Clean and sand the cracked area.
- Use a plastic weld kit or epoxy formulated for plastics.
- Follow cure times and smooth edges.
Only use this when the hose end or fitting is cracked and you want a long‑lasting fix.
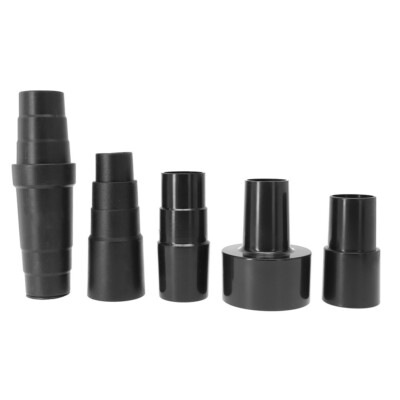
6. Replace the hose or adaptor
- If the hose is torn or severely warped, replace it.
- Order OEM or exact-size universal replacements.
- Follow manufacturer instructions for fitting.
Sometimes replacement is fastest and prevents repeated fixes.
Quick diagnostic checklist
Use this checklist before you start any repair to target the right fix for how to fix vacuum cleaner hose connection loose issue.
- Is the cuff cracked or simply dirty?
- Do locking tabs engage? Are any broken?
- Is the hose the correct diameter for the port?
- Is the leak loud or barely noticeable?
- Does the vacuum run hotter or struggle after the leak?
These quick checks save you time and guide you to the simplest solution.
Preventive maintenance to avoid future issues
A little care prevents loose connections and stretches the life of your vacuum.
- Clean cuff and fittings weekly if used heavily.
- Check clamps, clips, and gaskets monthly.
- Store the hose unbent, coiled loosely to avoid kinks.
- Replace cuffs and O‑rings at first sign of hardening or cracks.
- Use only compatible replacement parts for your model.
Keeping the hose clean and store it right made a big difference in my own house vacuum; I cut repair jobs in half.

My experience: mistakes to avoid and practical tips
I’ve fixed dozens of vacuums. Here are real lessons that help when you learn how to fix vacuum cleaner hose connection loose issue.
- Don’t overtighten clamps. Too tight can cut into the hose and make leaks worse.
- Clean first. Many “failed seals” are just dirty fittings.
- Measure twice before buying parts. A slightly wrong cuff can seem to fit but will leak.
- Keep an emergency clamp in a drawer. It has saved me on many quick fixes.
- Test the vacuum between steps so you don’t mask the original problem.
These tips come from hands‑on repairs, and they speed up a proper fix.

When to call a professional
Call a technician if:
- The leak persists after replacing cuffs and clamps.
- The vacuum motor runs hotter or trips safety switches.
- Internal fittings or electronics are damaged.
- The model is under warranty and repair may void it.
A pro can diagnose internal leaks, replace hidden gaskets, and advise on warranty-safe repairs. Costs vary, but a simple hose replacement often runs less than a professional service call.

PAA-style quick questions
Why does my vacuum hose become loose over time?
Repeated bending and tugging can wear out the rubber cuff and break locking tabs. Dirt buildup can also prevent a tight seal.
Can tape be a long-term fix for a loose hose?
Tape is a short to medium‑term solution. High‑quality tape or heat‑shrink can last months, but clamps or new cuffs are more durable.
Is it worth repairing the hose or should I replace the vacuum?
If the vacuum is relatively new and the motor is fine, repairing or replacing the hose is usually cost‑effective. Old or heavily damaged units may justify replacement.
Frequently Asked Questions of how to fix vacuum cleaner hose connection loose issue
What is the fastest way to fix a loose vacuum hose connection?
Cleaning the cuff and reseating the hose is the fastest fix. If that fails, slip on a hose clamp for an immediate, reliable seal.
How do I know if the gasket or cuff needs replacing?
If the cuff is cracked, brittle, or deformed, or if suction doesn’t improve after cleaning, replace the gasket or cuff.
Can I use universal parts for my vacuum hose?
Universal cuffs and clamps work for many models, but OEM parts ensure the best fit and long‑term performance.
Will glue or epoxy ruin my hose permanently?
Some adhesives can make future repairs hard but provide a durable fix. Choose plastic‑safe epoxy and follow directions carefully.
How often should I inspect the hose connection?
Inspect the hose connection monthly if you use the vacuum often, otherwise check every few months.
Can a loose hose connection damage the vacuum motor?
Yes. A persistent leak forces the motor to run harder and can cause overheating or shorten motor life.
Conclusion
Fixing a loose vacuum hose connection is usually quick and affordable. Clean the fittings, try a clamp or new cuff, and use the step‑by‑step fixes above for a durable seal. If the problem persists or you see motor issues, consult a professional. Take action now: inspect your hose, try the simple fixes, and leave a note if you need help choosing parts or tools. Share your repair story or ask a question below — I’ll respond with practical advice.

Liora Pennings is a seasoned chef and kitchen enthusiast with a passion for turning everyday cooking into an effortless experience. With years of hands-on culinary expertise, she specializes in practical techniques, ingredient know-how, and smart kitchen solutions that help home cooks elevate their meals. At KitchFlair.com, Liora shares her best tips, time-saving tricks, and honest product reviews to guide readers toward a more efficient, enjoyable, and inspired cooking routine. Whether you’re a beginner or a seasoned home chef, Liora’s friendly, knowledge-packed insights make every visit to the kitchen a little easier—and a lot more delicious.