How To Fix Vacuum Cleaner Making Rattling Sound Inside: DIY
Tighten loose parts, clear debris, and replace worn belts or bearings to stop the rattling.
I’ve fixed dozens of noisy vacuums, and I’ll walk you through exactly how to fix vacuum cleaner making rattling sound inside. You’ll learn how to diagnose the source, safe steps to open and inspect your machine, common fixes for parts like the brushroll, belt, fan, and motor bearings, plus when to call a pro. Read on for clear, tested steps and real-life tips so you can quiet your vacuum fast.
Why your vacuum makes a rattling sound inside
A rattling sound often means a loose part or a foreign object hitting metal or plastic inside. It can come from the brushroll area, the hose, the dust cup, the fan, or the motor area. Small items like coins, screws, or stones get sucked in easily and can rattle as air moves parts. Wear and tear on belts, bearings, or mounts also creates vibration and noise.
How to fix vacuum cleaner making rattling sound inside starts with finding the exact source. Once you know where the noise comes from, you can decide whether to clear debris, tighten a loose part, or replace a worn component. Many rattles are easy to fix at home with basic tools. If you hear grinding or burning with the rattle, stop and get professional help.

Tools, parts, and safety before you begin
Gather the right tools before you open the vacuum. Use basic tools only. Typical items:
- Phillips and flat screwdrivers for outer panels and brush guards.
- Needle-nose pliers for grabbing small objects.
- Socket set for motor mounts or brushroll end caps.
- Replacement belt, brushroll, or bearings if needed.
- Soft cloth and compressed air to clean debris.
Safety steps to follow:
- Unplug the vacuum before any inspection or repair.
- Remove the dust cup or bag to ease access and reduce mess.
- Wear safety glasses when working near the fan or motor.
- Keep children and pets away while you work.

Step-by-step diagnosis to find the rattle
Follow a clear order to avoid wasted effort. Use this checklist:
- Run the vacuum briefly to confirm the rattle and note which area it seems to come from.
- Turn off and unplug the vacuum. Remove the dust cup, bag, and filters.
- Inspect the hose and wand by tapping them and shaking gently to listen for loose objects.
- Remove the brushroll cover and inspect the brushroll, end caps, and belt.
- Open the motor housing only if needed and if you are comfortable doing so.
Tips for listening:
- Put your ear near the floor head, hose, and motor cover to localize the sound.
- Use a wooden dowel or screwdriver handle as a simple stethoscope. Touch the dowel to the housing and your ear to the other end.
- If the rattling stops when you cover the exhaust, the problem may be downstream in the airflow path.
How to fix vacuum cleaner making rattling sound inside often ends at this step when the object is found. If nothing is obvious, proceed to clean and inspect moving parts next.

Common fixes by source
Below are common causes and clear fixes you can do at home. Each subsection explains what to check and how to repair it.
Loose screws, panels, and clips
What to check
- External panels, screws, and clips on the base, canister, and handle.
Fix - Tighten loose screws. Replace missing clips. Add threadlocker for screws that come loose repeatedly.
How this helps - Tight panels stop vibration chatter and often eliminate rattles that sound like they come from the motor.
Brushroll and brush housing
What to check
- Tangled hair, coins, and debris on the brushroll. Worn end caps or bearings.
Fix - Remove the brushroll. Cut away hair and string. Replace worn end caps or bearings. Replace the brushroll if bristles are flat or missing.
How this helps - A free, balanced brushroll spins quietly. A stuck or imbalanced brushroll rattles.
Belt issues
What to check
- Cracked or stretched belt. Loose belt tension.
Fix - Replace the belt with a model-specific replacement. Re-tension per manufacturer instructions.
How this helps - A healthy belt stays snug. A loose belt flaps and rattles, especially under load.
Foreign object in hose, wand, or air path
What to check
- Shake hose and wand. Run small flexible brush through. Inspect ports and filters.
Fix - Remove the object using pliers or by detaching sections. Clear the air pathway with compressed air if needed.
How this helps - Loose objects often cause intermittent rattles that move as the vacuum changes speed.
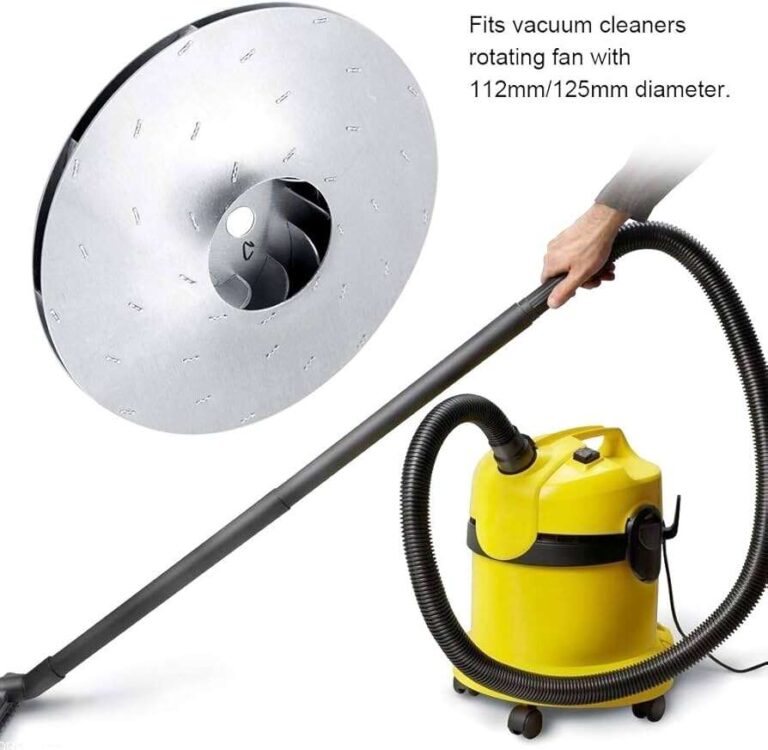
Fan, impeller, or turbine damage
What to check
- Chips in fan blades, cracked impeller, or misaligned fan housing.
Fix - If the fan or impeller is cracked, replace it. Small chips can still rub and create noise, so replacement is best.
How this helps - A damaged impeller hits the housing and makes a sharp rattle or grinding sound.
Motor bearings or motor mounts
What to check
- Squealing or grinding with the rattle, overheating, or excessive vibration.
Fix - Replace motor bearings if serviceable. Tighten or replace mounts. If motor is failing, consider full motor replacement or a technician.
How this helps - Motor bearings wear over time and create internal rattle. Repair restores smooth rotation.
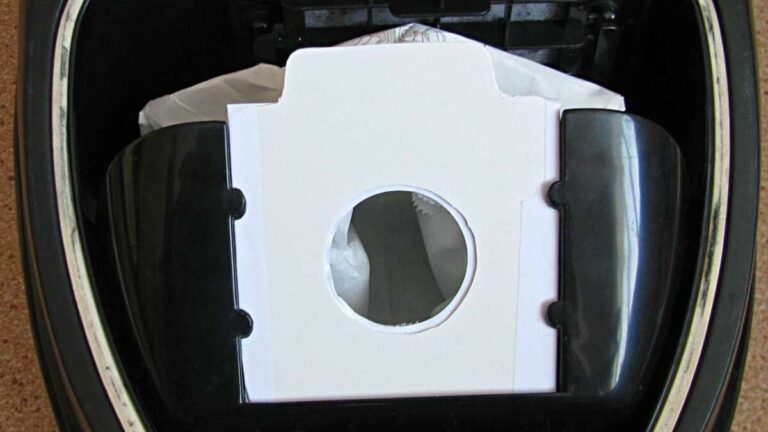
Dust cup, filter, and loose debris in the canister
What to check
- Pebbles, large debris, or loose parts inside the dust cup or bag compartment.
Fix - Empty and clean the dust cup. Rinse washable filters. Re-seat any loose internal parts.
How this helps - Cleaning removes audible loose items that bounce and rattle during operation.

Two quick PAA-style questions
Q: How long will it take to fix a rattling vacuum?
A: Most simple checks and fixes take 15–45 minutes. Replacing motors or bearings takes longer or needs a pro.
Q: Can a rattling vacuum damage the motor?
A: Yes. If the cause is misaligned parts or bad bearings, continued use can overheat and damage the motor. Fix the rattle quickly.

When to repair yourself and when to call a professional
Repair at home when:
- The rattle is caused by a visible foreign object, loose screw, belt, or brushroll.
- You are comfortable with basic tools and simple parts replacement.
Call a pro when: - You hear grinding or burning with the rattle. That suggests motor damage or failing bearings.
- The motor housing needs disassembly beyond the user manual scope.
- Replacement parts are expensive relative to the vacuum’s value.
From my experience, DIY stops most rattles. But I always recommend a pro if the motor is involved. A wrong DIY motor repair can cost much more.
Preventive maintenance to stop rattles before they start
Simple habits reduce noise and keep the vacuum healthy. Do these regularly:
- Empty the dust cup or replace the bag when it’s two-thirds full.
- Clean or replace filters per the manual every 1–6 months.
- Check the brushroll weekly and clear hair and string.
- Inspect the hose for holes or dents and clear blockages.
- Replace belts annually or as they show wear.
- Tighten visible screws every few months.
A steady maintenance routine prevents most rattles from returning and keeps suction strong. I learned this after fixing the same noisy machine three times; small fixes save time and money.

Frequently Asked Questions of how to fix vacuum cleaner making rattling sound inside
What does a rattling sound in a vacuum usually mean?
A rattling sound usually means a loose part or foreign object is moving inside. It can also mean worn bearings or a damaged fan.
Can I keep using the vacuum if it rattles?
Temporarily yes if the sound is minor and there’s no burning smell. Stop if you hear grinding, smell burning, or see smoke and get it checked.
How do I remove small objects from a vacuum hose?
Detach the hose and use a long flexible brush or a coat hanger with a rag to pull the object out. Use pliers for items near the ends.
Will replacing the belt fix a rattle?
Yes if the rattle is from a loose or worn belt. A new belt restores proper tension and reduces vibration.
How much does professional repair cost for a rattling vacuum?
Costs vary. Simple repairs may be $50–$150. Motor replacement or major repairs can run higher, sometimes near the cost of a new vacuum.
Conclusion
You can quiet most vacuums by finding the source, removing debris, tightening parts, and replacing worn belts or brushroll components. Follow safe steps, use the right tools, and do basic maintenance to prevent future rattles. If the rattle points to the motor, seek a professional to avoid bigger damage. Try the steps here, share your results, and subscribe or comment below with your vacuum model and the noise you hear for more tailored help.

Liora Pennings is a seasoned chef and kitchen enthusiast with a passion for turning everyday cooking into an effortless experience. With years of hands-on culinary expertise, she specializes in practical techniques, ingredient know-how, and smart kitchen solutions that help home cooks elevate their meals. At KitchFlair.com, Liora shares her best tips, time-saving tricks, and honest product reviews to guide readers toward a more efficient, enjoyable, and inspired cooking routine. Whether you’re a beginner or a seasoned home chef, Liora’s friendly, knowledge-packed insights make every visit to the kitchen a little easier—and a lot more delicious.