How To Clean Vacuum For Better Airflow: Quick Guide
Clean filters, clear ducts, and remove brush and hose blockages to restore strong vacuum airflow.
I’ve spent years servicing vacuums and testing airflow fixes, so I know what really works. This guide on how to clean vacuum cleaner for better airflow performance walks you through safe, clear steps, tools, and troubleshooting advice. Read on for practical tips you can use today to get stronger suction, longer motor life, and cleaner air in your home.

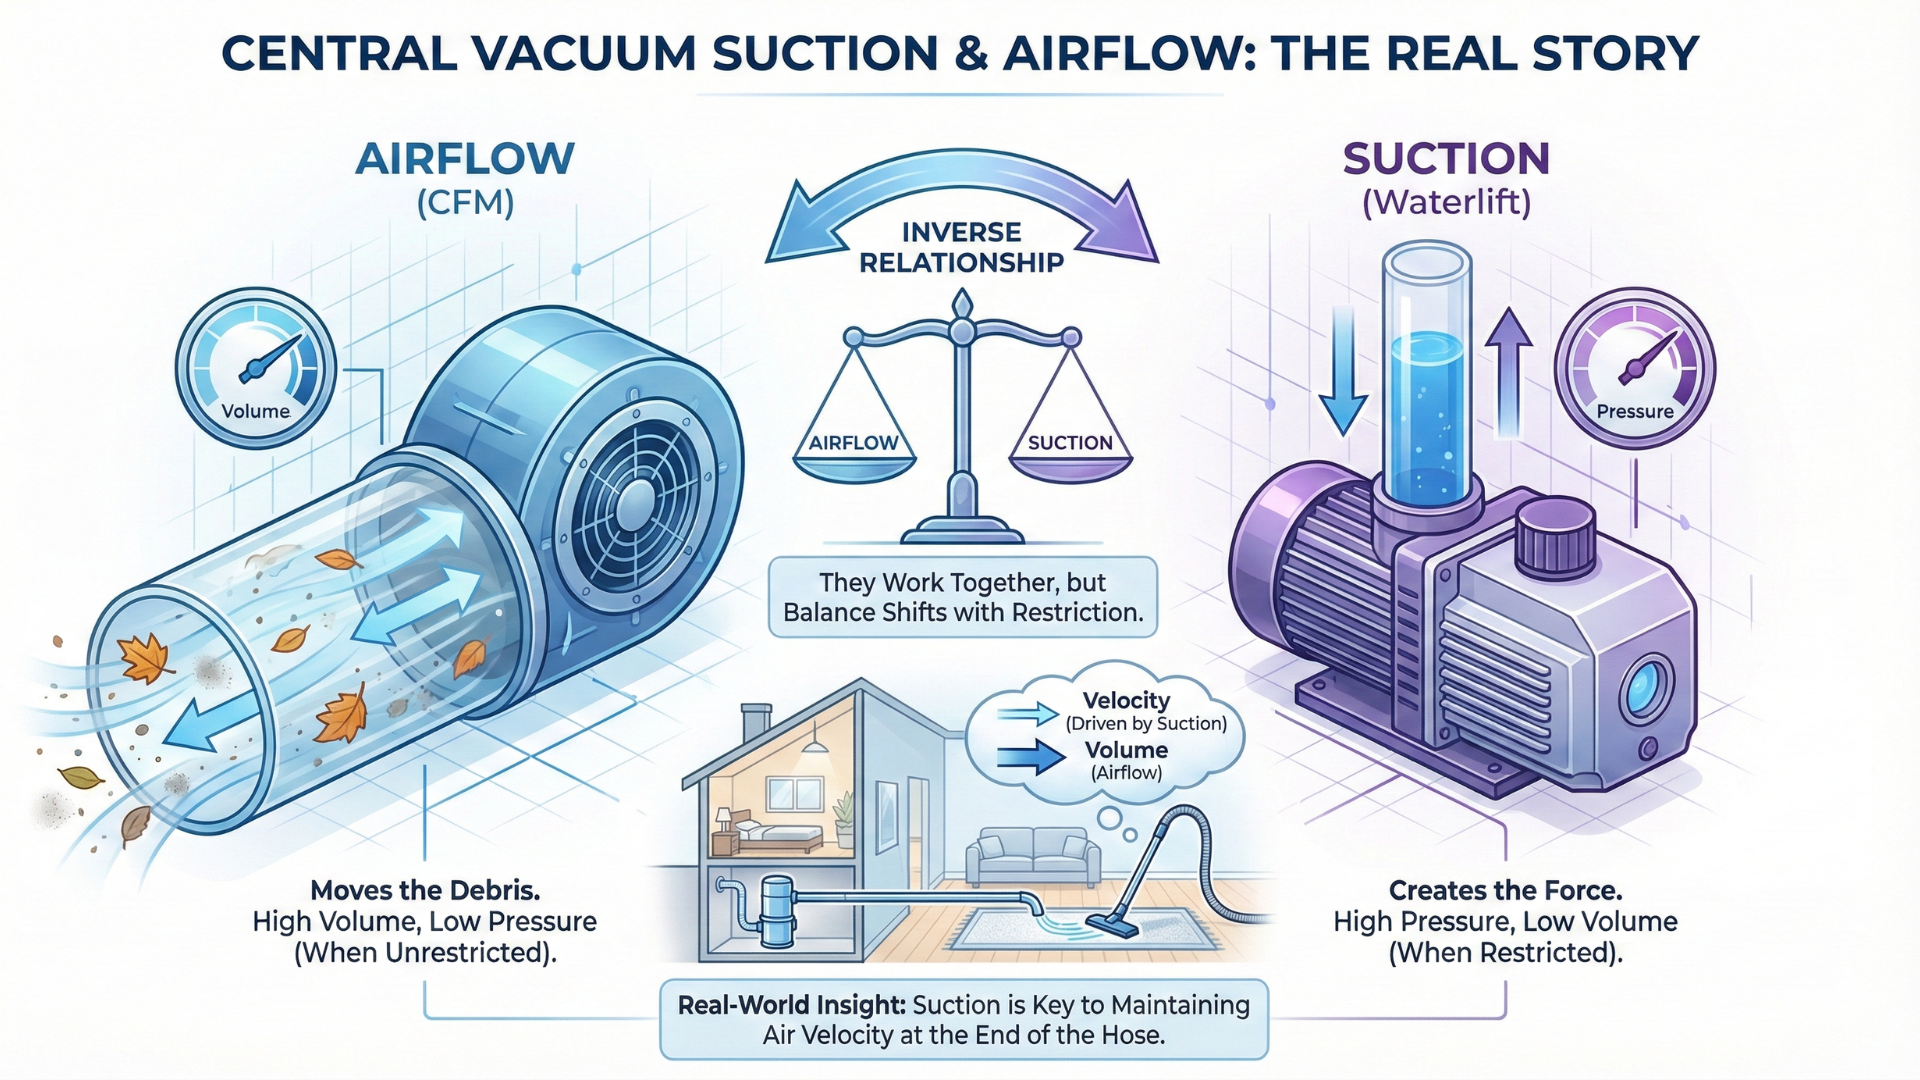
Why airflow matters and how dirt affects your vacuum
Airflow is how air moves through the machine. Strong airflow equals strong suction. When airflow drops, cleaning power falls and the motor works harder. Over time this causes higher energy use and early wear.
Common causes of reduced airflow include clogged filters, packed dust bins, blocked hoses, tangled brush rolls, and dirty seals. Addressing these issues is the core of learning how to clean vacuum cleaner for better airflow performance. Fix those areas and you regain suction fast.
From my experience, a small clog in the hose can cut suction by half. I’ve fixed cheap and high-end models with the same basic steps. Clean regularly and your vacuum will work closer to how it did on day one.

Tools and supplies you need before you start
Gather these items for a smooth clean. They make the process quick and safe.
- Soft brush or toothbrush for crevices.
- Compressed air can or low-pressure blower for vents.
- Microfiber cloths for wiping.
- Mild dish soap and warm water for washable parts.
- A long flexible brush or broom handle to push clogs out of hoses.
- Replacement filters if yours look damaged or won’t clean well.
- Gloves and a mask if you are sensitive to dust.
Having the right tools speeds repair and reduces mistakes when learning how to clean vacuum cleaner for better airflow performance.

Step-by-step cleaning guide to restore airflow
Follow these steps in order. Take your time and keep parts organized.
1. Unplug and prepare
Always unplug the vacuum first. Empty the dust bin or remove the bag outside if possible.
2. Empty and wash the dust bin or replace the bag
- Remove the bin or bag. Empty it into a trash bag.
- Wash plastic bins with warm soapy water and dry completely.
- Replace disposable bags if full or torn.
Cleaning the bin or changing the bag is one of the fastest ways to improve airflow when learning how to clean vacuum cleaner for better airflow performance.
3. Clean or replace filters
- Check pre-motor and HEPA filters. Tap out dry filters over trash.
- Wash washable filters with water only and let fully air dry for 24 hours.
- Replace filters that are torn, misshapen, or don’t regain shape after washing.
Clogged filters are the most common reason suction drops. Replace them on schedule to keep airflow steady.
4. Clear the hose and wand
- Detach hose and look through it under bright light.
- Use a flexible brush or a broom handle wrapped with cloth to push clogs out.
- For stuck debris, work from both ends or use water if the hose is washable. Dry fully.
A blocked hose often hides the problem when learning how to clean vacuum cleaner for better airflow performance.
5. Clean the brush roll and belt
- Remove the brush roll. Cut away hair and fibers with scissors.
- Check the belt for cracks or stretch. Replace if loose.
- Spin the brush roll to ensure free rotation before reassembly.
A tangled brush roll reduces airflow at the floor head and makes the motor strain.
6. Inspect seals, gaskets, and vents
- Look for damaged seals where parts connect.
- Wipe seals with a damp cloth and replace if brittle.
- Blow dust from vents with compressed air to free internal dust.
Leaky seals let air escape and reduce suction even when the filter is clean.
7. Check motor compartment and fan area
- Only open according to the manual. Remove visible dust using a soft brush or compressed air.
- Do not wet electrical parts.
- If you smell burning or hear unusual sounds, stop and consult a technician.
Cleaning around the motor improves flow and reduces overheating risks.
8. Reassemble and test
- Refit parts carefully, ensuring seals and clips snap into place.
- Test suction on the floor and on an attachment.
- Compare performance before and after cleaning to confirm improvement.
Repeat targeted cleaning if suction is still weak. Often one missed clog is the cause.
Maintenance schedule and simple habits that help
A little routine keeps airflow strong and cuts deep-clean time later.
- After every use: Empty bin or check the bag.
- Weekly: Inspect brush roll and clear hair.
- Monthly: Check filters and hose for clogs.
- Every 6–12 months: Deep clean, replace filters, and check belts.
These habits make how to clean vacuum cleaner for better airflow performance easy and predictable.

Troubleshooting common airflow problems
Short checks you can do before calling for help.
- Weak suction but fan runs: Check for blocked hose, full bag, or clogged filters.
- Strange noise: Inspect brush roll, belt, and motor area for debris or wear.
- Overheating or shutoff: Clean filters and vents. Let the motor cool, then test.
If you’ve cleaned everything and airflow is still poor, a failing motor or cracked internal duct may be the issue. Professional repair may be needed.
Benefits and limits of cleaning for airflow performance
Cleaning gives fast, low-cost gains. You’ll see better suction, less dust in rooms, and longer vacuum life.
Limitations:
- Old motors lose power over time.
- Cracked internal parts or worn fan blades require parts replacement.
- Some high-efficiency filters need scheduled replacement to maintain performance.
Knowing how to clean vacuum cleaner for better airflow performance helps you get the most from the machine. Regular care delays part replacement and expensive repairs.

Personal tips, mistakes to avoid, and real-life examples
I once spent an hour replacing a belt that didn’t need replacing. The real issue was a hair-clogged inlet under the brush head. Lesson learned: inspect simple things first.
Practical tips:
- Always check the hose for debris before replacing parts.
- Use scissors to get hair off the brush roll. Pull, don’t yank.
- Keep spare filters on hand so you can swap and run tests quickly.
Common mistakes:
- Reassembling wet filters. Wait until fully dry.
- Ignoring small cracks in seals that leak air.
- Over-tightening clips and breaking plastic parts.
These small habits help when practicing how to clean vacuum cleaner for better airflow performance.
Quick PAA-style questions
How often should I clean my vacuum filters?
Clean pre-filters monthly and HEPA filters every 3–6 months. Replace filters per the manufacturer if they don’t restore after washing.
Can I use water on all vacuum parts?
Only wash parts labeled washable, like some bins and filters. Never wet motors, electrical components, or non-washable filters.
Will replacing the belt improve suction?
A worn or loose belt improves cleaning if it causes the brush roll to stop spinning, but it won’t fix clogs or filter issues.
Frequently Asked Questions of how to clean vacuum cleaner for better airflow performance
How do I know if my vacuum has airflow problems?
Check suction by placing your hand over the hose end. If suction is weak, inspect the bag, filters, hose, and brush roll for blockages.
Can I wash all vacuum filters to improve airflow?
No. Only wash filters labeled washable. Non-washable or HEPA filters should be replaced when clogged to restore airflow.
How long does it take to clean a vacuum for better airflow?
A basic clean takes 15–30 minutes. A deep clean with filter drying can take 24 hours due to drying time.
Are there any safety tips when cleaning the vacuum?
Always unplug the unit first. Avoid getting electrical parts wet and wear a mask if you’re sensitive to dust.
When should I call a professional?
Call a technician if you smell burning, the motor runs without suction after cleaning, or you need internal motor work or fan repairs.
Conclusion
Cleaning your vacuum restores suction, reduces motor wear, and improves home air quality. Tackle filters, bins, hoses, brush rolls, and seals on a regular schedule to maintain strong airflow. Start with simple checks, use the right tools, and replace worn parts when needed for lasting results. Try these steps this week and see the difference in cleaning power and efficiency. Share your results or ask questions in the comments and subscribe for more hands-on cleaning tips.

Liora Pennings is a seasoned chef and kitchen enthusiast with a passion for turning everyday cooking into an effortless experience. With years of hands-on culinary expertise, she specializes in practical techniques, ingredient know-how, and smart kitchen solutions that help home cooks elevate their meals. At KitchFlair.com, Liora shares her best tips, time-saving tricks, and honest product reviews to guide readers toward a more efficient, enjoyable, and inspired cooking routine. Whether you’re a beginner or a seasoned home chef, Liora’s friendly, knowledge-packed insights make every visit to the kitchen a little easier—and a lot more delicious.