How To Replace Coffee Maker Power Cord Safely: Step-By-Step
Replace the coffee maker power cord by disconnecting power, using a matching cord, wiring correctly, and testing safely.
I’ve repaired dozens of small appliances and know how to replace coffee maker power cord safely without frying the machine—or yourself. This guide walks you through tools, part selection, clear step-by-step instructions, wiring tips, testing, and when to call a professional. Read on for precise, experience-backed steps to get your coffee maker working again and keep your kitchen safe.
Why replacing a power cord matters and safety first
A frayed or damaged cord is a top cause of electrical fires and shocks. Replacing the cord promptly protects your home and extends the life of your coffee maker.
Handle electricity with respect. Always unplug before you touch wires and follow basic electrical safety rules. When you learn how to replace coffee maker power cord safely, you reduce risk and save money on repairs.

When to replace the cord vs replace the machine
If the coffee maker is otherwise fine, replacing the cord is usually cheaper and greener. Replace the whole machine if the heater, control board, or plastic housing is damaged.
Look for these signs:
- Exposed wires or melted insulation
- Intermittent power or sparks
- Burns or smells of hot plastic
If you see extensive internal damage, replace the appliance rather than the cord. Learning how to replace coffee maker power cord safely helps only when the internal electronics are sound.

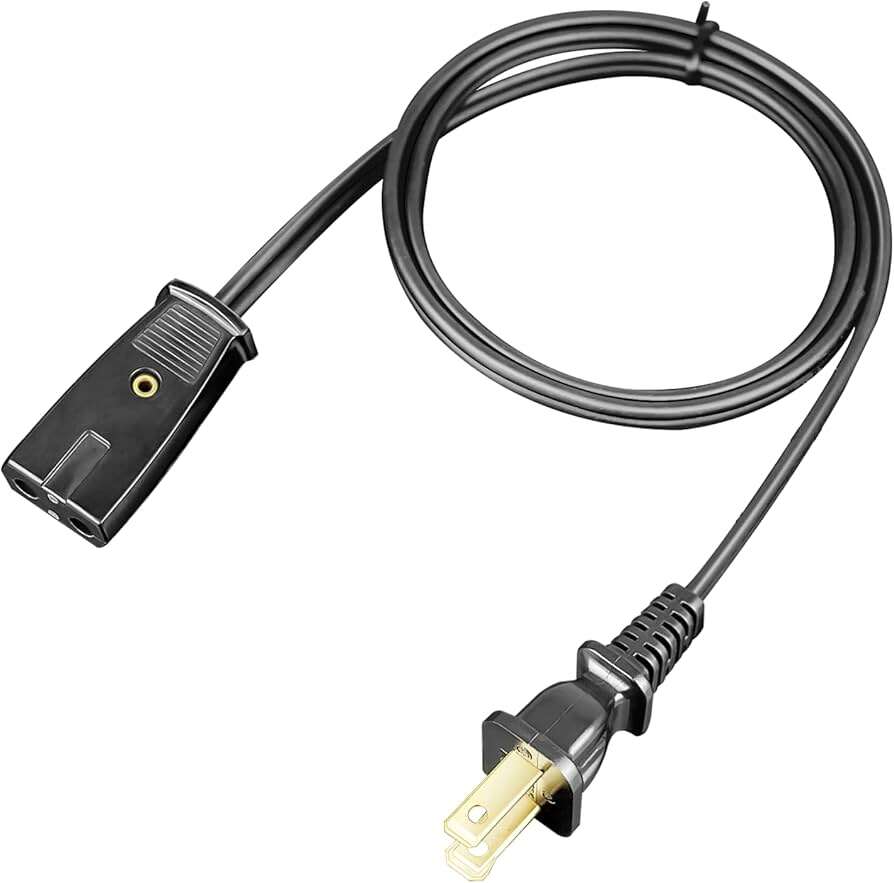
Source: ebay.com
Tools and materials you’ll need
Gather parts and tools first. Working calm and prepared keeps the job safe and quick.
You will need:
- Replacement power cord rated for the appliance (voltage and current)
- Wire strippers
- Small screwdrivers (Phillips and flat)
- Multimeter for voltage and continuity checks
- Heat-shrink tubing or electrical tape
- Crimp connectors or soldering iron and solder
- Safety gloves and eye protection
Select a cord that matches the coffee maker’s ratings. The phrase how to replace coffee maker power cord safely means choosing the right cord and tools.

Source: amazon.com
How to choose the correct replacement cord
Match voltage, amperage, and connector type. If the original cord had a molded plug or connector, look for an exact match.
Checklist:
- Match rated voltage (usually 120V in the US)
- Match or exceed amp rating
- Match plug and strain relief style
- Choose proper wire gauge (typically 18 AWG for small coffee makers; check label)
Choosing the wrong cord can overheat the wires. Knowing how to replace coffee maker power cord safely starts with selecting the correct cord.

Source: smartgecko.academy
Step-by-step: how to replace coffee maker power cord safely
Follow each step. Short, calm actions reduce mistakes.
- Unplug and cool down
- Unplug the machine and wait until all internal parts are cool.
- Work in a well-lit, dry area
- Place the coffee maker on a stable surface. Avoid damp floors.
- Take photos before disassembly
- Photograph wiring and connector positions. These images help during reassembly.
- Remove the case panels
- Use screwdrivers to remove screws. Keep screws labeled.
- Locate the cord connection
- Find where the cord enters. It may attach to a terminal block, spade connectors, or be hard-wired.
- Verify no voltage present
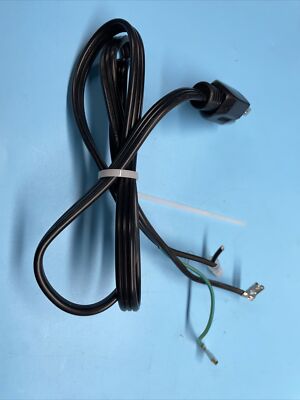
– Use a multimeter to confirm zero voltage between hot and neutral. - Remove the old cord
- Note wire color positions. Detach wires from terminals or cut them if needed.
- Prepare the replacement cord
- Strip wires about 3/8 inch. Slide heat-shrink tubing onto wires before connecting.
- Make secure connections
- Use crimp connectors, properly sized spade terminals, or solder joints. Cover joints with heat-shrink tubing or quality electrical tape.
- Reassemble and secure strain relief
- Ensure the cord sits in the strain relief so pulling the cord won’t tug the internal connections.
- Final test
- With the machine assembled, plug in and test functions. Watch for unusual heat, smoke, or smells. If something seems wrong, unplug immediately.
Following these steps explains how to replace coffee maker power cord safely, with clear, tested actions.

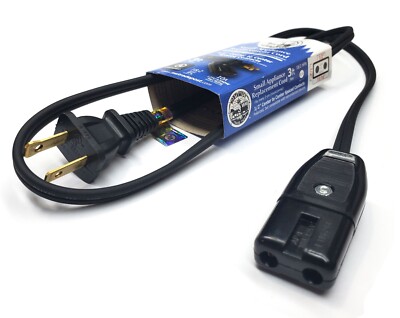
Source: amazon.com
Wiring colors and connector types explained
Know what the wires mean and how they connect.
Common US color codes:
- Black or brown = hot (live)
- White or blue = neutral
- Green or green/yellow = ground (earth)
Connector types: - Spade terminals: common on small appliances
- Terminal block screws: secure with a screw
- Pigtail solder: less common in mass-market units
Match the original wiring exactly. If the coffee maker had no ground wire, check if the metal chassis is double-insulated and rated for two-prong cords. Correct wiring is a core part of how to replace coffee maker power cord safely.
Source: everestkitchennc.com
Testing, safety checks, and what to watch for
Testing is non-negotiable. Confirm safe operation before daily use.
- Continuity test on each conductor with a multimeter
- Insulation resistance check if you have a megohmmeter
- Functional test: power up and observe operation for several minutes
Signs of trouble: - Warm or hot cord near the entry point
- Flickering power or odd noises
- Burning smell or smoke
If any issue appears, unplug immediately and troubleshoot or call a pro. Good testing seals your work when you learn how to replace coffee maker power cord safely.

Source: amazon.com
When to hire a professional and legal limits
Know your limits. Some jobs need a trained electrician or appliance repair tech.
Hire a pro if:
- The appliance uses a sealed, complex control board
- You are not comfortable with wiring
- Local codes require licensed work for appliance cord changes
DIY is fine for simple cords when you follow safe steps. If in doubt, a certified technician removes risk and liability. Prioritize safety when learning how to replace coffee maker power cord safely.

Source: walmart.com
Common mistakes and troubleshooting tips
Avoid these errors I’ve seen in the field.
Common mistakes:
- Using the wrong wire gauge
- Failing to secure strain relief
- Reversing hot and neutral
- Leaving loose connections that heat up
Troubleshooting quick fixes: - Recheck photos if wiring seems off
- Tighten any loose terminal screws
- Swap in a known-good cord to isolate the problem
Learning from mistakes is part of mastering how to replace coffee maker power cord safely.
Personal experience, lessons, and pro tips
I once repaired an espresso maker for a neighbor. A bad cord caused intermittent power and a melted plastic edge. I replaced the cord, secured the strain relief, and tested for 30 minutes. It worked for years after.
Lessons I learned:
- Take photos before you start. They save time.
- Always verify continuity and insulation.
- Use heat-shrink, not just tape, for long-term safety.
A few pro tips: - Label screws and parts as you remove them.
- Keep a small parts kit with wire nuts, crimp connectors, and spare screws.
- Buy a good multimeter; it pays for itself.
These small habits make how to replace coffee maker power cord safely repeatable and reliable.
People also ask (PAA-style)
Q: Can I replace a coffee maker power cord myself?
A: Yes, for simple two- or three-wire cords if you follow safety steps and match ratings. Stop and call a pro for complex electronics or if unsure.
Q: What wire gauge do coffee makers use?
A: Most small coffee makers use 18 AWG, but check the machine label. Heavier or commercial units use thicker wire.
Q: How do I know if a cord is causing the problem?
A: Look for visible damage, test continuity, and try a known-good cord to isolate the fault.
Frequently Asked Questions of how to replace coffee maker power cord safely
How long does it take to replace a coffee maker power cord safely?
A straightforward replacement usually takes 20 to 45 minutes. Complex models or extra testing can add time.
Is it safe to use electrical tape instead of heat-shrink tubing?
Tape can work short-term but heat-shrink gives a neater, more durable, and safer seal. Use heat-shrink where possible.
Do I need to ground the coffee maker when replacing the cord?
If the original cord had a ground wire or the chassis is metal, yes. If it was double-insulated with a two-prong cord, follow the original design.
Can I use any universal replacement cord?
Only use cords that match voltage, amp rating, plug type, and wire gauge. Universal cords often work but confirm specs first.
What if the coffee maker still won’t turn on after replacing the cord?
Unplug and check internal fuses, thermostats, and connections. If basic checks fail, get a professional diagnosis.
Conclusion
Replacing a coffee maker power cord safely is a manageable DIY task when you follow clear steps: pick the right cord, use proper tools, verify wiring, and test thoroughly. Work methodically, document what you do, and stop if anything feels unsafe. Your coffee maker can return to reliable service without risk, and you’ll gain confidence in basic appliance repair. Try these steps on a simple repair, subscribe for more practical guides, or leave a comment with your question or experience about how to replace coffee maker power cord safely.

Liora Pennings is a seasoned chef and kitchen enthusiast with a passion for turning everyday cooking into an effortless experience. With years of hands-on culinary expertise, she specializes in practical techniques, ingredient know-how, and smart kitchen solutions that help home cooks elevate their meals. At KitchFlair.com, Liora shares her best tips, time-saving tricks, and honest product reviews to guide readers toward a more efficient, enjoyable, and inspired cooking routine. Whether you’re a beginner or a seasoned home chef, Liora’s friendly, knowledge-packed insights make every visit to the kitchen a little easier—and a lot more delicious.