How To Test Vacuum Cleaner Capacitor Safely At Home: Guide
Test a vacuum capacitor by unplugging, discharging with a resistor, then using a multimeter or capacitance meter.
I’ve tested dozens of small motors and parts, and I’ll walk you through exactly how to test vacuum cleaner capacitor safely at home. This guide explains what the capacitor does, the tools to use, step-by-step testing, how to read results, and safe replacement tips — all from hands-on experience and clear safety rules. Read on to learn practical checks that save time and keep you safe.

How a vacuum cleaner capacitor works
A vacuum cleaner capacitor stores and releases electrical energy to help the motor start or run smoothly. Many vacuums use a start or run capacitor to give the motor the extra push it needs during startup.
Knowing how a capacitor behaves helps you test it. A good capacitor charges and holds a charge. A bad capacitor may be open, shorted, or have lost capacitance. Testing checks these states and confirms whether the capacitor is the real cause of a power or performance problem.

Safety first: before you test
Safety matters more than speed. Never skip the safety steps when you test vacuum cleaner capacitor safely at home.
Unplug the vacuum and remove the capacitor from the machine before testing. Capacitors can hold a dangerous charge even with power off. Always discharge the capacitor using a resistor rated for the voltage, not by shorting with a screwdriver. Wear eye protection and insulated gloves. Work on a nonconductive surface and keep metal tools away from live circuits.
Tools and parts you'll need
You don’t need a full electronics lab to test vacuum cleaner capacitor safely at home. Gather these basic tools.
- Insulated gloves and safety glasses
- A multimeter with capacitance mode (preferred)
- A separate capacitance meter or LCR meter if available
- A resistor for safe discharge, 10 kΩ 5 W or similar
- Needle-nose pliers and insulated screwdrivers
- Replacement capacitor matching µF and voltage rating
- Camera or phone to photograph wiring before removal

Step-by-step: how to test vacuum cleaner capacitor safely at home
Follow these steps slowly. Each step keeps you safe and gives reliable results when you test vacuum cleaner capacitor safely at home.
- Prepare and document
- Unplug the vacuum. Wait a few minutes for any charge to bleed off.
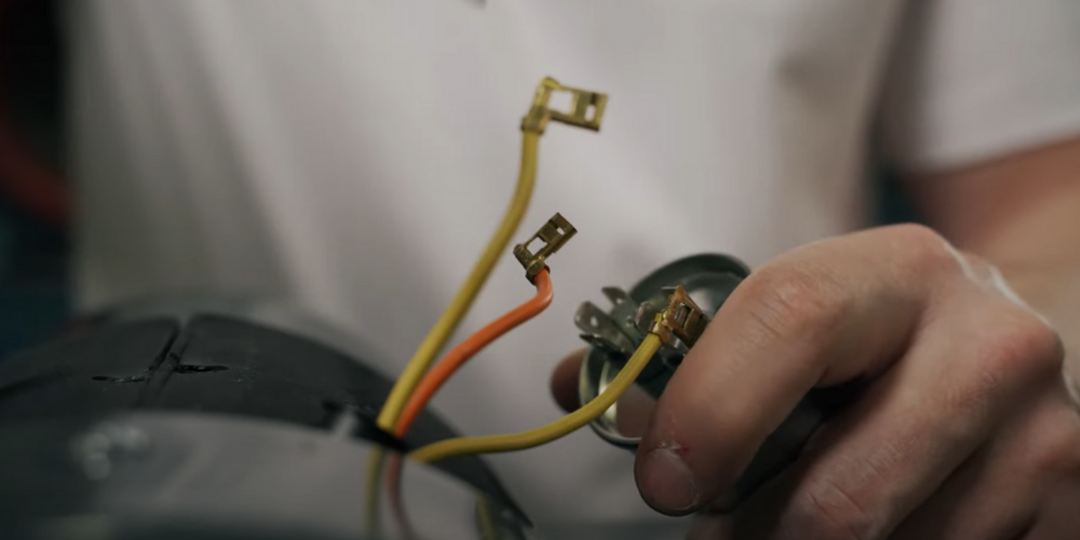
- Take a photo of wiring and connections so you can reinstall correctly.
- Remove the capacitor
- Open the access panel and remove the capacitor. Handle it gently.
- Discharge the capacitor safely
- Connect a 10 kΩ 5 W resistor across the capacitor terminals for 10–20 seconds.
- Use insulated leads and keep hands clear. Confirm with a meter that voltage reads near zero.
- Visual inspection
- Look for bulging, cracks, oil leaks, or burned terminals. Physical damage often means replacement.
- Test with a multimeter (capacitance mode)
- Set the meter to capacitance range.
- Connect meter probes to the capacitor terminals.
- Compare the reading to the label. Tolerance is often ±5% to ±20%. If the reading is far below the labeled µF, the capacitor is bad.
- Test with a multimeter (ohms or resistance) — quick check
- On resistance mode, a charged capacitor shows momentary low resistance that rises toward infinity as it charges through the meter. If it reads as a short (near 0Ω) or permanent open (OL), it’s likely bad.
- ESR or leakage test (advanced)
- If you have an ESR meter, check equivalent series resistance. High ESR indicates failure even if capacitance seems OK.
- Reinstall or replace
- If the capacitor passes tests within tolerance, reinstall it.
- If it fails, replace with a matching part and retest the vacuum.
When you test vacuum cleaner capacitor safely at home, avoid using a screwdriver to discharge the part. That method damages the capacitor and can cause sparks or injury.
Interpreting results and common fault signs
Knowing what the numbers mean helps you decide the next step.
- Capacitance within spec
- Normal: within the labeled µF ± tolerance.
- Action: reinstall and test the vacuum; look elsewhere if issues persist.
- Low capacitance
- Sign: reading well below label.
- Action: replace the capacitor.
- Shorted capacitor
- Sign: near 0Ω on resistance test or the multimeter shows continuous short.
- Action: replace immediately; shorts can cause motor damage.
- Open capacitor
- Sign: no change or OL on resistance and no capacitance reading.
- Action: replace.
- High ESR or leakage
- Sign: failed ESR test or the capacitor heats quickly.
- Action: replace; high ESR can prevent motor starting.
Always cross-check with the vacuum’s symptoms. A motor that hums but won’t start often points to a failed start capacitor. If tests are borderline, err on the side of replacement to protect the motor.

Replacing the capacitor and tips
Replace only with a capacitor that matches both µF and voltage ratings. Motor run capacitors often require high AC voltage ratings. A mismatch can cause failure or hazard.
- Match µF exactly or as close as possible.
- Match or exceed the voltage rating (do not use lower voltage).
- Use motor-grade capacitors (class-rated for AC motor use).
- Secure mounting and tight terminal connections prevent vibration damage.
- Recheck wiring against your photos before powering up.
After replacement, test the vacuum on low supervision. Listen for odd sounds and monitor for smoke or heat. If anything seems off, unplug and recheck.

Common causes and related repairs
Capacitor failure often coincides with other issues. Knowing related faults saves time.
- Worn motor brushes can mimic capacitor problems.
- Bearing or shaft issues can make the motor draw more current and stress the capacitor.
- Power surges or poor wiring can damage capacitors.
- Age and heat degrade capacitors over time.
If replacing the capacitor doesn’t fix the vacuum, inspect the motor, brushes, and power cord next.

Personal experience and lessons
I once replaced a vacuum capacitor for a customer and the machine still hummed. I had overlooked worn brushes. After replacing brushes, the motor ran quietly. Lesson: test related parts too.
Another time I forgot to discharge a capacitor fully and got a painful jolt. Since then I always use a resistor and verify zero volts before touching terminals. This test process is fast when you follow the safety steps.
Common quick questions
Can I test a capacitor while it’s still in the vacuum?
You can do a basic in-circuit test, but readings may be skewed by other components. For accurate results, remove the capacitor first.
Is a cheap multimeter good enough to test vacuum capacitors?
A basic multimeter with capacitance mode works for many caps. For precise checks, use a dedicated capacitance or ESR meter.
How long should a capacitor hold a charge?
A healthy capacitor should hold charge for many seconds when isolated. If it leaks down instantly, it is likely bad.
Frequently Asked Questions of how to test vacuum cleaner capacitor safely at home
What is the safest way to discharge a vacuum capacitor?
Use a resistor rated for the capacitor’s voltage (for example, 10 kΩ 5 W). Connect it across the terminals with insulated leads and wait until the meter reads near zero volts.
How do I know the capacitance value is acceptable?
Compare the measured capacitance to the labeled µF value. If the reading falls outside the labeled tolerance (commonly ±5% to ±20%), consider the capacitor failed.
Can a capacitor cause the vacuum to hum but not start?
Yes. A failing start capacitor can let the motor hum without turning. Testing and replacing the capacitor often fixes this symptom.
What if my multimeter shows odd readings?
Remove the capacitor and retest. In-circuit measurements often give odd readings due to parallel components. If readings still look wrong, use a dedicated capacitance meter or replace the cap.
Is it okay to replace a capacitor with one of slightly higher µF?
Avoid increasing µF significantly. Use the same µF rating or follow manufacturer guidance. The voltage rating can be equal or higher, but µF should match.
How often do vacuum capacitors fail?
Capacitors degrade slowly with heat and age. Many last years, but heavy use or high heat reduces life. Inspect them during routine maintenance.
Conclusion
Testing a vacuum capacitor at home is safe and reliable when you follow clear steps: power down, discharge with a resistor, document wiring, test with the right meter, and interpret results against the label. My practical experience shows that careful testing prevents unnecessary replacements and saves motors from extra damage. Take the safety steps seriously and replace any capacitor that reads out of spec.
Try testing one part at a time. If you’re unsure, replace the capacitor with the correct rating or consult a repair professional. If this guide helped, leave a comment or subscribe for more hands-on repair tips.

Liora Pennings is a seasoned chef and kitchen enthusiast with a passion for turning everyday cooking into an effortless experience. With years of hands-on culinary expertise, she specializes in practical techniques, ingredient know-how, and smart kitchen solutions that help home cooks elevate their meals. At KitchFlair.com, Liora shares her best tips, time-saving tricks, and honest product reviews to guide readers toward a more efficient, enjoyable, and inspired cooking routine. Whether you’re a beginner or a seasoned home chef, Liora’s friendly, knowledge-packed insights make every visit to the kitchen a little easier—and a lot more delicious.