
Replace the belt by removing the base plate, swapping the worn belt, and reassembling the brush roll.
I have spent years repairing and maintaining Kirby vacuums for friends and clients. I know how to replace a belt on a kirby vacuum cleaner from hands-on work with multiple models. This guide walks you through every step, shows common mistakes, and gives tips that save time and money. Read on and you will feel confident fixing your Kirby belt today.

Tools and parts you'll need
You need a few simple tools to replace the belt on a Kirby vacuum.
Gather a flathead screwdriver, Phillips screwdriver, needle-nose pliers, and a replacement Kirby belt.
Have a flashlight and a soft cloth handy to keep parts clean and to spot small screws.

Safety first before you start
Always unplug the vacuum before working on it.
Let the brush roll stop fully and wear gloves to avoid cuts from the brush bristles.
Work on a flat surface and keep small parts in a tray so they don’t roll away.
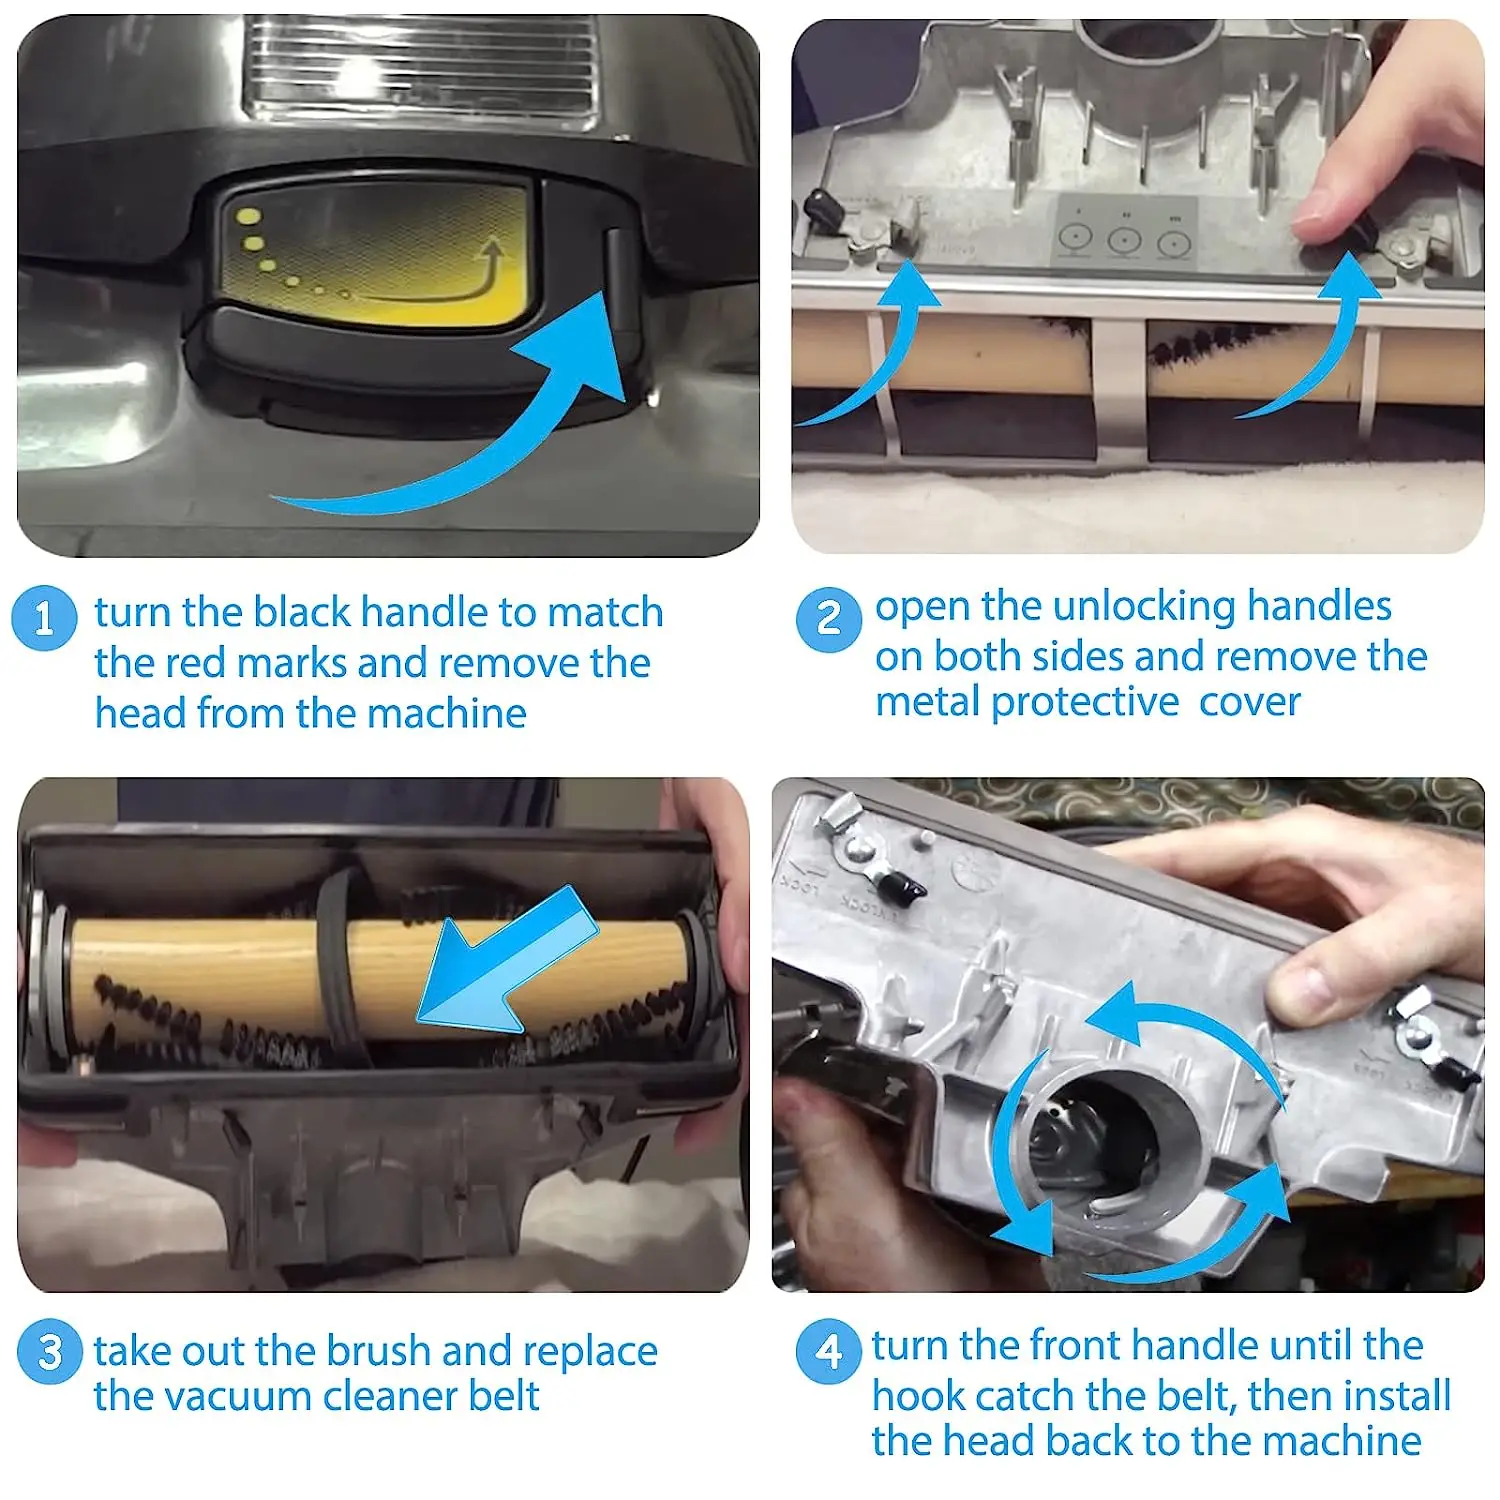
Step-by-step: how to replace a belt on a kirby vacuum cleaner
This step-by-step guide shows how to replace a belt on a kirby vacuum cleaner in clear, easy steps. Follow each step and check fit as you go.
-
Turn off and unplug the vacuum
- Lay the vacuum on its back on a soft towel to protect the housing.
- Confirm the power is disconnected and the brush roll is not moving.
-
Remove the base plate
- Use a Phillips screwdriver to remove the screws holding the base plate.
- Keep the screws in a small container so you do not lose them.
- Lift the base plate away to expose the brush roll and belt.
-
Take out the brush roll
- Slide or lift the brush roll out of its holders depending on your model.
- Note how the brush sits and how the belt wraps around the motor shaft.
- Use a flashlight to inspect the brush bearings for wear.
-
Remove the old belt
- Peel the tired belt off the motor shaft and brush roll.
- If the belt is broken, remove all fragments carefully to avoid debris in the housing.
- Check the belt path and motor pulley for hair or string jams.
-
Install the new belt
- Loop the new belt around the motor shaft first, then around the brush roll.
- Keep the belt smooth and centered on both pulleys to avoid slipping.
- If the belt looks loose, check you have the correct size for your Kirby model.
-
Reinstall the brush roll
- Place the brush roll back into its holders, making sure the belt stays on the pulleys.
- Rotate the brush by hand to confirm smooth movement and correct tension.
- If the brush binds, remove and reseat it, then check belt alignment.
-
Reattach the base plate and test
- Secure the base plate with the screws you removed earlier.
- Stand the vacuum upright, plug it in, and run it briefly to test the brush roll.
- Listen for strange noises and check for smooth brush rotation.
I recommend replacing the belt as soon as you hear slippage or see visible wear. If you follow these steps you will know exactly how to replace a belt on a kirby vacuum cleaner without guesswork.

Common mistakes and troubleshooting when replacing a Kirby belt
Many problems happen from small errors. Here are issues I’ve seen and how to fix them.
-
Incorrect belt size
- Using the wrong belt causes slippage or snapping. Always match the belt to your Kirby model or measure the old belt.
-
Misaligned belt or brush roll
- A crooked belt can wear fast and make noise. Reseat the brush and center the belt on both pulleys.
-
Forgetting to remove debris
- Hair and string in bearings cause the brush to bind. Clean the brush ends and bearings before installing the new belt.
-
Over-tightening or forcing parts
- Forcing the brush roll into place can break holders. Gently align parts and check fit before screwing the base plate down.
If the vacuum still doesn’t pick up after replacing the belt, check the brush motor and suction path. These checks will help you fully resolve drive issues after you learn how to replace a belt on a kirby vacuum cleaner.

Choosing the right replacement belt and maintenance tips
Choosing the correct belt matters for performance. Use these guidelines to select and maintain the belt.
-
How to pick the right belt
- Match belt size or part number to your Kirby model. If unsure, measure the old belt’s length and width.
-
Genuine vs. aftermarket
- Genuine Kirby belts often last longer and fit better. Good aftermarket belts can be cheaper but check reviews and specs.
-
Maintenance tips
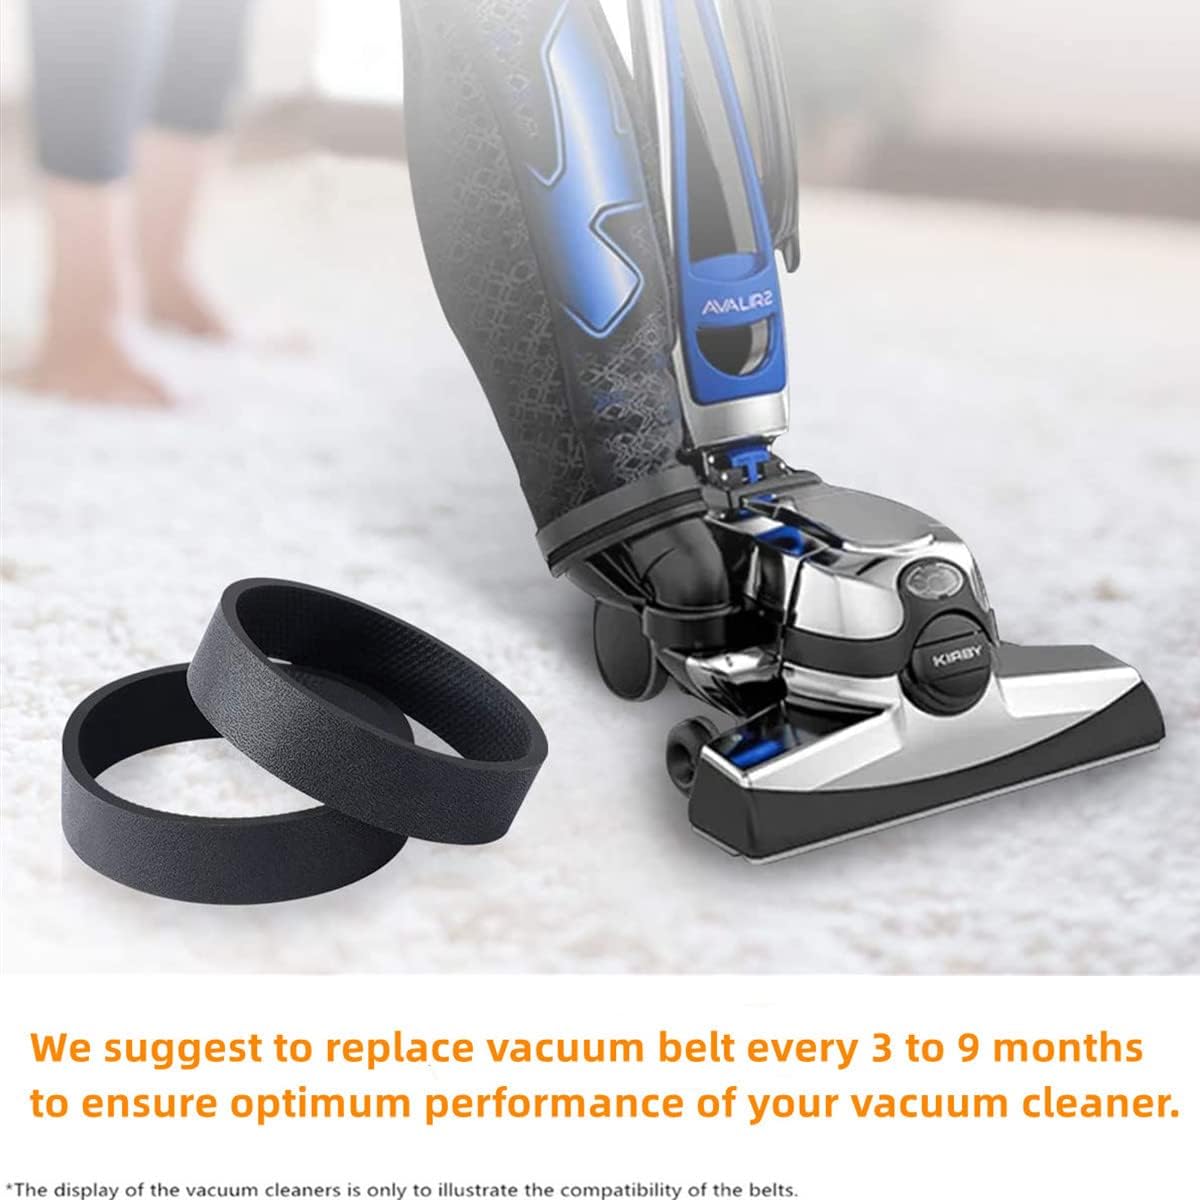
- Clean the brush roll monthly and remove wrapped hair. Inspect the belt every 3 months or at first sign of wear. Store spare belts in a cool, dry place.
Personal tip: I keep one spare genuine belt at home. It saved me time the day my machine failed before guests arrived. Small preparation like that makes the task of how to replace a belt on a kirby vacuum cleaner quick and stress-free.

Signs your belt needs replacement
Recognize early signs so you don’t damage other parts. Common symptoms include:
- Grinding or squealing noise when running the vacuum.
- Brush roll not turning or turning slowly.
- Loss of pickup power on carpets.
- Visible cracks, glazing, or stretching on the belt.
If you notice any of these signs, follow this guide on how to replace a belt on a kirby vacuum cleaner before more parts wear out.
Frequently Asked Questions of how to replace a belt on a kirby vacuum cleaner
How often should I replace the belt on my Kirby?
Replace the belt every 6 to 12 months if you use the vacuum frequently. Inspect it monthly and change it at the first sign of wear or slippage.
Can I use a universal belt for my Kirby vacuum?
You can use a universal belt only if it matches the length and width for your model. A poor fit can cause noise or reduce brush roll performance.
Is it hard to replace a belt on a Kirby vacuum?
No, it is straightforward with basic tools and the right belt. Follow step-by-step instructions and work slowly to avoid mistakes.
What model-specific tips help when replacing the belt?
Check how the brush bearings seat for your specific Kirby model and note screw types. Small layout differences change how you remove the base plate.
Will replacing the belt fix loss of suction?
Replacing the belt fixes brush roll drive issues, not suction blockages. If suction is low, also check the filters, hoses, and bag or canister.
What if the belt keeps breaking after replacement?
If the belt breaks repeatedly, inspect the motor shaft and pulleys for burrs or misalignment. Also ensure you are using the correct belt size and type.
Conclusion
You can replace a Kirby belt quickly and safely if you follow clear steps and use the right parts. Start by unplugging, remove the base plate, swap the belt, and test the brush roll. Regular checks and simple maintenance prevent surprises and keep your Kirby running at peak performance. Try these steps the next time your brush roll slows, and leave a comment below if you run into a snag or want model-specific help.

Liora Pennings is a seasoned chef and kitchen enthusiast with a passion for turning everyday cooking into an effortless experience. With years of hands-on culinary expertise, she specializes in practical techniques, ingredient know-how, and smart kitchen solutions that help home cooks elevate their meals. At KitchFlair.com, Liora shares her best tips, time-saving tricks, and honest product reviews to guide readers toward a more efficient, enjoyable, and inspired cooking routine. Whether you’re a beginner or a seasoned home chef, Liora’s friendly, knowledge-packed insights make every visit to the kitchen a little easier—and a lot more delicious.
Leave a Reply