Patch small tears with flexible tape or heat-shrink, or replace the cuff for major damage.
I’ve repaired dozens of hoses and cleaned homes for years, so I’ll walk you through exactly how to repair vacuum cleaner hose issues step by step. This guide covers diagnosing leaks, choosing the right tools, quick fixes for punctures and cracks, fixes for collapsed or kinked hoses, and when to replace the hose or call a pro. Read on to learn practical, tested methods to restore suction and extend the life of your vacuum hose.

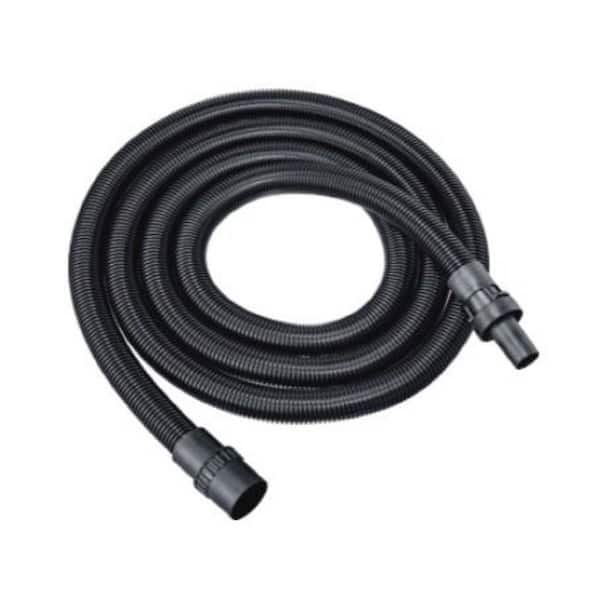
Tools and materials you’ll need
Start with the right tools. Having the proper items saves time and produces a stronger repair when you learn how to repair vacuum cleaner hose failures.
- Utility knife or sharp scissors for trimming damaged ends.
- Rubbing alcohol or mild soap and water for cleaning the surface.
- Flexible repair tape or self-fusing silicone tape for small holes.
- Heat-shrink tubing sized to the hose, or a rubber sleeve and hose clamps.
- Epoxy putty or flexible rubber adhesive for cracks.
- Replacement cuffs, clamps, and hose couplers for torn ends.
- Zip ties and hose clamps for temporary and semi-permanent fixes.
- A spare replacement hose if the damage is beyond repair.
I always keep a small repair kit in my cleaning closet. It saves a service call and often restores full function in under an hour. Knowing what each tool does helps when you decide how to repair vacuum cleaner hose damage.
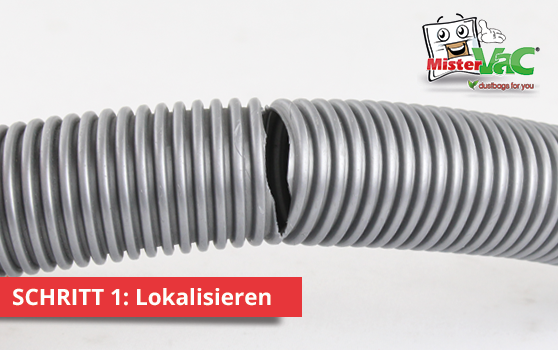
How to diagnose vacuum hose problems
Diagnosing the problem saves wasted effort. Follow these simple checks to find leaks, clogs, and structural damage when you want to know how to repair vacuum cleaner hose properly.
- Listen for whistling or loss of suction while the vacuum runs.
- Run your hand (carefully) along the hose to feel for air escaping.
- Shine a flashlight down the hose to spot tears, crushed sections, or obstructions.
- Remove attachments and test sections separately to isolate the damaged area.
- Submerge short sections in water (while the vacuum is off) to watch for bubbles if you suspect small punctures.
In my experience, many “bad motor” complaints trace back to an obvious hose leak. Identifying the exact location makes the repair straightforward and efficient.
Step-by-step repairs for common issues
Here are clear steps to fix the most common problems and show you how to repair vacuum cleaner hose issues in real homes.
Small punctures and tiny tears
Small holes are the easiest to fix when you learn how to repair vacuum cleaner hose punctures.
- Clean the area with rubbing alcohol and let it dry.
- Wrap self-fusing silicone tape tightly around the hole, stretching the tape as you wind.
- Press firmly and smooth the tape to seal gaps.
- Test the vacuum and re-wrap if needed.
This fix is fast and flexible. I used it on a rental vacuum that served heavy traffic for months and it held strong.
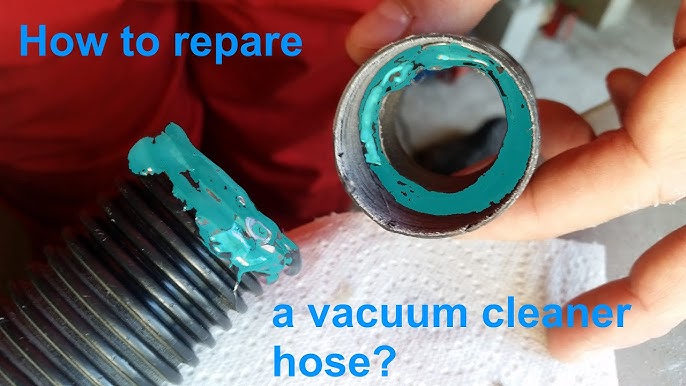
Long cracks or worn sections
Long cracks often need stronger material to stay sealed.
- Trim ragged edges so the surface is smooth.
- Apply flexible rubber adhesive or epoxy putty over the gap and smooth it.
- Let cure per product instructions, then wrap with a reinforcing sleeve or heat-shrink if available.
- Replace the section if stiffness or collapse occurs near the crack.
I once repaired a six-inch crack with epoxy and a sleeve; suction returned to nearly full strength and lasted until I could order a replacement hose.
Collapsed or kinked hose sections
A collapsed hose restricts airflow. Here’s how to repair vacuum cleaner hose collapses.
- Straighten the hose and check if it springs back.
- If soft, insert a rigid sleeve (PVC or a stiff pipe) inside the collapsed area and secure with clamps.
- For long-term repair, replace the ribbed hose with a new one that fits the machine.
- Add outer reinforcement like spiral wire or a clamp to prevent future collapse.
Temporary internal sleeves work well for emergency fixes. For long-term function, replacement is often better.
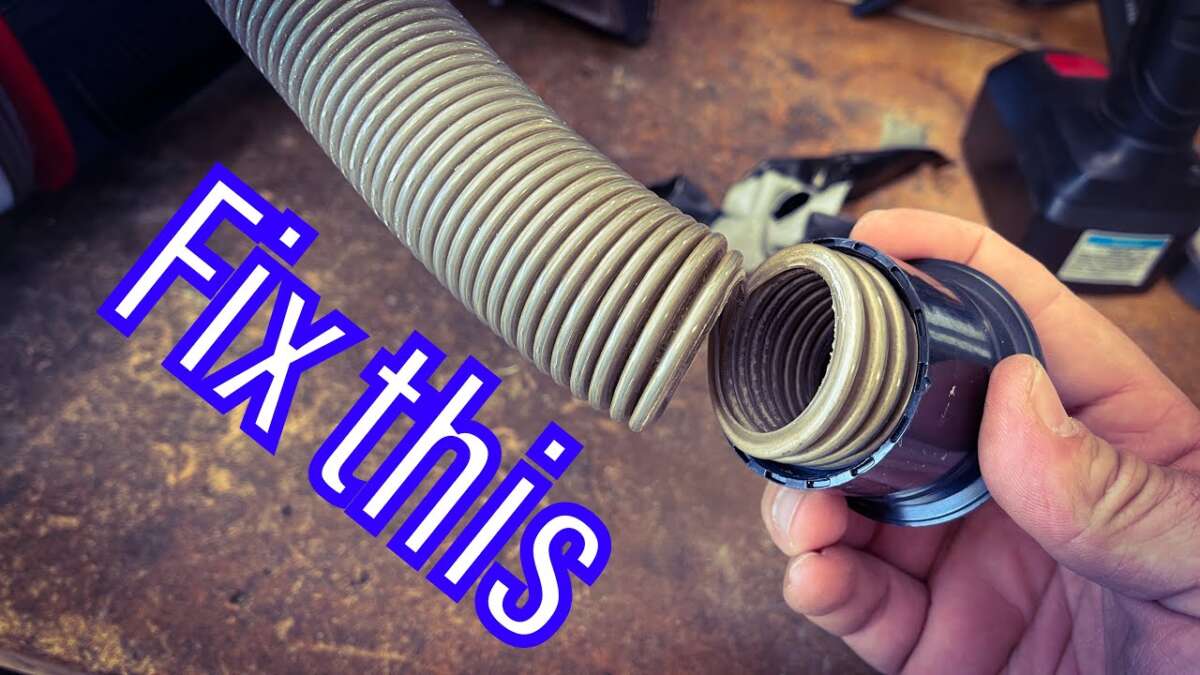
Torn cuff or connection end
A torn cuff causes air leaks at the joints. Fix this when you learn how to repair vacuum cleaner hose connections.
- Cut off the badly damaged cuff squarely.
- Slide on a replacement cuff or use a universal hose coupler.
- Secure with a hose clamp or strong zip tie.
- Ensure a snug fit to maintain suction.
Replacing the cuff is one of the most cost-effective repairs. I’ve replaced dozens of cuffs in less than 15 minutes.
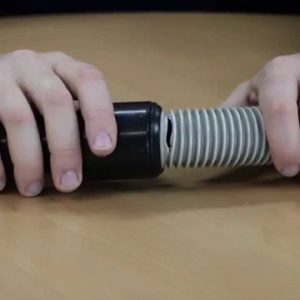
Detached sections or ruptured ribs
If a hose separates or ribs break, you can often splice it.
- Clean and dry both ends.
- Insert a coupler and slide each hose end onto the coupler.
- Tighten clamps and test for leaks.
- If ribs are damaged, reinforce with a sleeve and wrap.
Splicing restores service quickly. It’s a good solution when you want to know how to repair vacuum cleaner hose on the spot.
Tips, common mistakes, and safety
These tips help you repair smarter and avoid common pitfalls when you try to repair vacuum cleaner hose.
- Avoid aggressive adhesives that harden the hose and reduce flexibility.
- Do not use rigid patches on highly flexible hose sections.
- Always unplug the vacuum before inspecting or repairing.
- Test with the vacuum running after repairs to confirm success.
- Replace the hose if multiple repairs are needed or if airflow remains poor.
I learned the hard way that some adhesives make the hose brittle. A flexible product keeps movement and suction intact.
When to replace the hose or call a professional
Knowing when to replace and when to repair prevents wasted effort. Use these signs to decide whether to repair or replace the hose.
- Replace the hose if damage is widespread, ribs are crushed, or multiple cracks exist.
- Call a pro if the vacuum’s motor noise remains abnormal after a hose fix.
- Replace if suction loss persists after a successful-looking repair.
- Consider replacement when repair costs approach the price of a new hose.
I recommend replacing hoses for older vacuums with repeated failures. A new hose restores performance and avoids recurring downtime.

Preventive care to extend hose life
Prevention keeps your hose working longer and reduces the number of times you must learn how to repair vacuum cleaner hose.
- Avoid vacuuming sharp debris and liquids unless hose is rated for wet pick-up.
- Store the hose coiled loosely to prevent kinks and crushed ribs.
- Inspect the hose monthly for wear and early cracks.
- Clean interior clogs with a broom handle or air compressor when safe.
Routine checks can double a hose’s useful life. Small care steps prevent emergency repairs.

Frequently Asked Questions of how to repair vacuum cleaner hose
How do I find a leak when trying to repair a vacuum cleaner hose?
Listen for whistling while the vacuum runs, run your hand along the hose to feel for escaping air, and use a flashlight to inspect tears. Isolate sections by removing attachments to narrow down the location.
Can I use duct tape to repair a vacuum hose?
Duct tape works as a temporary fix but often fails over time because it doesn’t flex well. Use self-fusing silicone tape or a flexible rubber patch for a longer-lasting repair.
How long does it take to repair a vacuum cleaner hose?
Small puncture repairs can take 10–20 minutes, while replacing a cuff or splicing might take 20–60 minutes. Full replacement depends on parts availability and usually takes under an hour.
Is it cheaper to repair or replace a vacuum hose?
Minor repairs are cheap and fast. Replace the hose when damage is extensive or repairs become frequent, as repeated fixes can cost more than a new hose.
Will repairing the hose void my vacuum warranty?
Some manufacturers require original parts and authorized technicians for warranty work. Check the vacuum’s warranty terms before doing permanent repairs.
Conclusion
You can often restore suction and extend the life of your vacuum by following clear steps to diagnose and repair common hose problems. Use flexible tapes and adhesives for small holes, replace cuffs and splice sections for larger damage, and opt for replacement when wear is widespread. Take safety precautions, keep basic tools at hand, and inspect your hose regularly to avoid surprises. Try a repair today, and leave a comment to share your experience or ask a question.

Liora Pennings is a seasoned chef and kitchen enthusiast with a passion for turning everyday cooking into an effortless experience. With years of hands-on culinary expertise, she specializes in practical techniques, ingredient know-how, and smart kitchen solutions that help home cooks elevate their meals. At KitchFlair.com, Liora shares her best tips, time-saving tricks, and honest product reviews to guide readers toward a more efficient, enjoyable, and inspired cooking routine. Whether you’re a beginner or a seasoned home chef, Liora’s friendly, knowledge-packed insights make every visit to the kitchen a little easier—and a lot more delicious.
Leave a Reply