How To Repair Stuck Brew Button On Coffee Maker: Quick Fix
Clean, dry, and gently free the button; clean contacts, lubricate the mechanism, and reset or replace the switch.
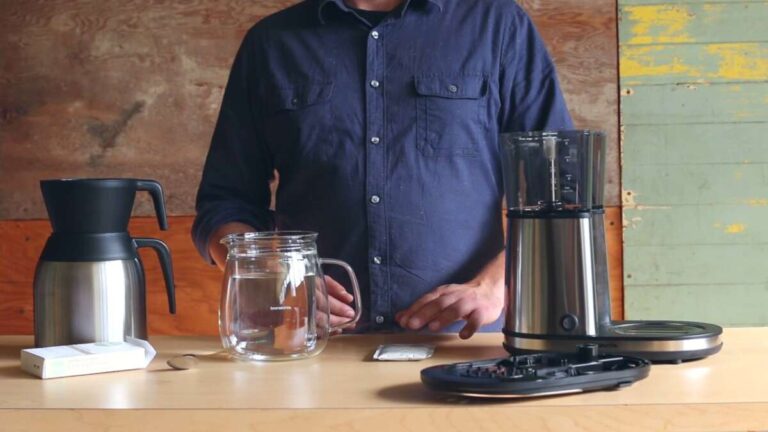
I’ve fixed dozens of coffee makers and I know how frustrating a stuck brew button can be. This guide on how to repair stuck brew button on coffee maker walks you through causes, safety, tools, clear step-by-step repairs, troubleshooting tips, and when to call a pro. You’ll get practical, tested steps that work for most household drip machines, single-serve brewers, and espresso makers. Read on and you’ll be brewing again fast and safely.

Why brew buttons get stuck
Most stuck brew buttons come from simple causes. Coffee grounds, oils, scale, and spilled water build up under the button. Sticky residues and mineral scale can gum up plastic levers and metal switches. Mechanical wear, broken springs, or a misaligned frame also make buttons jam. Electrical faults or a failed micro-switch may mimic a stuck button but need different fixes.
Common reasons at a glance:
- Coffee grounds and oils that harden around the button.
- Mineral scale from hard water seeping into crevices.
- Spilled syrup, milk, or sugary drinks that attract grime.
- Broken plastic tabs, bent levers, or weak springs.
- Faulty micro-switch or internal wiring short.
Understanding the cause helps you choose the right fix. If the problem is grime, cleaning usually solves it. If the switch is dead, you may need to replace it. My experience shows most home fixes are cleaning and simple part swaps.

Tools and safety steps before you begin
Safety first. Unplug the maker and remove water, pods, and filters. Wear gloves and eye protection if you’ll use cleaners. Work on a towel or tray to catch screws and parts.
Essential tools you’ll need:
- Soft cloths and cotton swabs for cleaning.
- Small flathead and Phillips screwdrivers.
- Compressed air can or a small brush.
- Isopropyl alcohol (70% or higher) or food-safe degreaser.
- Food-grade silicone grease or dielectric grease for plastic pivots.
- Small needle-nose pliers and tweezers.
- Multimeter for electrical checks (optional).
Simple safety tips:
- Always unplug the machine before opening it.
- Let hot parts cool fully.
- Avoid getting cleaners on heating elements.
- Take photos while disassembling so you can reassemble easily.
Doing this work carefully lowers the risk of damage. If the machine is under warranty, check terms before opening it.

Step-by-step repair: how to repair stuck brew button on coffee maker
Follow these clear steps. Work slowly and keep parts organized. This approach covers most small and medium problems with stuck buttons.
- Initial checks
- Unplug the machine and empty the reservoir.
- Press the brew button to confirm it is physically stuck, not electronically disabled.
- Look for visible debris or spilled liquids around the button area.
- External cleaning
- Use compressed air to blow away loose grounds and dust.
- Dip a cotton swab in isopropyl alcohol and clean around the button seam.
- Wipe the exterior with a damp cloth and mild detergent, then dry.
- Partial disassembly (if needed)
- Remove the coffee maker’s housing screws. Keep screws in a small container.
- Gently lift the outer shell to access the button assembly.
- Take photos of wire positions and part placement.
- Clean the button mechanism
- Use a small brush and alcohol to clean plastic pivots and contact surfaces.
- For sticky residue, let alcohol soak for a minute before wiping.
- If springs are present, check they are seated correctly and not stretched.
- Lubricate moving parts
- Apply a tiny amount of food-grade silicone or dielectric grease to plastic pivot points and metal levers.
- Avoid lubricating electrical contacts directly. Clean contacts instead.
- Test the switch and wiring
- With the housing reassembled loosely and the machine still unplugged, test button travel manually.
- If you suspect an electrical issue, use a multimeter to check continuity on the switch.
- Replace the switch if it shows open circuit when pressed.
- Reassemble and test
- Refit the housing and tighten screws evenly.
- Plug the machine in and run a plain water cycle to clear any residue.
- Press the brew button multiple times to ensure normal travel and function.
If cleaning and lubrication don’t fix the jam, the internal switch, spring, or plastic housing may be broken and need replacement. Replacing a small switch is often inexpensive and straightforward if you have a soldering iron or a compatible plug-in part.
Personal tip: I once fixed a popular drip brewer by removing a sticky candy spill stuck behind the panel. A cotton swab with alcohol and a small flathead to pop the panel free had it working in 15 minutes. Small patience and good light go a long way.

Troubleshooting and extra tips
If the initial repair fails, try these focused checks. They help pinpoint the problem quickly.
Check for scale or mineral buildup
- Run a descaling cycle with vinegar or a manufacturer-approved descaler.
- Repeat cleaning steps after descaling and test the button again.
If the button is intermittent
- Inspect the switch for corrosion on contacts.
- Clean contacts with a contact cleaner and test continuity.
When the button feels soft or loose
- Springs or plastic catches may be worn.
- Replace the worn part. Small plastic clips often break from repeated use.
If the machine won’t power on
- Verify power at the outlet and check the power cord for damage.
- Test the internal fuse or thermal cutoff if accessible.
Avoid these common mistakes
- Don’t pour water into the machine while open or plugged in.
- Don’t use WD-40 or heavy oils on plastic parts—they attract dirt.
- Don’t force parts back into place; note orientation first.
A real-world trick: keep a small brush and a can of compressed air by your coffee station. A quick monthly clean stops grime from building and prevents stuck brew buttons.

When to call a pro or replace the machine
Some issues are best handled by a technician or mean it’s time for replacement. Consider professional help if any of these apply:
- The machine is under warranty — opening it may void coverage.
- The wiring or heating element looks burnt or scorched.
- You find a complex PCB failure or a sealed component that needs factory tools.
- Repair costs approach the price of a new machine.
Replacing parts may be cheap for many models. For older or low-cost makers, replacement can be more cost-effective than labor. If safety is in doubt, call a certified appliance repair person. My rule: fix simple mechanical jams yourself; get help for electrical faults.
Quick PAA-style questions
Q: Will vinegar fix a stuck brew button?
A: Vinegar helps remove mineral scale but won’t remove sticky oils. Clean the button directly and use alcohol for greasy residues.
Q: Can I use WD-40 on a button?
A: Don’t use WD-40 on plastic pivots. It attracts dirt and may damage plastics. Use food-grade silicone or dielectric grease instead.
Q: How long does this repair take?
A: Most cleaning and basic fixes take 15–45 minutes. Switch replacement may take 30–60 minutes depending on access.

Frequently Asked Questions of how to repair stuck brew button on coffee maker
What is the first thing I should do if my brew button is stuck?
Unplug the coffee maker and empty the reservoir. Inspect the button area for visible debris, then try compressed air and a cotton swab with alcohol to clean the seam.
Can I fix a stuck brew button without tools?
Yes. Many sticky buttons clear with compressed air, a cloth, and isopropyl alcohol. More stubborn jams will need a screwdriver and basic tools.
Is it safe to disassemble my coffee maker?
It is safe if you unplug it and follow simple precautions. Avoid touching heating elements and take photos of parts before reassembly to avoid mistakes.
How do I know if the problem is electrical, not mechanical?
If the button moves freely but the unit does not respond, it’s likely electrical. Use a multimeter to test the switch or seek a technician if you’re not comfortable.
How often should I clean my coffee maker to prevent stuck buttons?
A light wipe around buttons weekly and a descaling cycle every 1–3 months (depending on water hardness) prevents buildup and sticky buttons.
Conclusion
Cleaning, careful inspection, and simple part checks will solve most issues with how to repair stuck brew button on coffee maker. Start with safety, use the right tools, and work slowly. If you run into electrical faults or warranty issues, seek professional help. Try the steps outlined here and you’ll likely save time and money while learning useful repair skills. If this helped you, try a quick clean on your machine today, share your results, or leave a comment with your model and issue for tailored advice.

Liora Pennings is a seasoned chef and kitchen enthusiast with a passion for turning everyday cooking into an effortless experience. With years of hands-on culinary expertise, she specializes in practical techniques, ingredient know-how, and smart kitchen solutions that help home cooks elevate their meals. At KitchFlair.com, Liora shares her best tips, time-saving tricks, and honest product reviews to guide readers toward a more efficient, enjoyable, and inspired cooking routine. Whether you’re a beginner or a seasoned home chef, Liora’s friendly, knowledge-packed insights make every visit to the kitchen a little easier—and a lot more delicious.