How To Repair Coffee Maker Water Reservoir Crack: Quick Fix
Use food-safe epoxy or plastic welding to seal small reservoir cracks quickly and safely.
I’ve fixed dozens of coffee machines and teach people how to repair coffee maker water reservoir crack with clear, practical steps. This guide lays out how to diagnose the damage, pick the right materials, and perform safe repairs that last. Read on to save your brewer and avoid unnecessary replacements.

Why water reservoirs crack and when repair makes sense
Cracks form from stress, heat cycles, impact, or poor plastics. Hard water and sediment can hide small hairline cracks until they leak. Repair makes sense when the crack is small, the plastic is not warped, and parts are still available for your model. If the reservoir is brittle, contaminated, or structurally damaged, replacement is safer.

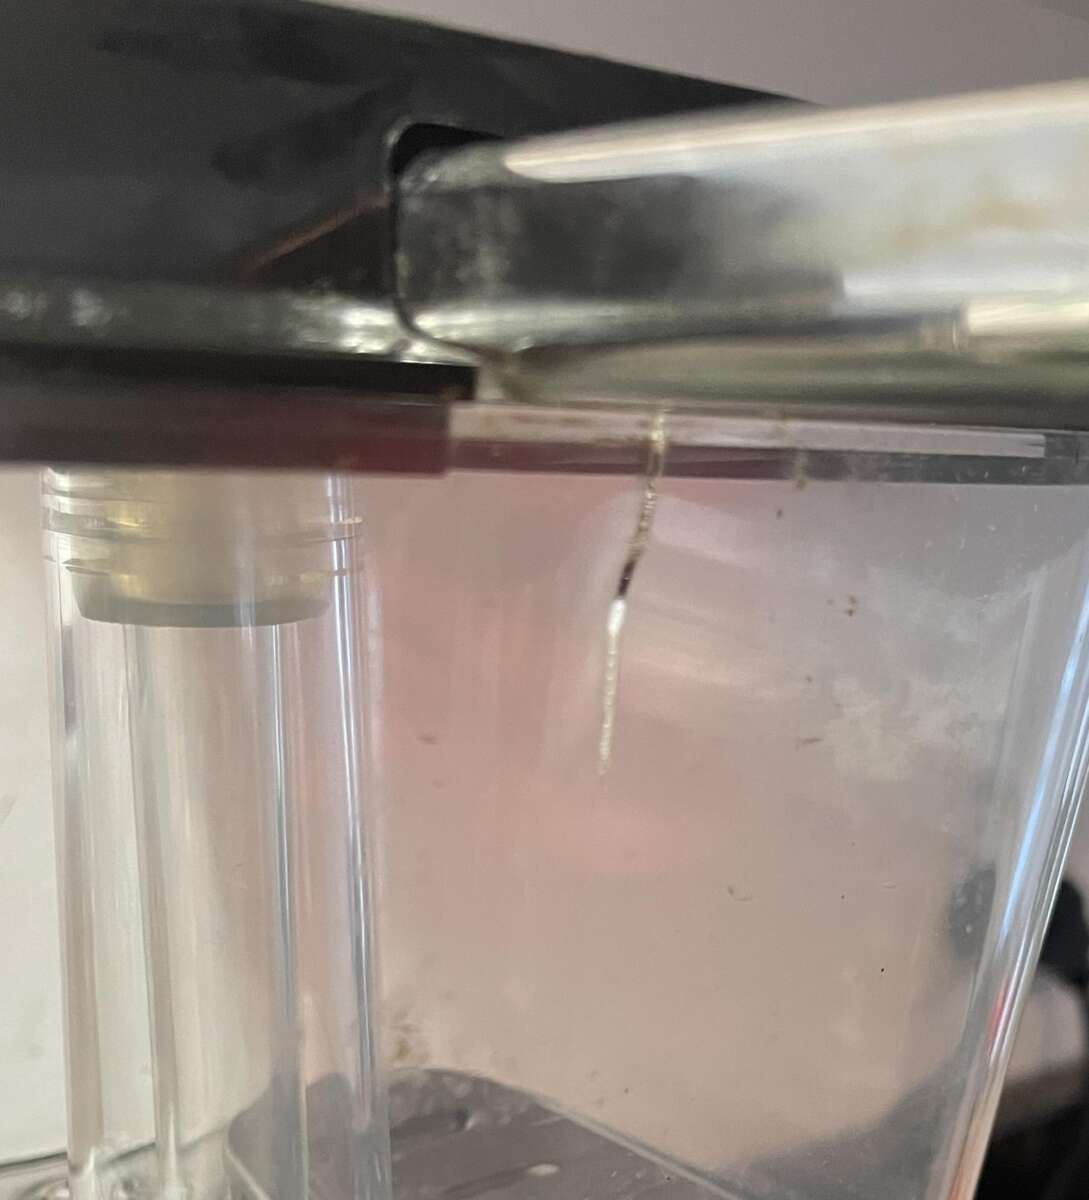
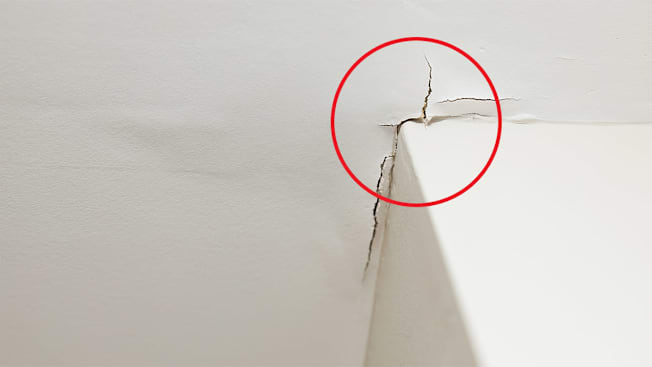
Assessing the crack: size, location, and leak test
Start clean. Empty and rinse the reservoir. Dry it and inspect under good light for hairline cracks or stress rings. Fill with water and look for slow drips. Mark the crack with a pen and measure length. If the crack is under a molded seam, near a valve, or passes through a mounting point, the repair is harder and may fail. If the crack is less than 1.5 inches and the plastic is the same material on both sides, repair is usually possible.
.jpg)
PAA-style quick questions
What counts as a repairable crack?
Small surface cracks or splits less than about 1.5 inches that don't affect mounts or valves are usually repairable.
How do I find a hairline leak?
Dry the reservoir and run a light along it while a friend slowly fills the tank; water will show or form beads where the crack is.
Is it safe to use epoxy on my coffee maker?
Use food-safe, waterproof epoxy labeled for potable water and follow cure time exactly to keep it safe.

Tools and materials you’ll need
Collect everything before you start:
- Food-safe epoxy or two-part polyurethane epoxy rated for potable water.
- Food-grade silicone sealant (for non-structural sealing).
- Plastic welding kit or soldering iron with a plastic welder tip (optional for durable fixes).
- Isopropyl alcohol, rags, fine sandpaper (220–400 grit), and a marker.
- Clamps or tape to hold parts while curing.
- Replacement reservoir or reservoir gasket if repair won’t work.
Using proper materials makes the repair safe for drinking water and long lasting.
Source: keurig.com

Step-by-step: repairing with food-safe epoxy
This is the simplest option for most DIYers and works well for small to medium cracks.
- Clean and dry the area. Wipe with isopropyl alcohol and let dry fully.
- Sand lightly around the crack to give the epoxy a key. Wipe off dust.
- Mix epoxy per instructions. Use only the amount you can apply before it sets.
- Apply epoxy over and slightly beyond the crack using a small spatula or toothpick. Smooth it flat.
- Support the reservoir so the epoxy stays in place. Use tape or clamps if needed.
- Let cure the full time listed by the manufacturer before water testing.
- Test by filling and watching for leaks. If it holds, run a full cleaning cycle before brewing.
Epoxy is best for cracks in flat or gently curved areas. It creates a rigid patch that resists pressure.
Step-by-step: plastic welding for a stronger fix
Plastic welding bonds plastic to plastic. It is stronger and more permanent than epoxy for many plastics.
- Identify plastic type if possible—look for recycling codes. Welding works best on polypropylenes and similar plastics.
- Clean and sand the area. Heat a small plastic welding rod to match the reservoir material.
- Melt a thin bead into the crack from the inside out. Work slowly and keep the weld smooth.
- Build up slightly beyond the surface for strength, trim any excess once cooled.
- Re-sand smoothly and test with water.
Plastic welding needs practice. If you are unsure, practice on scrap plastic first to avoid making the crack worse.

Using food-grade silicone and tape for temporary fixes
For emergency or temporary fixes, food-grade silicone can stop small leaks until a proper repair is done.
- Clean and dry the area well.
- Apply a bead of food-grade silicone over the crack. Smooth it and let it cure fully.
- For better support, apply a strip of waterproof tape over the silicone, then another silicone layer.
- Replace with a permanent repair or reservoir soon; silicone repairs are not as strong under repeated heat cycles.
This method is quick and low-cost. Use it when you need the brewer to work for a short time.

When to replace the reservoir instead of repairing
Replace when:
- The crack is long, runs across molded seams, or near mounting points.
- Plastic is brittle, discolored, or contaminated with mold or mineral buildup.
- The cost or effort of repair exceeds a replacement part price.
- The reservoir is glued or bonded in place and cannot be removed.
Replacement is often safer and cleaner long-term. Check manufacturer parts or third-party replacements for compatibility.
Source: consumerreports.org
Preventive maintenance to avoid future cracks
Simple care prevents many cracks:
- Use filtered water to reduce mineral stress.
- Empty and dry the reservoir if you won’t use the machine for days.
- Avoid tapping or dropping the tank when cleaning.
- Descale on the schedule recommended by the maker.
- Store the machine away from direct sunlight and heat to prevent plastic fatigue.
These habits extend reservoir life and cut repair needs.
Cost, time, and expected lifespan after repair
Expect these rough ranges:
- Epoxy repair: $10–$25 in materials, 1–4 hours including cure time, lasts months to years depending on stress.
- Plastic welding: $20–$60 for kit or tool access, 1–3 hours, often a multi-year fix if done well.
- Temporary silicone fix: under $10, quick cure, lasts weeks to months.
If you value reliability, a good repair or replacement is cheaper than frequent fixes.
Personal experience, tips, and common mistakes to avoid
I once repaired three different brewer reservoirs using epoxy and a welding tip. The epoxy jobs held well when the crack was outside stress points. The welding fix lasted the longest but took practice. Key tips from my experience:
- Always test with water before trusting a fix.
- Don’t rush the cure time—failed cures mean leaks.
- Match repair method to plastic type when you can.
Common mistakes include skipping surface prep, using non-food-safe products, and repairing near moving parts. Follow each step and you’ll save time and money.
Frequently Asked Questions of how to repair coffee maker water reservoir crack
What is the safest material to use for repair?
Use food-safe, potable-water-rated epoxy or approved plastic welding methods. These avoid contamination and hold under heat.
Can I use household glue or superglue?
No. Many common glues are not waterproof or food-safe and will fail when heated or in contact with water.
How long does a repair take before I can use the machine?
Cure times vary; epoxies can take 1–24 hours. Always follow the product cure instructions and do a water test before brewing.
Will repairs affect coffee taste or safety?
If you use food-safe materials and rinse the reservoir after curing, repairs should not change taste or safety. Avoid non-food-grade products.
Can every reservoir be removed for repair?
Not always. Some reservoirs are built into the body. If removal is hard, replacement or professional repair may be better.
Conclusion
You can often fix a leaky tank yourself by learning how to repair coffee maker water reservoir crack with the right tools and safe materials. Start by assessing the damage, pick a method that fits the plastic and the crack size, and follow curing and testing steps carefully. Take action today: try a safe epoxy patch or practice plastic welding on scrap before tackling the reservoir. If you’re unsure, get a replacement or professional help. Share your repair story below or subscribe for more hands-on coffee machine guides.

Liora Pennings is a seasoned chef and kitchen enthusiast with a passion for turning everyday cooking into an effortless experience. With years of hands-on culinary expertise, she specializes in practical techniques, ingredient know-how, and smart kitchen solutions that help home cooks elevate their meals. At KitchFlair.com, Liora shares her best tips, time-saving tricks, and honest product reviews to guide readers toward a more efficient, enjoyable, and inspired cooking routine. Whether you’re a beginner or a seasoned home chef, Liora’s friendly, knowledge-packed insights make every visit to the kitchen a little easier—and a lot more delicious.