How To Clean Vacuum Cleaner Motor Fan Blades Safely: Tips
Clean the motor fan blades by powering off, removing the cover, and gently wiping blades with a soft brush and cloth.
I write and repair vacuums for home users and pros. I’ll walk you through how to clean vacuum cleaner motor fan blades safely with clear steps, safety tips, and real-world tricks I’ve learned on the bench. Follow this guide and you’ll protect the motor, keep suction strong, and avoid costly repairs.

Why cleaning motor fan blades matters
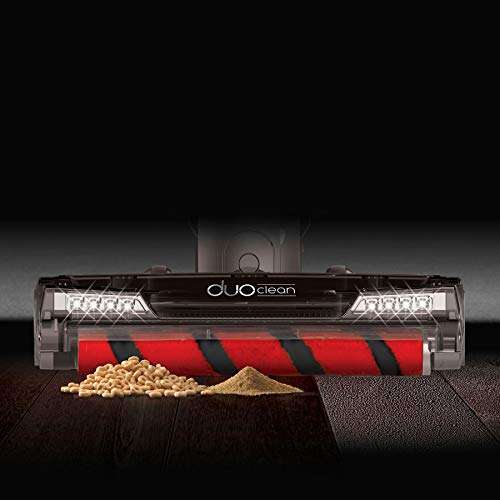
Dirty motor fan blades reduce airflow and cause the motor to work harder. Over time, hair, dust, and sticky debris unbalance the fan and raise temperatures. Cleaning helps restore efficiency, extends motor life, reduces noise, and prevents overheating.
Key benefits of cleaning motor fan blades
- Restores airflow and suction quickly.
- Reduces motor strain and lowers energy use.
- Prevents long-term damage and costly repairs.
- Reduces odors and dust recirculation.
I learned this after fixing a client’s burnt motor that had hair-wrapped fan blades. A simple cleaning would have saved the motor. Regular care is cheaper than replacement.

Safety first: tools, precautions, and checks
Safety matters when you learn how to clean vacuum cleaner motor fan blades safely. Always treat the motor as an electrical device and take these precautions.
Essential safety checklist
- Power off and unplug the vacuum. Remove the battery if cordless.
- Work in a well-lit, ventilated area. Place a towel or tray to catch debris.
- Wear gloves and safety glasses to protect from sharp edges and dust.
- Have basic tools ready: screwdriver set, soft brush, microfiber cloths, canned air or hand pump, mild detergent, and rubbing alcohol.
Before you start
- Check the user manual for model-specific steps and warranty notes.
- Note how parts fit together. Take photos with your phone as you disassemble.
- If the motor is hot after use, wait at least 30 minutes to cool.
I always photograph my steps when I open a motor housing. It makes reassembly much easier and avoids mistakes.

Step-by-step: how to clean vacuum cleaner motor fan blades safely
Follow these steps slowly and carefully. Read through the whole list before you begin.
-
Prepare the vacuum
- Unplug the vacuum and remove the dust bin, filters, and brush roll.
- Work on a clean surface and lay out small parts in order.
-
Open the motor housing
- Remove screws or clips that hold the housing. Keep screws in a small container.
- Gently lift the housing. Avoid pulling wires. If wires are clipped, note their position.
-
Inspect the fan and motor area
- Look for hair, string, and trapped debris. Note any broken blades or signs of burning.
- If the motor smells strongly of burned windings or you see melted plastic, stop and consult a professional.
-
Remove loose debris
- Use a soft brush to sweep away dust and hair from the blades and surrounding area.
- Use canned air or a hand bulb pump to blow out particles. Keep the can upright and short bursts only.
-
Clean the fan blades
- Lightly dampen a microfiber cloth with water or a 50/50 mix of water and rubbing alcohol.
- Wipe each blade gently. For sticky grime, use a soft brush with mild dish soap and water, then wipe dry.
-
Deep clean tight spots
- Use cotton swabs or a small paintbrush to clean the blade roots and hub.
- Avoid inserting tools into the motor bearings.
-
Check bearings and shaft
- Spin the fan by hand to feel for roughness. A smooth, quiet spin is normal.
- If the fan rubs or makes grinding noises, the bearing may need replacement.
-
Reassemble and test
- Reattach the housing and any covers, replacing screws in their original spots.
- Reinstall filters and the dust bin. Plug in and run the vacuum for a short test at low power.
- Listen for unusual noise or vibration. If all sounds normal, the cleaning worked.
Practical tip: Use gentle pressure. Fan blades are fragile and misalignment causes vibration.

Deep cleaning, stubborn grime, and minor repairs
Some vacuums need more than a routine wipe. Here’s how to handle tougher problems while staying safe.
Removing sticky residue
- Apply a small amount of isopropyl alcohol to a cloth. Rub carefully and dry immediately.
- For gummy gunk, use a soft toothbrush with mild soap and rinse cloth often.
Dealing with hair and string
- Cut wrapped hair into short lengths with scissors and pull them out.
- Avoid yanking, which can bend blades or pull on the motor shaft.
When to replace parts
- Replace cracked or bent blades. Even small bends cause imbalance.
- Replace bearings if you hear grinding or if the fan won’t spin freely.
- If the motor shows burning, smoking, or strong smell, stop and seek a professional repair.
I once cleaned a fan with a bent blade that still looked fine. The vibration persisted until the blade was replaced. Small defects matter.

Maintenance schedule and tips to prevent buildup
Preventive care saves time and money. Here’s a simple routine to keep your motor fan clean.
Monthly tasks
- Empty the dust bin after each use.
- Check the brush roll and remove hair.
Every 3 months
- Clean or replace filters as recommended by the manufacturer.
- Inspect the intake and hose for blockages.
Every 6–12 months
- Open the housing and check the motor fan blades.
- Clean blades and inspect bearings and wiring.
Every year or when symptoms appear
- Have a professional service the motor if you detect reduced suction, burning smells, or loud noise.
Small habits that help
- Use a prefilter bag for heavy dust work.
- Avoid vacuuming thick strings, construction debris, or wet messes unless the vacuum is built for it.
- Use correct attachments to reduce stress on the motor.

Common mistakes to avoid
Avoid these errors when you learn how to clean vacuum cleaner motor fan blades safely.
- Do not run the vacuum with housing open. It exposes you to the spinning fan.
- Do not use water directly on the motor or electrical components.
- Do not force parts during disassembly. Forced parts break easily.
- Do not ignore odd smells or sounds; they signal issues that get worse fast.
- Do not assume all vacuums dismantle the same way. Check the manual first.
From experience, the most common mistake I see is using a screwdriver without noting screw sizes. Label screws by step to avoid mixups.

Frequently Asked Questions of how to clean vacuum cleaner motor fan blades safely
How often should I clean the motor fan blades?
Clean the fan blades every 6–12 months for most homes. Clean sooner if you vacuum pet hair often or use the machine heavily.
Can I use water to clean the fan blades?
Only use water on the fan blades when the motor is removed and kept dry from electrical parts. Use damp cloths and dry thoroughly before reassembly.
Is it safe to clean the motor fan blades myself?
Yes, if you follow safety steps: unplug the vacuum, remove the battery, and avoid touching windings or bearings. Stop and get professional help if you see burning or damaged parts.
What if the fan blades are bent or broken?
Bent or broken blades should be replaced to restore balance and prevent motor damage. Running with damaged blades causes vibration and quicker wear.
Will cleaning the motor fan blades improve suction?
Yes. Cleaning restores airflow, which often improves suction and reduces motor effort. It is one of the most effective DIY fixes for low suction.
How do I know if the bearings are bad?
Bad bearings cause grinding, wobble, or a fan that won’t spin freely by hand. If you suspect bearing failure, replace them or consult a repair shop.
Conclusion
Keeping the fan clean is one of the best ways to protect a vacuum’s motor and keep suction strong. Follow the safety checklist, work slowly, and use gentle cleaning methods. Schedule routine checks and tackle small issues early to prevent bigger repairs. Try these steps on your next maintenance day, and leave a comment or subscribe to learn more cleaning and repair tips.

Liora Pennings is a seasoned chef and kitchen enthusiast with a passion for turning everyday cooking into an effortless experience. With years of hands-on culinary expertise, she specializes in practical techniques, ingredient know-how, and smart kitchen solutions that help home cooks elevate their meals. At KitchFlair.com, Liora shares her best tips, time-saving tricks, and honest product reviews to guide readers toward a more efficient, enjoyable, and inspired cooking routine. Whether you’re a beginner or a seasoned home chef, Liora’s friendly, knowledge-packed insights make every visit to the kitchen a little easier—and a lot more delicious.