How To Repair Vacuum Cleaner Internal Wiring Burnt Issue: A
Fix burnt internal vacuum wiring by isolating power, removing charred sections, and splicing new insulated wires correctly.
I have spent years repairing home appliances, and I know how scary a burnt smell from a vacuum can be. This guide explains how to repair vacuum cleaner internal wiring burnt issue in clear steps. I will walk you through diagnosis, safety, tools, step-by-step repair, testing, and long-term prevention. You will get practical tips from real repair work and learn what to do and what to avoid when handling a vacuum cleaner with damaged internal wiring.
Why vacuum cleaner internal wiring burns
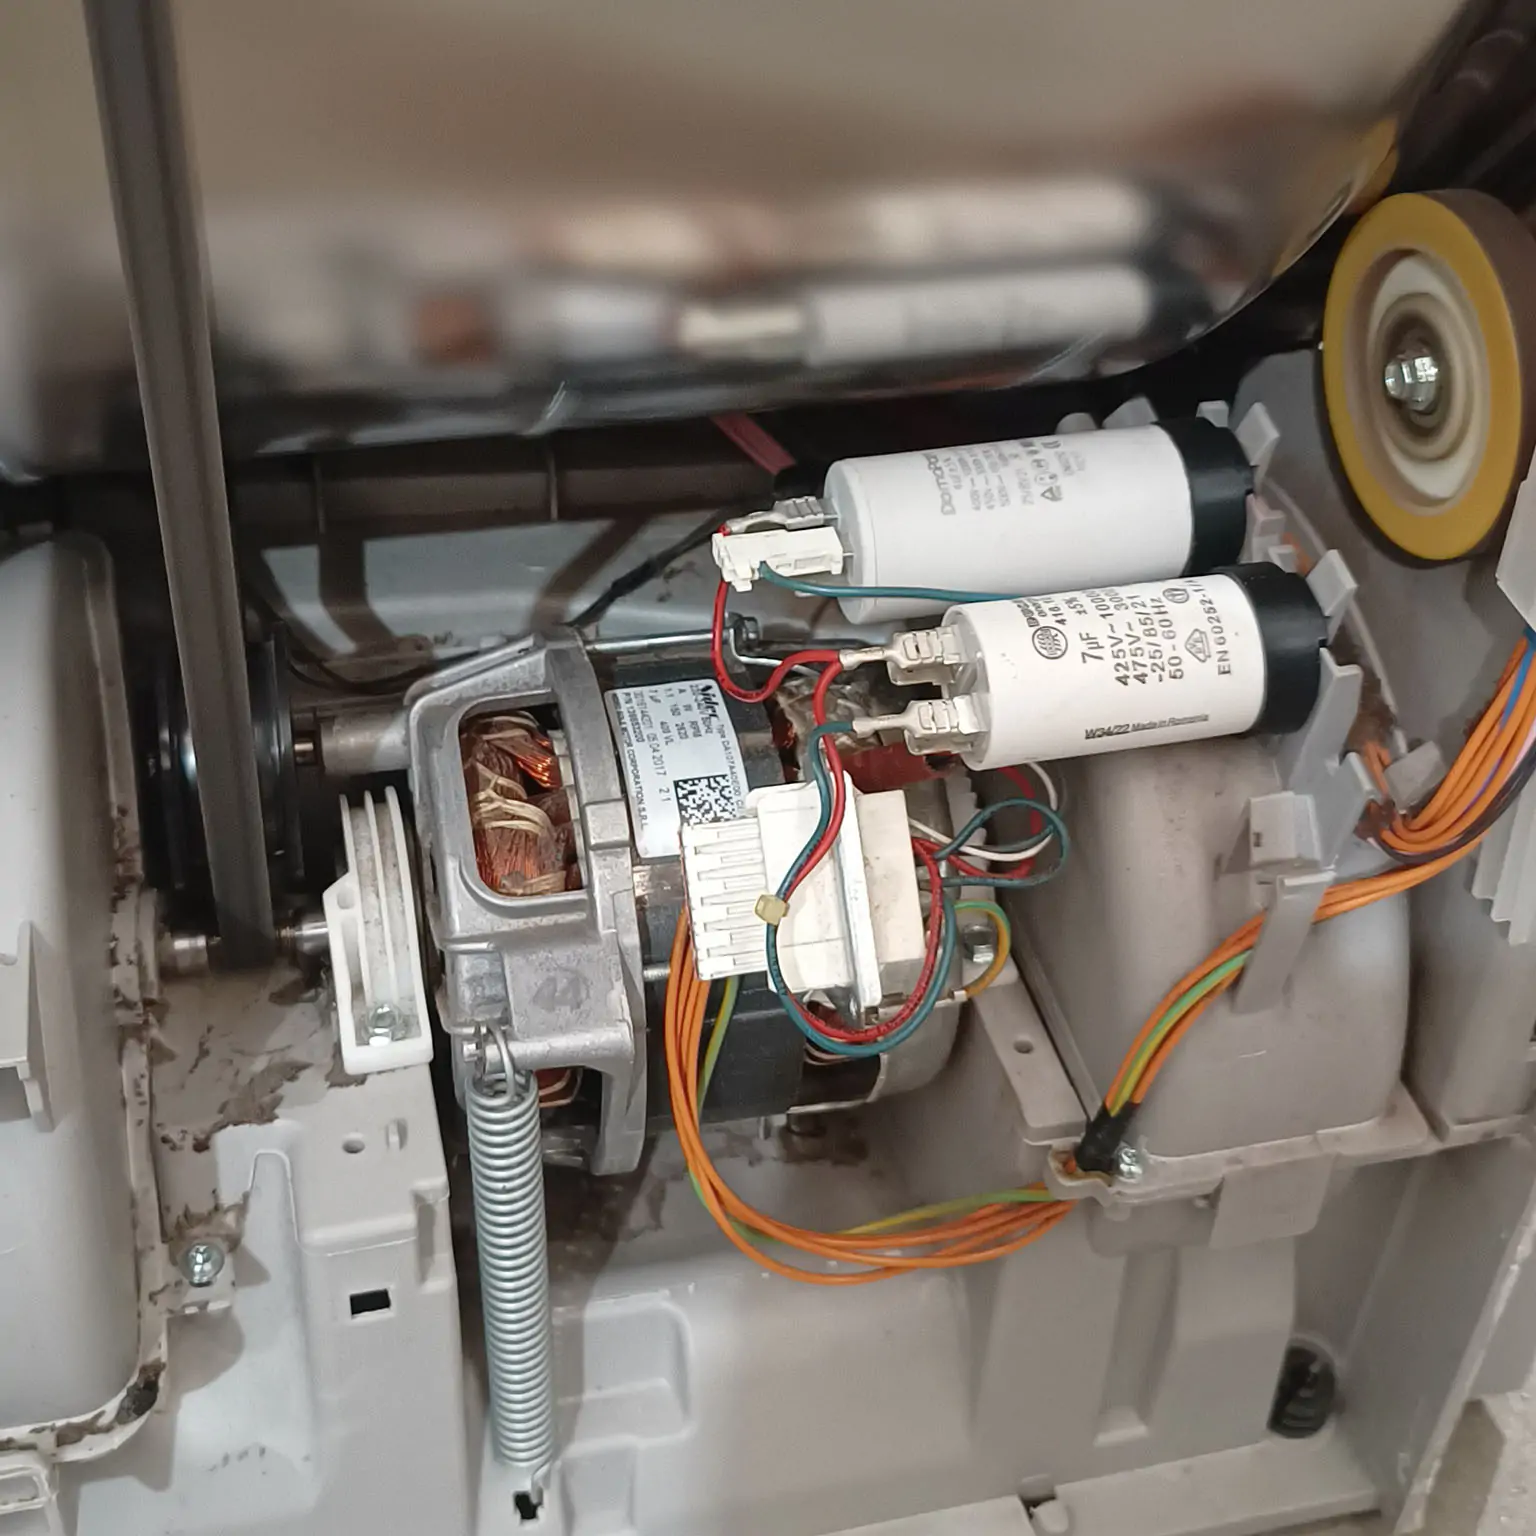
Wiring in a vacuum can burn from heat, short circuits, or loose connections. Overheating happens when the motor draws excess current. A jammed brush roll or blocked airflow makes the motor work harder. Old insulation breaks down with age and vibration.
Common causes include:
- Motor overload that raises wire temperature.
- Loose terminal or plug connections that cause arcing.
- Rodents or wear that expose wires to shorts.
- Poor repairs or wrong gauge wire used previously.
Understanding the cause helps you fix it safely. If you want to repair vacuum cleaner internal wiring burnt issue, start by finding the burn source. I once fixed a unit where a loose terminal under the cord clamp caused repeated burns. Tightening and replacing the clamp ended the problem for good.

Safety first: isolate and inspect
Never work on a plugged vacuum. Unplug and remove the bag or canister. Wait for the motor to cool. Use personal protective equipment: safety glasses and insulated gloves.
Inspection steps:
- Unplug and open the housing per the manual.
- Smell and look for burn marks, melted insulation, or charred plastic.
- Check the cord entry, switch, motor terminals, and filter areas.
If the motor windings are burnt and black, the motor may need replacement instead of wiring repair. If you find heavy soot inside, get a professional opinion. When in doubt, stop and seek expert help. This limits risk and saves money.

Tools and parts you need
Use the right tools. Cheap tools can make a repair unsafe.
Essential tools:
- Multimeter for continuity and voltage checks.
- Wire strippers and a quality crimping tool.
- Heat-shrink tubing and a heat gun or lighter.
- Soldering iron and rosin-core solder (optional for stronger joints).
- Insulated screwdrivers and needle-nose pliers.
Recommended parts:
- Replacement wire of the correct gauge (check the vacuum specs).
- New terminal connectors and spade lugs.
- High-temperature adhesive or silicone for strain relief.
- Replacement cord or switch if damaged.
Using proper wire gauge and high-temp insulation matters. I learned this the hard way after a repair failed because the spliced wire was too thin. Always match the original wire rating when you repair vacuum cleaner internal wiring burnt issue.

Step-by-step repair guide
This section covers how to repair vacuum cleaner internal wiring burnt issue with hands-on steps. Keep each step short and methodical.
- Remove power and open the unit
- Unplug the vacuum. Remove bag or filter. Unscrew the housing carefully.
- Document wire layout
- Take photos or draw a quick diagram. This makes reassembly easy.
- Locate burnt sections
– Identify charred insulation, melted connectors, or black soot. - Cut out damaged wire
- Cut back to clean insulation. Remove more if insulation is brittle.
- Prepare replacement wire
- Cut new wire to length. Strip 1/4 inch insulation from ends.
- Make secure connections
- Use crimp connectors or solder joints. If you solder, also crimp for mechanical strength.
- Insulate with heat-shrink tubing
- Slide tubing over joint before connecting. Heat to shrink snugly.
- Reapply strain relief
- Ensure cord clamp or grommet is tight. Loose strain relief causes future wear.
- Reassemble and inspect
- Check routing so wires do not rub on sharp edges or hot parts.
Safety checks while doing the repair:
- Use the correct wire gauge. Thin wire causes heat buildup.
- Do not twist bare wires without a proper connector.
- Keep wiring away from the motor fan and high-heat areas.
If the switch or motor terminals are scorched, replace them. In my shop, a burnt switch was the real cause of repeated burns. Replacing the switch solved the issue completely. Repeat: if you see burned motor windings, the motor is likely beyond simple wiring repair.

Testing and troubleshooting
After repair, test before full use. Testing prevents another failure.
Simple tests:
- Continuity test across splices and switches with a multimeter.
- Power-on test with short runs: plug in and run for 10–20 seconds while watching for smoke or smell.
- Check for correct voltage at the motor terminals.
Troubleshooting tips:
- If fuse or circuit breaker trips, disconnect immediately and re-inspect for short.
- If burning smell returns, open the unit again and inspect the motor and switch.
- If the motor overheats quickly, the motor or airflow system may be faulty.
I always run a repaired vacuum for a full cleaning cycle under supervision. That practice once revealed a hidden short in the hose cord that I missed during the first pass. Always test fully.
Prevention and maintenance tips
Prevent future wiring burns with simple habits and care.
Routine actions:
- Clean filters and hoses regularly to reduce motor load.
- Inspect the cord and external plug often for wear.
- Replace brushes and bearings when worn to avoid motor strain.
- Use the correct vacuum settings for the job and avoid overload.
Long-term fixes:
- Use high-temp wire and connectors in repairs.
- Strengthen cord strain relief and secure wiring inside the housing.
- Keep vents and cooling paths clear to prevent overheating.
A small check once a month can save a big repair later. When I began routine checks, I cut down repeat wiring repairs by half. These steps are easy and effective if you want to repair vacuum cleaner internal wiring burnt issue and keep it fixed.

Frequently Asked Questions of how to repair vacuum cleaner internal wiring burnt issue
How do I know if the wiring is burnt or the motor is bad?
If you see melted insulation or black soot near wires, the wiring is burnt. If the motor windings are dark and smell like burnt insulation, the motor may be damaged and need replacement.
Can I use regular wire to replace a burnt wire in a vacuum?
No. Use wire with the same gauge and temperature rating as the original. Regular thin wire can overheat and burn again.
Is soldering necessary for a strong repair?
Soldering adds conductivity and strength but always pair it with a mechanical crimp or connector. Solder alone can crack under vibration.
What gauge wire should I use for vacuum repairs?
Match the original wire gauge. Most household vacuums use 16 to 12 AWG depending on motor power. Check the manual or measure the old wire.
When should I call a professional instead of repairing myself?
Call a professional if motor windings are burnt, you detect heavy soot inside the motor, or you lack tools or confidence. Safety and correct diagnosis matter.
How long does a proper wiring repair last?
A correct repair using proper gauge wire, heat-shrink, and good strain relief can last many years. Lifespan depends on use and maintenance.
Conclusion
You can repair vacuum cleaner internal wiring burnt issue safely if you follow clear steps. Start with safety, find the burn source, use the right tools and wire, make strong insulated joints, and test thoroughly. Regular maintenance prevents most wiring burns. Take action: inspect your vacuum today, fix small issues early, and consider professional help if the motor looks damaged. Share your repair story or ask a question below to keep the conversation going.

Liora Pennings is a seasoned chef and kitchen enthusiast with a passion for turning everyday cooking into an effortless experience. With years of hands-on culinary expertise, she specializes in practical techniques, ingredient know-how, and smart kitchen solutions that help home cooks elevate their meals. At KitchFlair.com, Liora shares her best tips, time-saving tricks, and honest product reviews to guide readers toward a more efficient, enjoyable, and inspired cooking routine. Whether you’re a beginner or a seasoned home chef, Liora’s friendly, knowledge-packed insights make every visit to the kitchen a little easier—and a lot more delicious.