How To Clean Vacuum Cleaner Exhaust Filter Properly: Guide
Clean your vacuum exhaust filter by removing it, gently tapping out dust, washing if allowed, and fully air-drying before reinstalling.
I’ve spent years fixing and maintaining vacuums for friends and clients. I know what works and what myths to ignore. This guide shows exactly how to clean vacuum cleaner exhaust filter properly. You’ll get clear steps for each filter type, tools to use, safety tips, troubleshooting, and a simple maintenance plan. Read on and you’ll save money, breathe cleaner air, and extend your vacuum’s life.

Why cleaning your vacuum exhaust filter matters
A clogged exhaust filter reduces suction. It makes the motor work harder. It can release dust and allergens back into the room. Cleaning the filter restores airflow and keeps the unit efficient.
Most modern vacuums use reusable or disposable exhaust filters. HEPA filters trap tiny particles but need careful care. A clean filter improves air quality and saves energy. I’ve seen vacuums regain 20–30% suction after filter cleaning. Regular cleaning prevents overheating and costly repairs.
Identify your filter type and check the manual
Not all filters are the same. Identify yours before you clean.
- HEPA washable: Many are washable but need gentle care.
- HEPA non-washable: These require replacement, not washing.
- Foam or sponge: Usually washable and quick to dry.
- Paper or fiberglass: Disposable; never wash these.
- Carbon or odor filters: Often need replacement; some can be rinsed carefully.
Always check the vacuum’s manual or the filter label. The manual tells you if the filter is washable and how to remove it safely. If the manual is missing, look for model guides online or sticker notes inside the dust bin area.
Tools and prep for cleaning
Gather a few simple items before you start.
- Soft brush to loosen dust from the filter surface.
- Mild dish soap for washable filters.
- Warm water for rinsing.
- Clean towel for blotting excess water.
- A shallow tray to soak small filters.
- Gloves and a mask if you’re allergic to dust.
- Screwdriver if your filter sits behind a secured panel.
Turn off and unplug the vacuum. Empty the dust bin or replace the bag first. This prevents more dust from being drawn into the filter during cleaning.
Step-by-step: how to clean vacuum cleaner exhaust filter properly
Follow these steps for washable filters. Repeat them every 3 months or sooner in dusty homes.
- Power off and unplug the vacuum. Wait five minutes for moving parts to stop.
- Remove the dust bin or bag. Keep loose dirt away from the filter area.
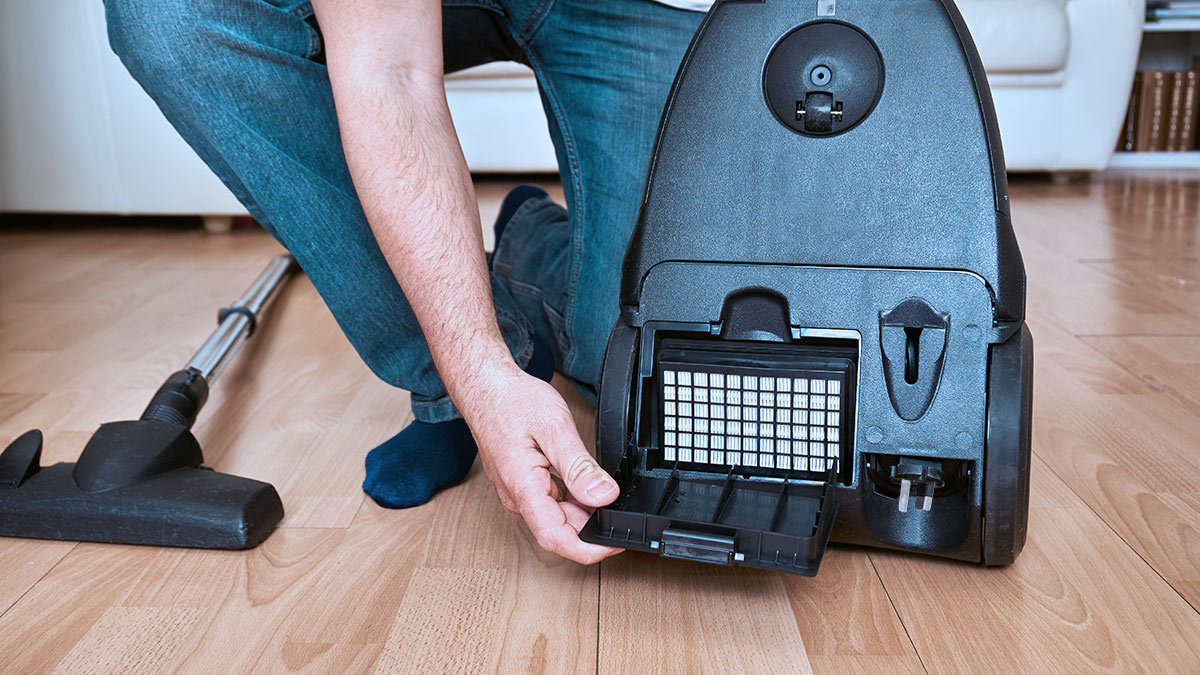
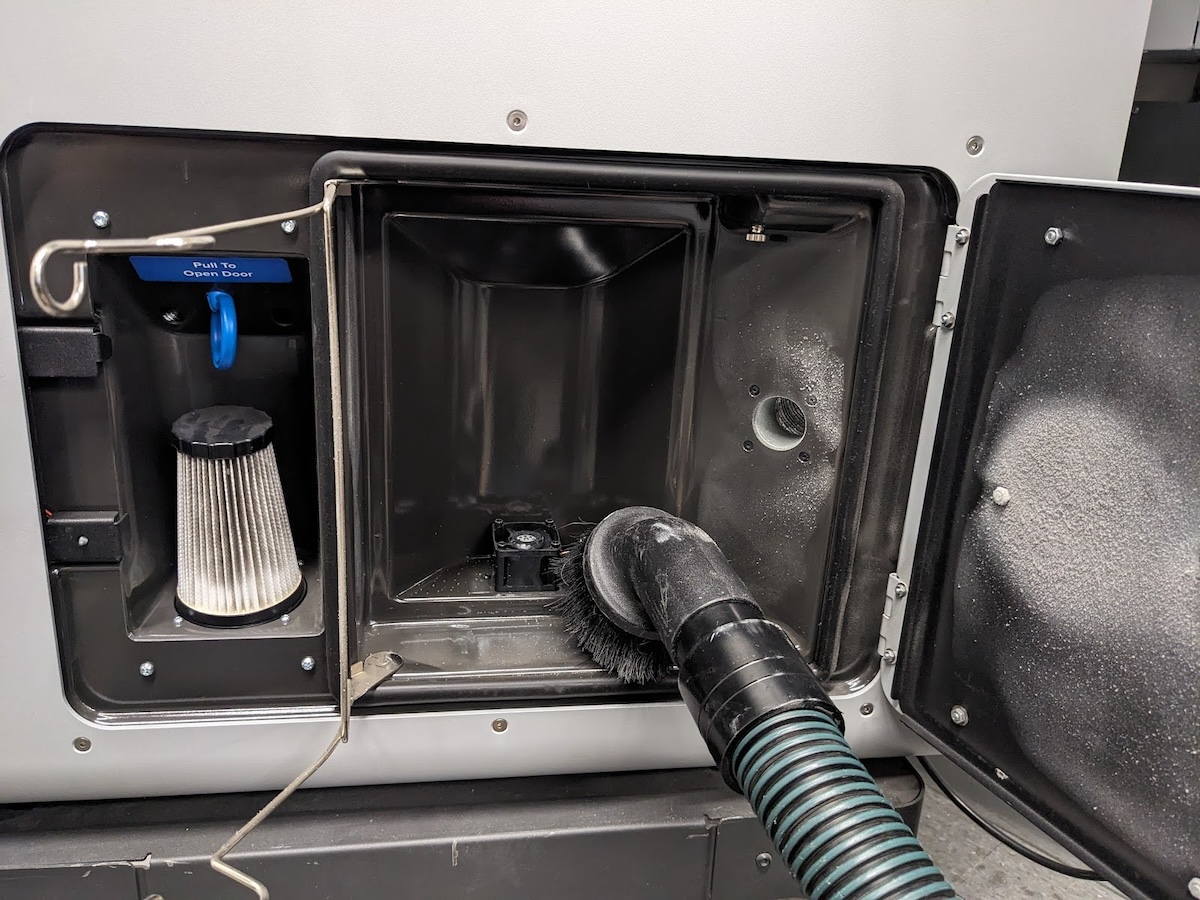
- Locate and remove the exhaust filter. Note its orientation for reassembly.
- Tap the filter gently over a trash can. This removes loose dust.
- Brush both sides lightly to free trapped particles.
- Rinse under lukewarm running water. Let water flow from clean to dirty side.
- If very dirty, soak in a basin with warm water and a few drops of dish soap for 10 minutes.
- Rinse thoroughly until water runs clear.
- Blot excess water with a towel. Do not wring fragile filters.
- Air-dry completely for 24 hours. Ensure no moisture remains before reinstalling.
If your filter is non-washable, skip steps 6–9. Instead, replace it with a new one per the manufacturer’s recommendations.
src="https://www.lg.com/content/dam/channel/wcms/hk_en/accessories_parts/lg-com/accessories/vacuum-cleaners/filter-dust-bag/cov30219501_hk/features/vacuum-cleaners-filter-dust-bag-cov30219501-how-to-clean-01-desktop.jpg"
alt="Special care for HEPA and delicate filters”
style=”max-width: 100%; height: auto; border: 2px solid black; border-radius: 10px; display: block; margin: 0 auto;”
loading=”lazy”
/>
Special care for HEPA and delicate filters
HEPA filters trap tiny particles. They need care.
- Check if the HEPA is labeled washable. If not, do not get it wet.
- For washable HEPA, use gentle water pressure only.
- Avoid soap on some HEPA types. Check the manual first.
- Never use heat to dry a HEPA filter. Heat can warp the media.
- Replace HEPA filters every 6–12 months if they are non-washable or damaged.
I once ruined a HEPA by machine-drying it. The shape changed and suction dropped. Air drying is the safest route.

Drying, reassembly, and testing
Drying is as important as cleaning.
- Place the filter on a clean towel in a dry room.
- Allow 24 hours minimum for complete drying. Longer may be needed in humid climates.
- Reinstall the filter in the correct orientation.
- Reattach dust bin or bag securely.
- Run the vacuum for a minute and listen for odd noises or motor strain.
- Check suction on a fabric or floor surface to confirm performance.
Never run the vacuum with a damp filter. Moisture can reach the motor and cause damage.

Maintenance schedule and best habits
Set a realistic routine for filter care.
- Inspect the exhaust filter every month in heavy-use homes.
- Clean washable filters every 1–3 months.
- Replace non-washable filters every 6–12 months, or sooner if performance drops.
- Replace carbon and odor filters per product guidance for effective odor control.
- Keep a replacement filter on hand to avoid running with a failing filter.
Small, regular checks save time and prevent big repairs later. I recommend marking filter check dates on your calendar.

Troubleshooting and common mistakes
Short answers to common problems.
- Q: My vacuum still smells after cleaning. A: Odor often comes from the dust bin or motor area. Clean the bin and check the carbon filter if present.
- Q: The filter tore while cleaning. A: A torn filter needs immediate replacement. Running the vacuum with a damaged filter lets dust into the motor.
- Q: Suction is weak after cleaning. A: Ensure the filter is fully dry and reinstalled correctly. Also check hoses and brushroll for clogs.
Common mistakes to avoid:
- Washing a non-washable filter and causing damage.
- Reinstalling a wet filter and risking motor damage.
- Skipping the dust bin clean and re-contaminating the filter.
- Using strong detergents or heat on fragile media.

Personal tips and lessons learned
From real jobs and home use, these tips helped me most.
- Keep a spare filter for quick swaps. It keeps the vacuum useful during drying.
- Photograph filter orientation before removal if it’s tricky to reinstall.
- Use a soft paintbrush to clear crevices around the filter housing.
- If you have allergies, wear a mask and clean outdoors if possible.
- Track replacements with a label that shows install date.
I once cleaned a filter on a humid day and impatiently used a hairdryer. The filter warped. Since then, I always plan ahead for drying time.
Frequently Asked Questions of how to clean vacuum cleaner exhaust filter properly
How often should I clean the exhaust filter?
Clean washable filters every 1–3 months in normal homes. Clean more often if you have pets or allergies.
Can I wash every kind of vacuum filter?
No. Only wash filters labeled washable. Paper and some HEPA filters cannot be washed and must be replaced.
How long should a filter air-dry before reinstalling?
Air-dry at least 24 hours. In humid areas, wait 48 hours to be safe. Ensure it is fully dry before use.
What if my suction is still weak after cleaning the filter?
Check for clogs in the hose, brushroll, and dust bin. Confirm the filter is dry and seated correctly.
Is it safe to use a vacuum with a damaged filter?
No. A damaged filter can let dust into the motor and release allergens into the air. Replace it before use.
Conclusion
Cleaning your vacuum exhaust filter properly is simple and powerful. Start by identifying the filter type, follow safe cleaning steps, and always let filters dry completely. Regular care keeps your vacuum running well and improves air quality. Try the routine for three months and note the difference in suction and dust control. If this guide helped you, subscribe for more practical cleaning tips or leave a comment with your filter type and questions.

Liora Pennings is a seasoned chef and kitchen enthusiast with a passion for turning everyday cooking into an effortless experience. With years of hands-on culinary expertise, she specializes in practical techniques, ingredient know-how, and smart kitchen solutions that help home cooks elevate their meals. At KitchFlair.com, Liora shares her best tips, time-saving tricks, and honest product reviews to guide readers toward a more efficient, enjoyable, and inspired cooking routine. Whether you’re a beginner or a seasoned home chef, Liora’s friendly, knowledge-packed insights make every visit to the kitchen a little easier—and a lot more delicious.