How To Repair Vacuum Cleaner Wire Connection In Motor: Fix
Repair the motor wire by disconnecting power, inspecting the splice, then soldering or crimping securely.
I’ve repaired dozens of motors and vacuum cleaners over the years. This guide shows exactly how to repair vacuum cleaner wire connection inside motor with clear steps. You will get safety checks, tools lists, a step-by-step repair method, testing tips, and real-life lessons from my experience. Read on and you’ll be ready to fix the motor wiring yourself or know when to call a pro.

Why motor wire connections fail and what to look for
Wires inside a vacuum motor can fail for simple reasons. Heat, vibration, abrasion, and loose terminals are common causes. Understanding the cause helps you fix it right the first time.
Common signs of a bad connection
- Intermittent power or motor that cuts in and out.
- Burning smell or visible charring near the motor terminals.
- Motor runs slow, hums, or makes grinding sounds when load is applied.
- Complete loss of power with a good wall outlet and switch.
Causes to expect
- Heat damage from motor operation.
- Repeated vibration loosening a solder joint or crimp.
- Friction cutting through insulation.
- Poor factory crimps or wire fatigue at bend points.
How diagnosing connects to repair
- If you know why the wire failed, you pick the right repair: replace a frayed section, redo a weak crimp, or add strain relief.
Source: ifixit.com

Safety first: steps to protect yourself and the appliance
Safety matters more than speed. A motor repair has live-voltage risk. Follow strict safety steps every time.
Basic safety checklist
- Unplug the vacuum from power and remove the plug from the wall.
- Work in a dry area and use insulated tools.
- Discharge any capacitors if your model contains them.
- Note the wire colors and terminal layout before you disconnect anything.
- Wear eye protection and avoid loose clothing around the motor.
Why these steps matter
- You avoid shock and accidental short circuits.
- You reduce risk of further damage to the motor and wiring.

Source: ovey.eu
Tools and parts you’ll need to repair vacuum cleaner wire connection inside motor
Having the right tools makes this repair smooth and reliable. Get good-quality tools and parts for a lasting fix.
Essential tools
- Multimeter for continuity and voltage checks.
- Soldering iron and rosin-core solder, or a quality crimping tool.
- Heat-shrink tubing and a heat gun or lighter.
- Wire stripper and diagonal cutters.
- Small screwdrivers and pliers to open housings and hold terminals.
Recommended parts
- Replacement motor wire of correct gauge and insulation rating.
- Pre-insulated butt connectors or crimp sleeves (if not soldering).
- Terminal spade or ring connectors that match motor studs.
- High-temperature adhesive or silicone for added strain relief.
Tip on wire gauge and insulation
- Match the original wire gauge. Most vacuum motors use 16–18 AWG. Use heat-resistant insulation if possible.
Source: emotorsdirect.ca
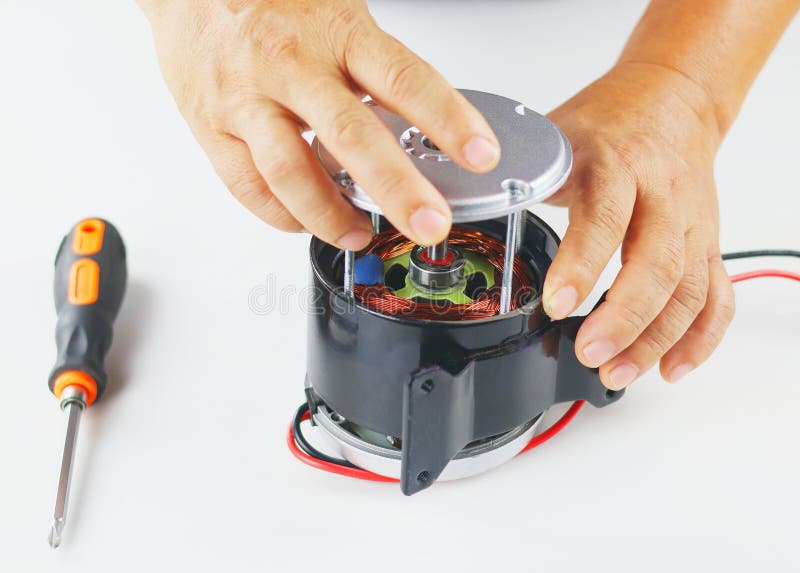
Step-by-step: how to repair vacuum cleaner wire connection inside motor
Follow these clear steps. Read through the full sequence before you start. I give both solder and crimp options so you can choose what fits your skills.
- Prepare the work area and document wiring
- Lay out parts on a clean surface. Take photos of the wiring before disassembly.
- Label wires with tape to preserve their original connections.
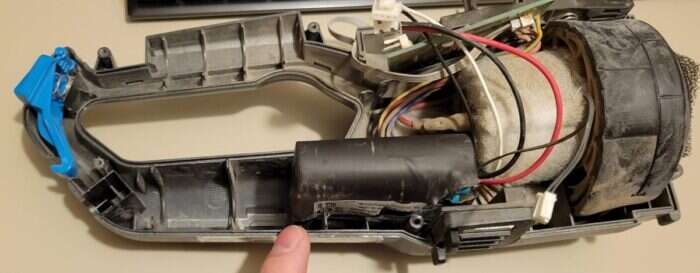
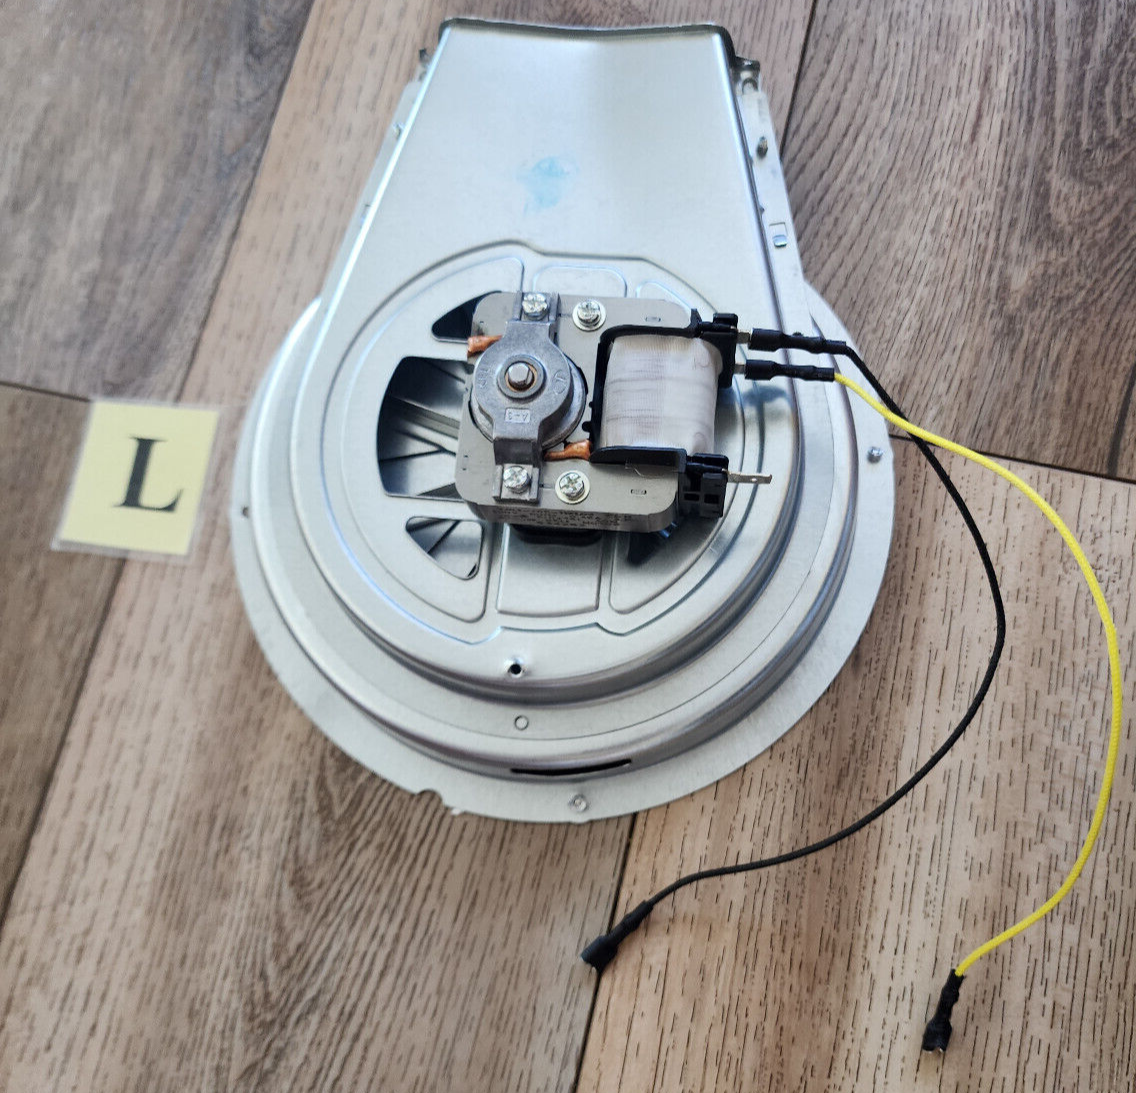
- Remove motor housing and access the terminal area
- Unscrew and open the motor cover carefully.
- Keep screws in a small container. Avoid losing small parts.
- Inspect the connection
- Look for broken strands, melted insulation, or loose terminals.
- Check the motor terminal stud for corrosion or heat damage.
- Cut back damaged wire
- Trim the wire to healthy insulation. Cut back slightly more if strands look brittle.
- Strip about 3/8 inch (8–10 mm) of insulation cleanly.
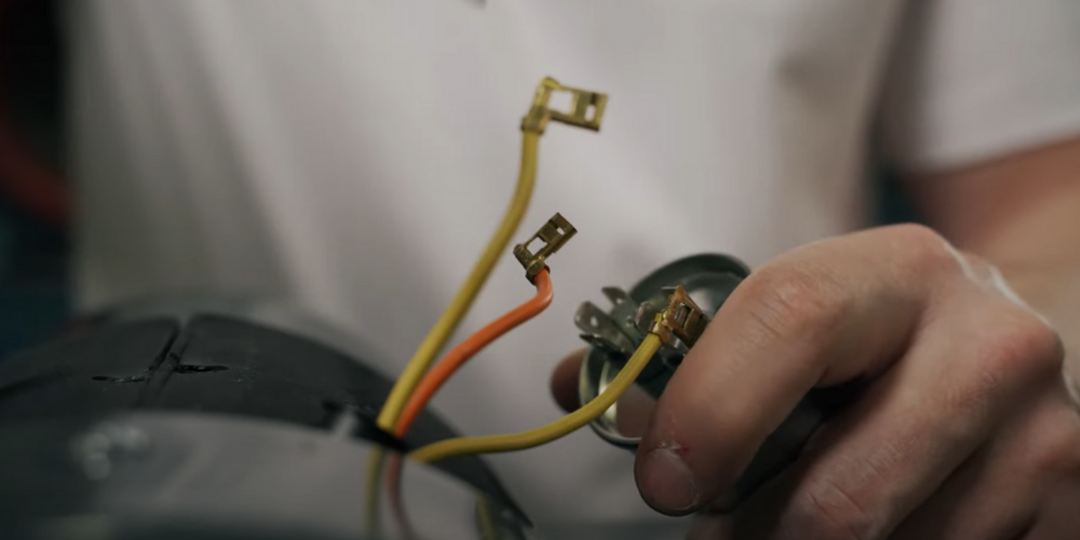
5A. Solder repair method (recommended for solid, lasting contact)
- Slide a piece of heat-shrink tubing onto the wire before soldering.
- Twist the wire strands and tin them with solder.
- Apply solder to the motor terminal if needed, then solder the wire to the terminal or to a replacement connector.
- Slide the heat-shrink over the joint and shrink it until snug.
5B. Crimp repair method (quick and reliable when done right)
- Use a proper crimp sleeve or butt connector sized to the wire gauge.
- Insert stripped wire ends and use a ratcheting crimper to make a firm crimp.
- For added security, solder the crimped joint lightly, then cover with heat-shrink tubing.
- Add strain relief
- Anchor the wire so it cannot flex at the terminal. Use cable ties or a clamp.
- This prevents future fatigue at the connection.
- Reassemble and prepare to test
- Reattach any terminal covers. Reinstall motor housing.
- Reconnect the plug, but do not yet close the vacuum completely if you plan further checks.
Important repair notes
- Use rosin-core solder for electrical work. Avoid plumbing (acid) solder.
- If motor terminals are too damaged, replace the terminal ring or stud assembly.
- If the motor has internal wiring harnesses, follow the wiring diagram or photos you took.
How to decide between solder and crimp
- Use solder for a permanent, low-resistance joint where vibration is moderate.
- Use crimp for fast, mechanically strong connections when you have a quality crimper.
Source: ebay.com
Testing, verification and troubleshooting after repair
Testing proves the repair worked. Use simple tests before full reassembly.
Electrical tests
- Continuity test across the repaired wire with a multimeter.
- Measure voltage at the motor while operating to confirm proper supply.
- Check motor current draw and compare with the motor rating; high current can indicate other issues.
Operational checks
- Run the motor briefly without load to listen for unusual noises.
- Smell for burning; stop immediately if you detect hot insulation smell.
- Monitor the repaired joint for heat after a 5–10 minute run.
Troubleshooting if it still fails
- Re-check wiring order and connections. A swapped lead or loose terminal kills the motor.
- If the motor hums but won’t spin, check brushes and rotor continuity.
- A persistent short or blown fuse suggests a deeper fault; consider professional motor service.
PAA-style question (short)
- How long should a soldered motor connection last? Properly done, it can last years, especially with strain relief and heat-resistant insulation.

Source: huntinggearguy.com
Maintenance and prevention to avoid future wire issues
A good repair is only half the job. Preventing recurrence saves time and money.
Simple maintenance tips
- Inspect the motor wiring every 6–12 months if you use the vacuum often.
- Keep the motor vents clean so the motor runs cooler.
- Replace braided or frayed power cords immediately.
- Avoid tugging on the cord during use; unplug from the wall by the plug.
Upgrade suggestions
- If your model heats frequently, swap to high-temp wire or add a short pigtail section with heat-resistant jacket.
- Fit protective loom or conduit around wires in high-friction spots.

Source: youtube.com
Personal experience: lessons learned from real repairs
I once repaired a canister vacuum where the motor wire failed at the terminal after two years. The factory crimp had no strain relief. I redid the connection with a soldered joint and added a clamp. The vacuum ran hot in that household, so I used high-temp sleeving. It has been quiet and reliable for three years now.
Common mistakes I’ve seen
- Cutting too little back and reusing brittle wire.
- Skipping strain relief and letting vibration break the new joint.
- Using the wrong solder or weak crimps.
My practical tips
- Take photos during teardown. They save time when you reassemble.
- Test for continuity before closing everything up. It avoids repeat disassembly.
Source: dreamstime.com
Frequently Asked Questions of how to repair vacuum cleaner wire connection inside motor
What tools are essential to repair vacuum cleaner wire connection inside motor?
A multimeter, wire stripper, soldering iron or crimper, heat-shrink tubing, and pliers are essential. These let you test, strip, join, and protect the repaired wire.
Can I use a simple twist-and-tape fix for a motor wire?
No. Twist-and-tape is unreliable with motor vibration and heat. Use solder or a proper crimp and heat-shrink for a safe, durable repair.
How do I know if the motor terminal itself needs replacement?
If the terminal is corroded, melted, or loose, replace it. A damaged terminal can cause repeated failures even after you repair the wire.
Is it better to solder or crimp the wire to the motor?
Both work. Solder gives low resistance and permanence; a quality crimp gives strong mechanical hold. Use heat-shrink and strain relief with either method.
How soon should I test the repaired connection?
Test continuity immediately after repair, then run the motor briefly and re-check the joint for heat. Short tests catch problems early.
Can I repair the wire myself safely?
Yes, if you follow safety steps, disconnect power, and use the right tools. If you feel unsure about high-voltage parts or the motor internals, seek a professional.
Conclusion
You can confidently repair vacuum cleaner wire connection inside motor by following safety steps, using the right tools, and choosing the correct join method. Start with careful inspection, choose solder or crimp wisely, add heat-shrink and strain relief, and test thoroughly. Take photos, work methodically, and learn from small mistakes to build lasting repairs.
Try a small repair on a simple model to build skill. If the job feels beyond your comfort level, consult a qualified technician. Leave a comment with your experience or questions, and subscribe to get more hands-on repair guides.

Liora Pennings is a seasoned chef and kitchen enthusiast with a passion for turning everyday cooking into an effortless experience. With years of hands-on culinary expertise, she specializes in practical techniques, ingredient know-how, and smart kitchen solutions that help home cooks elevate their meals. At KitchFlair.com, Liora shares her best tips, time-saving tricks, and honest product reviews to guide readers toward a more efficient, enjoyable, and inspired cooking routine. Whether you’re a beginner or a seasoned home chef, Liora’s friendly, knowledge-packed insights make every visit to the kitchen a little easier—and a lot more delicious.