How To Fix Vacuum Cleaner Making Loud Noise Problem: Guide
Clean filters, clear clogs, tighten loose parts, replace belts or bearings to stop loud noise.
I’ve fixed dozens of noisy vacuums in my shop and at home. This article walks you through why your vacuum gets loud and exactly how to fix vacuum cleaner making loud noise problem step by step. I explain causes, quick checks, safe repairs, parts to swap, costs, and when to call a pro. Read on and you’ll know how to fix vacuum cleaner making loud noise problem with confidence and safety.

Why a vacuum gets loud: common causes and quick signs
Noisy vacuums are annoying. They often signal a simple issue. Common causes include clogged airflow, worn bearings, broken belt, trapped debris, or damaged brushroll. Electric motor problems or loose panels can also make loud sounds.
Signs to look for:
- Unusual rattle when you move the cleaner.
- High-pitched squeal as soon as you turn it on.
- A grinding or rumbling that changes with head speed.
- Loss of suction along with noise.
Knowing these signs helps you decide if the fix is a quick DIY or needs a technician. If you want to learn how to fix vacuum cleaner making loud noise problem, start with these clues.

Quick troubleshooting checklist you can do in 10 minutes
Run these checks in order. They are safe and fast.
- Turn off and unplug the vacuum.
- Empty the dust bin or bag.
- Remove the wand, hose, and brushroll.
- Look inside the hose and wand for clogs.
- Inspect the brushroll for hair and threads.
- Smell for burning (stop if you smell the motor).
- Tighten visible screws and check panels.
If noise drops after one step, you found the likely cause. If it stays loud, continue through the steps in this guide to learn how to fix vacuum cleaner making loud noise problem properly.

Step-by-step fixes: practical repairs that work
Below are clear repairs for common causes. Each step uses simple tools: screwdriver, pliers, replacement belt, and lubricant. Work on a flat surface. Keep screws in a small dish.
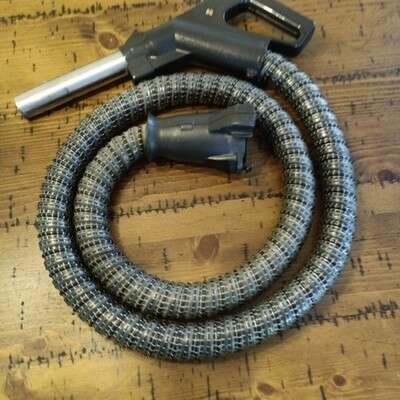
H3 Check and clear clogs
Clogs reduce airflow and strain the motor. A blocked hose often causes a loud, strangled sound.
- Detach hose and look through it.
- Use a broom handle to push out obstructions.
- Wash removable hoses with warm water and dry fully.
H3 Clean or replace filters
Dirty filters force the motor to work harder and louder.
- Wash foam and pre-motor filters per your manual.
- Replace HEPA or paper filters when clogged or torn.
- Always let washable filters dry completely before reinstalling.
H3 Remove hair and debris from the brushroll
Hair wrapped around the brushroll causes imbalance and rattles.
- Cut hair with scissors along the bristles.
- Pull out debris and spin the brushroll by hand.
- Replace worn brushroll if bristles are flattened.
H3 Replace the belt
A stretched or cracked belt slips and makes noise.
- Note belt path or take a picture before removal.
- Replace with the exact model belt.
- Test spin by hand; it should be snug.
H3 Inspect bearings and motor shaft
Grinding or loud rumble often means failing bearings.
- Remove the brush housing to access bearings.
- If bearings are noisy, replace them or the motor assembly.
- Lubricate sealed bearings only if allowed by the manual.
H3 Tighten panels, screws, and loose parts
Vibration can loosen screws and grommets.
- Tighten visible screws on the base and handle.
- Check the intake collar and hose connections.
- Replace cracked housings that vibrate loudly.
H3 Check the motor and electrical parts
If you hear a high-pitched whirl or burning smell, stop.
- A faulty motor or fan can be dangerous.
- If you’ve tried filters, belts, and bearings and noise persists, consider a pro.
These steps show how to fix vacuum cleaner making loud noise problem from simplest to hardest. Start with the easy swaps first.

Safety tips and when to call a professional
Minor fixes are safe at home. Stop and call a pro if you find:
- Smoke or burning smell.
- Motor is hot or sparking.
- Internal wiring is damaged.
- Complex motor disassembly is needed.
Safety checklist:
- Unplug the unit before any work.
- Use the manual for model-specific steps.
- Wear gloves when cutting hair or picking debris.
- Keep children and pets away from the workspace.
From experience, I once tried to replace a motor fan without the right tool. I damaged a fan blade and spent more to fix it. Save time and call a tech when the motor or wiring is involved.

Preventive maintenance to stop noise before it starts
A little upkeep prevents most loud issues. Make this routine monthly or quarterly.
- Empty dust bin or change bag when two-thirds full.
- Clean filters monthly, replace yearly if needed.
- Remove hair from the brushroll each week.
- Check belt tension and replace every 6–12 months.
- Inspect hoses and seals for cracks.
I keep a small tool kit by my vacuum. Quick checks once a month have halved my repair time and costs. Preventive care is the easiest way to avoid having to fix vacuum cleaner making loud noise problem later.

Cost, parts, and DIY vs professional repair guide
Knowing costs helps you decide whether to fix or replace. Here are typical ranges.
- Belts: $5–$20.
- Filters: $10–$50.
- Brushroll: $15–$60.
- Bearings or bearings kits: $10–$80.
- Motor replacement or labor: $100–$300 or more.
DIY is great for belts, filters, and brushrolls. Call a pro for motor work, sealed bearings, or electrical faults. If repair cost nears replacement price, compare value and warranty terms. This helps you weigh options when figuring how to fix vacuum cleaner making loud noise problem affordably.

Common quick questions (PAA-style)
H3 Why does my vacuum make a loud grinding noise?
Grinding often means bearings, motor fan damage, or debris in the brush chamber. Inspect the brushroll and motor area after unplugging the unit.
H3 Can a clogged filter cause loud noise?
Yes. Clogged filters restrict airflow and make the motor work harder, producing louder sounds. Clean or replace filters promptly.
H3 Is it safe to oil vacuum bearings?
Only oil if your manual allows it. Many modern bearings are sealed and should not be oiled. Wrong lubrication can void warranties.
Frequently Asked Questions of how to fix vacuum cleaner making loud noise problem
What is the first thing I should check when my vacuum is loud?
Start with the dust bin or bag, filters, and hose for clogs. These are the fastest fixes and often stop the noise.
How do I know if the motor is failing?
A failing motor often heats, smells of burning, or makes high-pitched whines and grinding. If noise persists after cleaning and part replacement, suspect the motor.
Can a worn belt make the vacuum louder?
Yes. A worn or slipping belt causes squeal and reduced brushroll action. Replace the belt if it shows cracks or stretch.
How often should I replace vacuum filters to avoid noise issues?
Replace paper or HEPA filters every 6–12 months, and clean washable filters every 1–3 months. Frequency depends on use and pets.
Is it worth repairing an old noisy vacuum?
Compare repair costs to replacement price. If motor replacement exceeds half the cost of a new unit, buying new may be better.
Conclusion
You can solve most noisy vacuum problems by checking clogs, filters, brushroll, belts, and loose parts. Start with the easy fixes and move to bearing or motor work only if needed. My hands-on repairs taught me to stop at signs of motor failure and hire a pro then. Take action today: run the quick checklist, do one or two simple fixes, or schedule a repair if you smell burning. If this guide helped, try the steps now, leave a comment about your model, or subscribe for more practical home repair tips.

Liora Pennings is a seasoned chef and kitchen enthusiast with a passion for turning everyday cooking into an effortless experience. With years of hands-on culinary expertise, she specializes in practical techniques, ingredient know-how, and smart kitchen solutions that help home cooks elevate their meals. At KitchFlair.com, Liora shares her best tips, time-saving tricks, and honest product reviews to guide readers toward a more efficient, enjoyable, and inspired cooking routine. Whether you’re a beginner or a seasoned home chef, Liora’s friendly, knowledge-packed insights make every visit to the kitchen a little easier—and a lot more delicious.