How To Unclog Vacuum Cleaner Air Pathway Completely: Guide
Clear the hose, filters, and brushroll first to fully restore vacuum airflow.
I’ve spent years fixing and servicing vacuums for friends and clients. I’ll walk you through exactly how to unclog vacuum cleaner air pathway completely, step by step, with safe methods, clear tools, and long-term tips. You’ll learn to diagnose blockages, remove stubborn obstructions, and prevent repeat clogs so your vacuum runs like new.

Why vacuum air pathways clog and what it costs you
Clogs form where airflow narrows or where debris collects. Towels, long hair, dense dust bunnies, and small objects can block the hose, wand, filter, or brush area. A blocked path reduces suction, strains the motor, and raises your electric bill. Knowing the common clog spots helps you act fast and avoid damage.
Common clog causes
- Long hair and pet fur wrapping around the brushroll or clogging the hose.
- Dense dust or fine powder building in filters and airflow channels.
- Small objects like coins, cereal, or debris stuck in the nozzle or wand.
- Damp debris that compacts and sticks inside hoses or filters.
Cost of ignoring clogs
- Reduced cleaning power that wastes time.
- Overheating motor and shortened vacuum life.
- Higher repair bills for burned motors or replacement parts.

Tools and safety checklist before you start
Safety first. Unplug the vacuum before any work. Wear gloves and eye protection if dust is heavy. Have these tools ready so you can clear the pathway quickly and safely.
Essential tools
- A flashlight to inspect deep inside hoses and attachments.
- A long, flexible brush or plumber’s snake for hoses.
- Needle-nose pliers and a flathead screwdriver for removing stuck items.
- A soft brush and compressed air for filters and small passages.
- Replacement filters and belts on hand if needed.
Safety steps
- Unplug the vacuum and remove batteries if cordless.
- Work in a well-ventilated area or outdoors for dusty cleaning.
- Avoid using water on electrical parts; let washable filters dry fully before reinstalling.

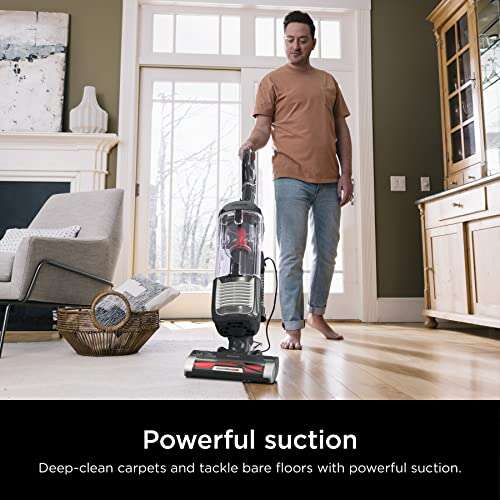
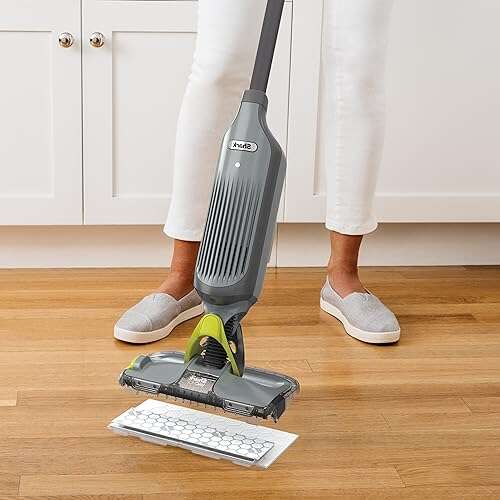
Step-by-step: how to unclog vacuum cleaner air pathway completely
This clear process covers the hose, wand, brushroll, filter, and motor intake. Follow each step in order. Take breaks if dust becomes heavy.
- Unplug and disassemble
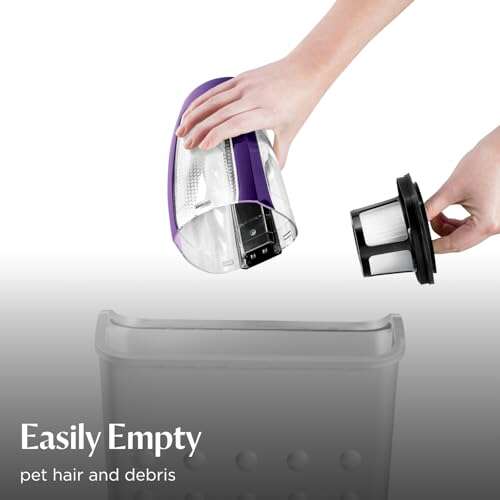
- Unplug the vacuum. Remove the dustbin or bag, hose, wand, and attachments. Lay parts out so you can inspect each one.
- Empty the dustbin or replace the bag
- Dispose of debris outdoors if possible. A clogged bag or full dustbin blocks airflow immediately.
- Inspect and clear the hose and wand
- Shine a flashlight through the hose and wand. If you see a clog, push it out from the nozzle end using a long flexible brush or plumbing snake. Work gently to avoid tearing the hose.
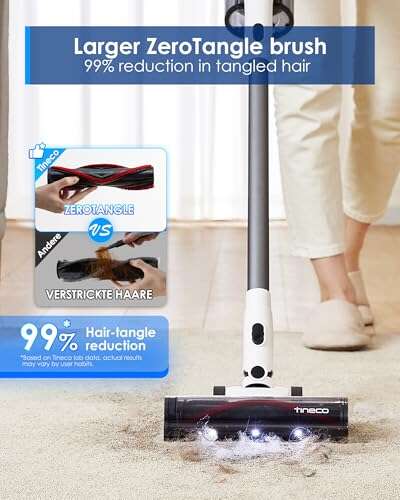
- Check the nozzle and brushroll
- Remove hair and fibers wrapped around the brushroll. Use scissors to cut tight wraps, then pull them away with pliers. Rotate the brushroll to verify it spins freely.
- Clean or replace filters
- Wash washable filters with water and let them dry completely. Replace HEPA and foam filters when they are damaged or too loaded to clean. A clogged filter often mimics a blocked air pathway.
- Inspect motor inlet and seals
- Look into the motor intake for obstructions. Use compressed air briefly to dislodge loose dust. Avoid blowing dust into the motor — point air away from sensitive parts.
- Reassemble and test
- Put parts back together, ensuring seals and clips lock securely. Test vacuum on a small area. If suction improves, you’ve cleared the pathway.
- Repeat deeper cleaning if needed
- If suction is still weak, repeat inspection and focus on hidden joints, narrow bends, or the motor housing.
I’ve unclogged hoses where cereal bits lodged after many family cleanups. A flexible brush made the job fast and prevented a costly motor burnout.
Deep block removal and tricky spots
Some clogs hide in bends, transition joints, or under the brush plate. These areas need careful attention to fully clear the air pathway.
Hose bends and narrow joints
- Use a long, flexible brush to reach deep bends. Push and pull slowly to catch compacted debris. If the hose is damaged, replace it rather than fight a tear.
Under the brush plate
- Remove the bottom plate to access the brush axle. Cut hair wraps away and clean the end caps. Check bearings and belts for wear.
Motor area precautions
- Never submerge motor parts in water. Use a soft brush and short bursts of compressed air to remove dust near the motor. If you smell burning or find metal debris, stop and consult a technician.
Filter chamber and seals
- Clean the filter housing and inspect gaskets. A poor seal reroutes airflow and reduces suction even if the path is clear.

Preventive maintenance to keep the air pathway clear
Routine care stops blockages before they form. Simple habits save time and protect your vacuum.
Daily and weekly habits
- Empty the dustbin after heavy use or when it is two-thirds full. Check and remove visible clogs in the nozzle before storing.
- Run a quick brushroll check once a week in homes with pets.
Monthly maintenance
- Wash washable filters monthly. Inspect hoses, wands, and seals for cracks or buildup.
- Replace belts and non-washable filters per the manufacturer’s schedule or sooner if worn.
Long-term tips
- Use high-quality bags and filters to trap dust without choking airflow.
- Avoid vacuuming large or sharp objects that can lodge in the pathway.
- Keep a flexible hose brush in your cleaning kit for quick spot fixes.
I learned this while servicing rental units. Ten minutes of monthly checks kept vacuums running for years.

When to call a professional
Some blockages and failures need expert help. Know when to stop and call a repair center.
Signs you need a pro
- Persistent weak suction after clearing filters and hoses.
- Loud grinding or burning smells from the motor.
- Electrical issues, smokey smells, or repeated belt breakage.
What a technician will do
- Run diagnostics, inspect the motor and internal airflow channels, and replace worn parts safely.

Frequently Asked Questions about how to unclog vacuum cleaner air pathway completely
What is the fastest way to unclog a vacuum hose?
The fastest safe method is to remove the hose, inspect it with a flashlight, and push the clog out with a flexible brush or plumber’s snake. Avoid using sharp objects that can puncture the hose.
Can I use water to clean vacuum filters and pathways?
Only washable filters can be rinsed with water. Never pour water into motor housings or electronic components. Let washable filters dry completely before reinstalling.
How often should I clean the brushroll to prevent clogs?
Check the brushroll weekly in homes with pets and monthly otherwise. Regular removal of hair and fibers prevents buildup that causes clogs.
Will a clogged air pathway damage the motor?
Yes. A prolonged blocked air pathway causes the motor to overheat and can lead to permanent motor damage. Clear clogs promptly to protect the vacuum.
What if I clear the hose but suction is still low?
Check the filter, dustbin, seals, and motor intake. A damaged or clogged filter and poor seals often mimic a blocked hose and reduce airflow.
Conclusion
You can restore strong suction and protect your machine by learning how to unclog vacuum cleaner air pathway completely. Follow the step-by-step checks, use the right tools, and adopt simple maintenance habits to prevent future blockages. Try these steps on your next cleaning session, and share your success or questions below — your feedback helps others and keeps vacuums running longer.

Liora Pennings is a seasoned chef and kitchen enthusiast with a passion for turning everyday cooking into an effortless experience. With years of hands-on culinary expertise, she specializes in practical techniques, ingredient know-how, and smart kitchen solutions that help home cooks elevate their meals. At KitchFlair.com, Liora shares her best tips, time-saving tricks, and honest product reviews to guide readers toward a more efficient, enjoyable, and inspired cooking routine. Whether you’re a beginner or a seasoned home chef, Liora’s friendly, knowledge-packed insights make every visit to the kitchen a little easier—and a lot more delicious.